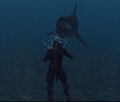
Акулы
Материал из CryWiki Russia
|
|
Добро пожаловать в урок от CryWiki Russia по добавлению акул на карту. В этой статье мы покажем вам, как назначить акулы к определенной области наряду с созданием простого потокового графа, необходимого для правильного спавна акул.
Содержание |
Настройка области для акул
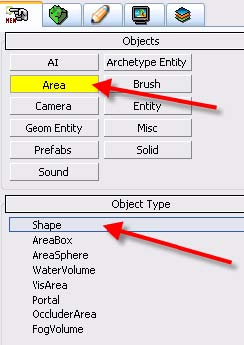
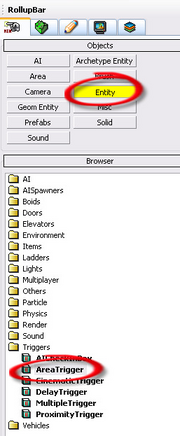
Для начала , нам нужно создать область для акул, которых вы добавите позже в статье, чтобы они перемещались и атаковали, когда мы входим. Чтобы это сделать, нам надо создать AreaShape. Он находится в RollupBar → Area → Shape, как показано на снимки ниже.
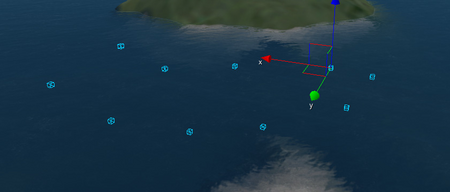
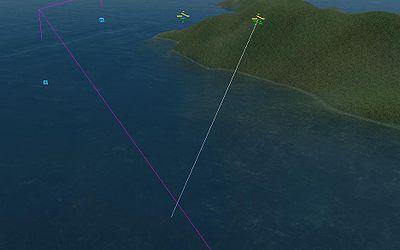
Вы должны увидеть на экране, в море оси X, Y и Z. Убедитесь, что Snap To Terrain выбраг (Ctrl + 1), чтобы форма не создалась под ландшафтом и щелкните кнопку мыши, чтобы создать первую точку. Продолжайте щелкать, чтобы добавить ещё точки (которые будут выглядеть как маленькие голубые кубы) и сделайте двойной щелчок, чтобы завершить форму. Это должно выглядеть примерно как на картинке ниже. Хотя вы не увидите линии между каждой из точек, которые образуют форму, пока вы не переместите камеру под воду. В дальнейшем мы сделаем, чтобы эти точки появлялись над водой.
Примечание:
Если вам нужно изменить точки формы , нажмите кнопку «Edit Shape» в параметрах форму. Вы можете дважды щелкнуть по соединяющей линии чтоьы создать новые точки, и сделайте двойной щелчок по точкам, чтобы удалить их.
Настройка формы
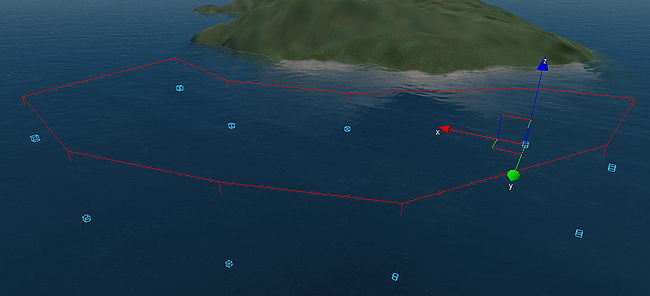
Прежде чем мы начнем назначать акул в этой области, мы изменим некоторые параметры нашей форме, чтобы сделать его попроще для последующих этапов данного урока. Сначала, выберите AreaShape и взгляните на его параметры в RollupBar. В параметрах будет его имя, вероятно Shape1. Для того, чтобы упростить организацию в будущем, переименуйте его в что-то вроде SharkShape , что будет легко различимо. В добавок к этому, вы также увидеть, что есть параметр Height, который по умолчанию равен 0; он определяет высоту формы и контролует, насколько будут высоки линий, соединяющие точки. Установите его чуть выше, чем высота вашего море; значение около 30 должно подойти. Как только вы сделаете это, ваша форма будет выглядеть как на скриншоте ниже.
Примечание:
To make your AreaShape even more visible, make sure you tick the box labelled DisplayFilled; this will shade in the boundaries nicely which should help you define your areas better.
Assigning Sharks To Your Shape
In this section we will cover assigning the WaterKillEvent entity to your shape; this effectively creates the sharks that attack you. We will also cover triggering the event when you enter the shape using an AreaTrigger.
Adding The WaterKill Event
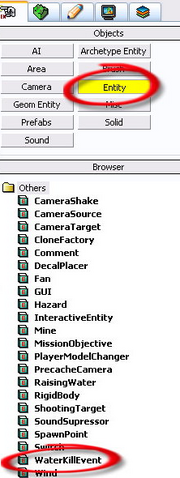
To start off, we need to add a WaterKillEvent to our map; this will spawn sharks that will come and attack you. This can be found in the RollupBar → Entity → Others → WaterKillEvent .
Once you’ve dragged it across, place it anywhere on your map near the shape. It’s important to stress that the little area that WaterKillEvent takes up itself is not the area that it will use, so it doesn’t need to be scaled or resized to fit anything.
Assigning an AreaTrigger
Next, we need to add an AreaTrigger to detect when the player is and isn’t inside the shape. To add an AreaTrigger to your map, browse to the RollupBar → Entity → Triggers → AreaTrigger.
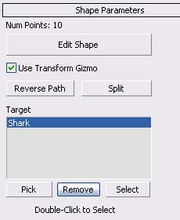
Place the AreaTrigger somewhere near the shape. In its parameters, for the sake of organisation and continuity, rename the AreaTrigger to SharkTrigger or a similar name that you can refer to quickly. Next, select the AreaShape that you created earlier. In it’s parameters, scroll down to the Target section and click on Pick.
Once you have pressed this button, a small crosshair icon should appear instead of the normal mouse icon. In the perspective view, scroll the camera so you can see the AreaTrigger, and then click on the AreaTrigger icon. A line should form between the AreaTrigger and the AreaShape, depicting that these two entities are now linked. This means that when you walk into the AreaShape, an action is triggered due to the linked AreaTrigger.
Setting Up The Flowgraph
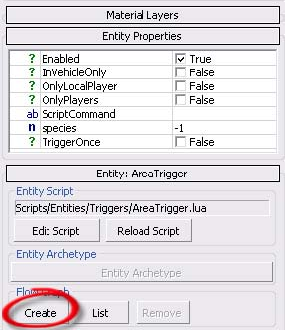
In order for the WaterKillEvent to be triggered when we enter the AreaShape, we need to create a small and simple flowgraph that will do this job. To start off, we need to link the flowgraph to one of the entities to ensure that the flowgraph loads when the game starts. To do this scroll down in the parameters of your AreaTrigger (although it can be any entity) and click the Create button in the flowgraph section.
Name it something appropriate, and you should now find yourself with a blank flowgraph canvas. First we are going to add in the AreaTrigger. To do this, select the AreaTrigger in the perspective view, and in the flowgraph editor, Right Click → Add Selected Entity. An entity:AreaTrigger node should now have appeared in your flowgraph, and if the graph was assigned to it, then its entity name will probably be <GraphEntity>.
With the AreaTrigger added in, its now time to do the same to the WaterKillEvent. Select it in the perspective view, go back to the flowgraph editor, Right Click → Add Selected Entity. The entity:WaterKillEvent node should now have appeared in your flowgraph, with the entity probably being WaterKillEvent1 (unless you renamed it). Your flowgraph should now resemble the one below.
Now it’s time to link the nodes together so that when you enter the AreaTrigger the WaterKillEvent is triggered. You’ll see that the AreaTrigger has an Enter output, and that the WaterKillEvent has a SpawnShark output. If we link these two together, the sharks will be spawned when the player enters the area. To link the two ports, hold down the left mouse button on the Enter output, and drag the link across to the SpawnShark output. Release the left mouse button to set the link. Finally we need to link the Leave port of the AreaTrigger and the RemoveShark port of the WaterKillEvent. Follow the same steps as before to achieve this. Your finished flowgraph should now look like this.
Finishing Off
Finally, to make sure the sharks attack you and don’t just completely ignore you, you need to generate their navigation. To do this, navigate to the top toolbar and click on AI → Generate All Navigation. The sharks should now attack you when you jump in. To jump into the game, position yourself next to the area and press Ctrl + G to spawn into the game. Swim into the area, and you’ll soon be greeted by some sharks!
