Добавление деталей эффекту частиц
Материал из CryWiki Russia
Добавление деталей эффекту частиц
Введение
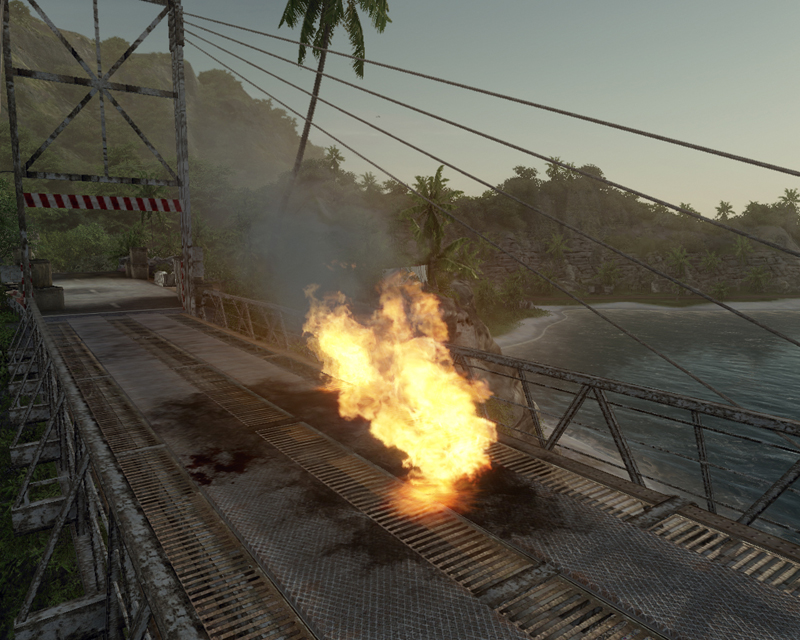
После создания простой 2D-частицы, мы сфокусируемся на добавлении детальности существующей частице. Для начала, загрузите частицу огня из 1-ой части, и следуйте инструкциям приведённым ниже.
Добавление частиц к эффекту
Добавление дочерних частиц
Каждая частица может иметь дочерние узлы, и они могут быть вызваны родительским эффектом.
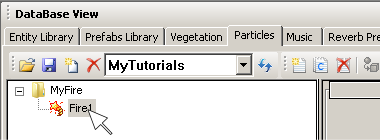
Для начала, убедитесь в том, что частица Fire1, которую вы создали в первой части руководства, выбран в редакторе частиц.
Далее, нажмите кнопку Add Sub Effect чтобы добавить дочерний узел.
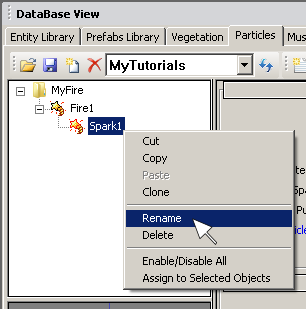
Щелкните правой кнопкой мыши по дочернему узлу и переименуйте его в «Spark1».
Настройка искр
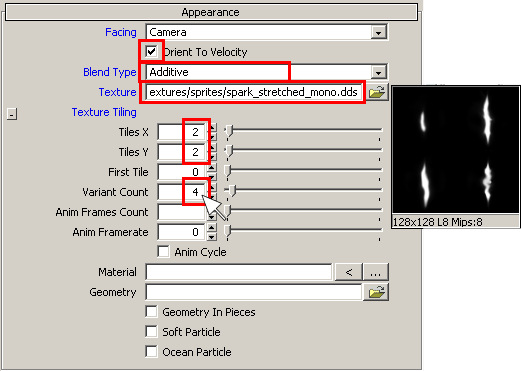
Выберите Spark1, затем перейдите в панель Appearance, и включите свойство Orient To Velocity, в качестве Texture укажите spark_stretched_mono.dds и в качестве Blend Type выберите Additive.
В дополнительных параметрах Texture Tiling, в качестве Tiles X и Tiles Y задайте 2, а в качестве Variant Count задайте4.
Примечание:
Вам, возможно, придётся щелкнуть правой кнопкой мыши по вашей сущности и выбрать Reload Script, для того, чтобы увидеть визуальный эффект.
Использование случайных кадров в анимированных частицах
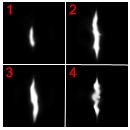
Этот спрайт сделан для использования в качестве анимированных текстур. Чтобы создать анимированные текстуры самому, подготовьте плиточные текстуры, как показано ниже. Порядок кадров анимации начинается в верхнем левом углу, идёт вправо, и заканчивается внизу справа.
Разрешение каждой плитки должно соответствовать основному правилу создания текстур для CryEngine 2, то есть оно должно быть кратно 16.
В нашем примере, мы укажем Variant Count вместо Anim Frames Count, так, при рождении, тектсура спрайта будет случайно взята из одной из 4 плиток.
Рождение вашей искры
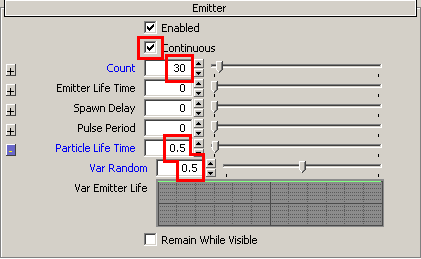
Перейдите в панель Emitter и включите свойство Continuous, в качестве Count укажите 30, в качестве Particle Life Time укажите 0.5 и в качестве Particle Life Time Var Random укажите 0.5.
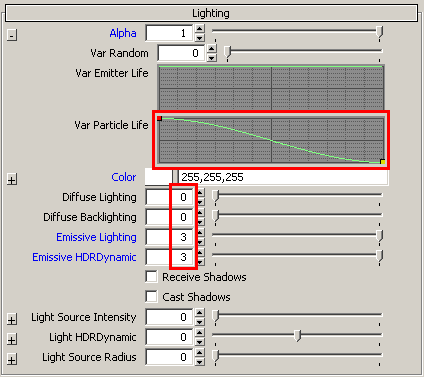
Перейдите в панель Lighting и в качестве Diffuse Lighting и Diffuse Backlighting укажите 0, в качестве Emissive Lighting и Emissive HDR Dynamic укажите 3 и настройте кривую Alpha Var Particle Life, как показано ниже.
Типы интерполяция типов в графах частиц
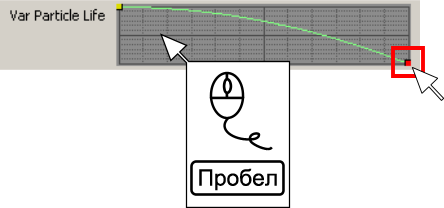
Далее, выберите конечную точку кривой, затем поместите курсор мыши в область графа и нажмите клавишу Пробел. Это изменит интерполяции типа точки на линейной.
Добавление цвета вашей частице
На данный момент, у этой текстуры нет цвета так, что давайте добавим его. Откройте панель дополнительных параметрах Color.
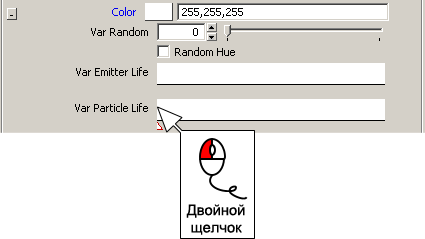
Дважды щелкните по левому краю панели Color Var Particle Life…
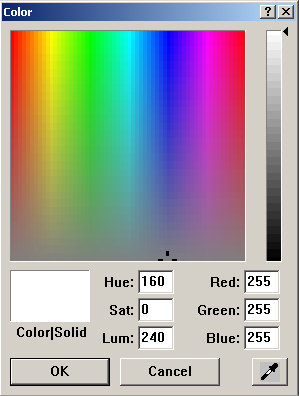
…и появится окно выбора цвета.
Выберите тёмно-оранжевый цвет, затем нажмите OK.
Дважды щелкните по правому краю панели Color Var Particle Life.
Создайте новую точку и выберите тёмно-оранжевый цвет. Панель Var Particle Life должна выглядеть, как показано.
Изменение размера ваших искр
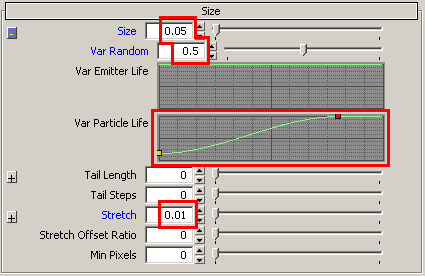
Далее, перейдите в панель Size и настройте её как показано ниже:
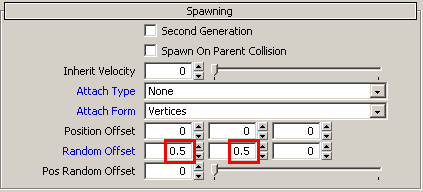
Перейдите в панель Spawning и в качестве Random Offset X и Y укажите0.5.
Поля Random Offset добавляет случайным сдвиг к точки рождения частицы от оси эмиттера.
Далее, включите свойство Second Generation. Это гарантирует, что рождение частицы будет вызвано родительской частицей. Каждый раз, когда рождается 1 спрайт Fire1, вызывается Spark1 и рождает до 30 спрайтов.
При включенным Second Generation, значение Inherit Velocity влияет на движение частиц второй генерации. Это процент скорости, которую наследует дочерняя частица от частицы родителя на время эмиссии. Попробуйте увеличить это значение, и посмотреть, как оно влияет на движение ваших частиц, и сохраните его, если он вам нравится.
Обязательно сохраните сцену до перехода к следующему шагу.
Настройка движения частиц
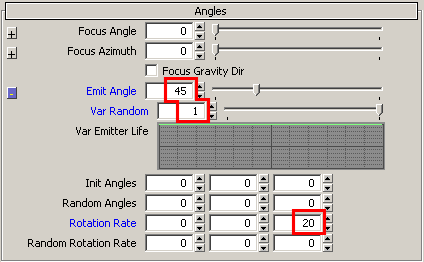
Перейдите в панель Angles и в качестве Emit Angle укажите 45, в качестве Emit Angle Var Random укажите 1 и в качестве Rotation Rate Z укажите 20.
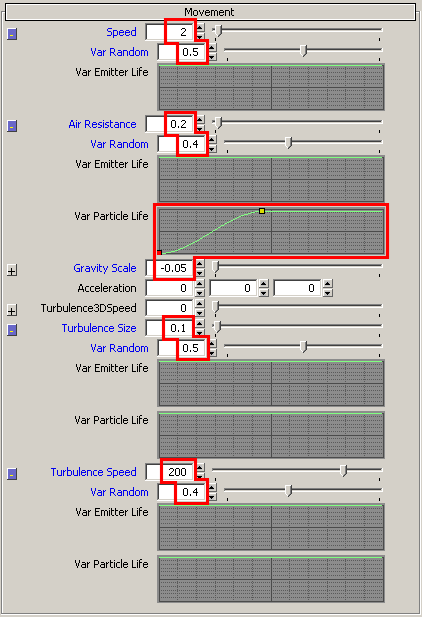
Go to the Movement pane and type in the settings indicated below:
This time, you set a negative value for Gravity Scale. This means particles will not fall to the ground, but rather fall to the sky.
Turbulence Size, and Turbulence Speed adds simple turbulence movement to particle. The Turbulence Size value controls the amount of turbulence the particle is exposed too, and Turbulence Speed controls the speed of the particle moving along the turbulence path. Play with higher or lower values of these parameters to get a good understanding of how these values work.
Testing your particle in different times of day
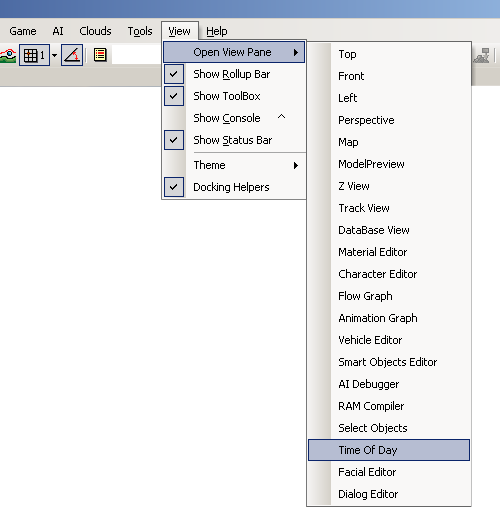
Open the Time Of Day window from View/Open View Pane/Time Of Day.
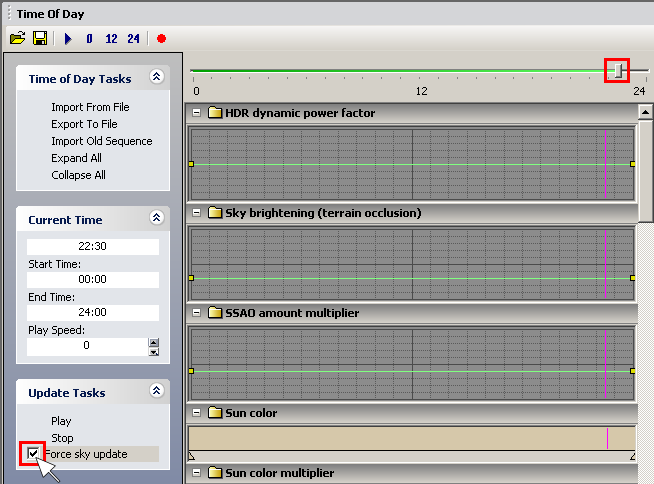
Turn on the Force sky update switch and drag the slide bar to around 22:30 as shown below:
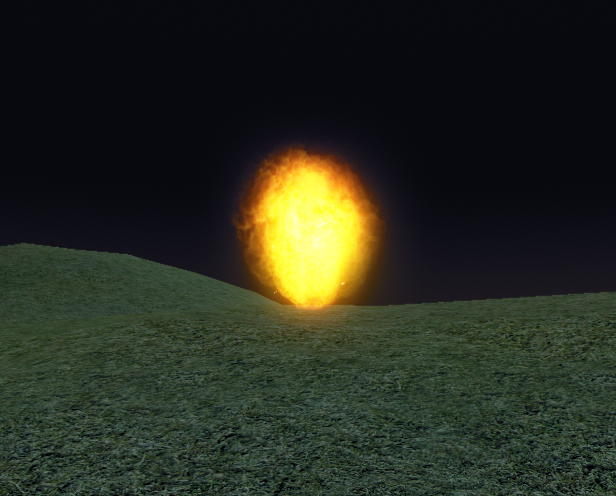
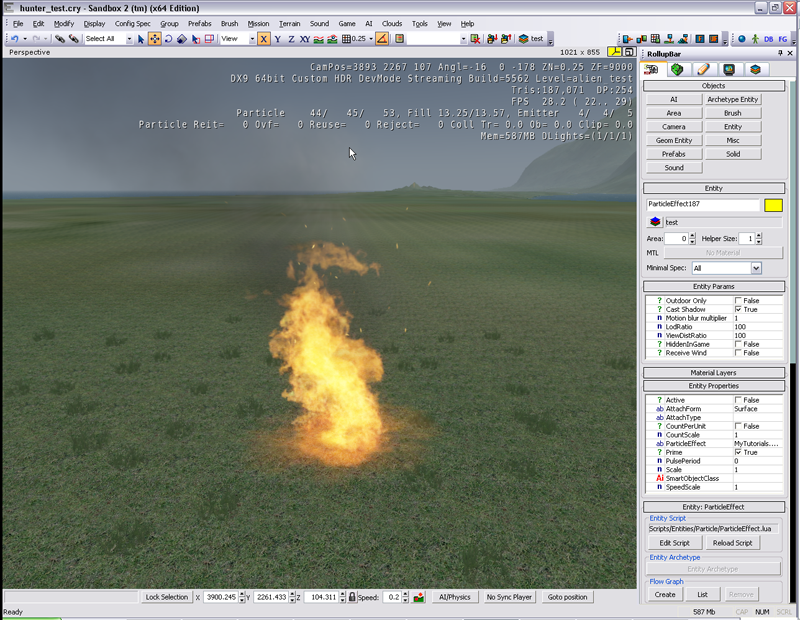
The scene will now become dark, so you can check out how your effect looks at night time.
From this image, it seems like the particle is glowing too strongly at night. To counter this, decrease Emissive Lighting, Emissive HDRDynamic and Alpha value.
You should always test your particle by switching between day time and night time and tweaking values, to make sure it looks good at all times.
Making your fire look more realistic
Setting up an animated texture
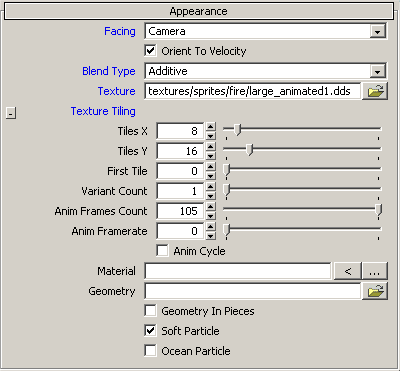
To make the fire appear even more realistic, you can change it to an animated texture.
Change the Fire1 settings to as shown below. Use the texture textures/sprites/fire/large_animated1.dds.
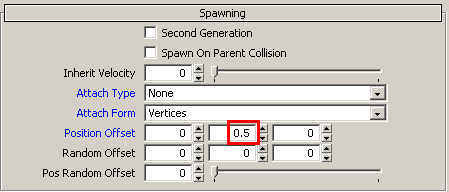
Also, be sure to set the position as shown below:
Adding smoke to your fire
Select Fire1, create a child and rename it Smoke1.
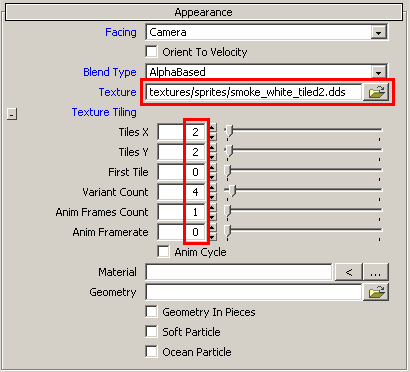
Setup Smoke1 as below. Use the texture textures/sprites/smoke_white_tiled2.dds.
Now, repeat the earlier steps:
In the Emitter pane, turn on Continuous and change the Count to an appropriate value.
In the Lighting pane, set up the Alpha value and Var Particle Life curve.
In the Angles pane, set up Rotation Randomization.
Also, remember to Reload Scripts on your selected particle, should you not see changes.
Adding a glow round the base of your fire
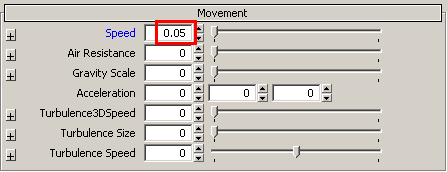
Select Fire1, create a child and rename it Base1. This will be a particle that will spawn around the base of your fire, and as such, should not raise up. Set the movement speed to a very low value to reflect this:
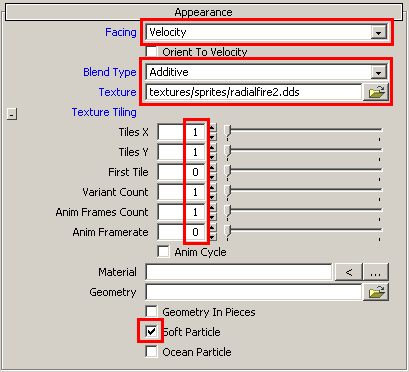
Setup Base1 as below. Use the texture textures/sprites/radialfire2.dds.
In the Emitter pane, turn on Continuous, change the Count to an appropriate value.
In the Lighting pane, set up the Alpha value and Var Particle Life curve. Also, tweak Emissive Lighting and Emissive HDRDynamic if you would like to.
In the Angles pane, adjust the Random Rotation Rate.
Also, remember to Reload Scripts.
Useful information
Loading and using other libraries
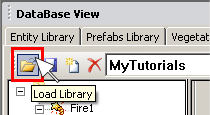
Click the Load Library button at left top of the Database View.
A browser window will open, from which you can select a different library.
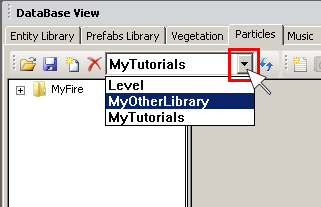
You can switch between libraries by selecting them from the library drop-down menu.
Copying and pasting particle attributes
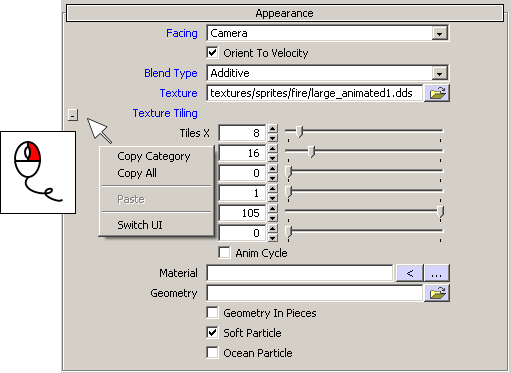
You can copy and paste between libraries by right-clicking within the pane and selecting either Copy Category or Copy All.
You can Paste using the same menu.
Applying a material to a particle
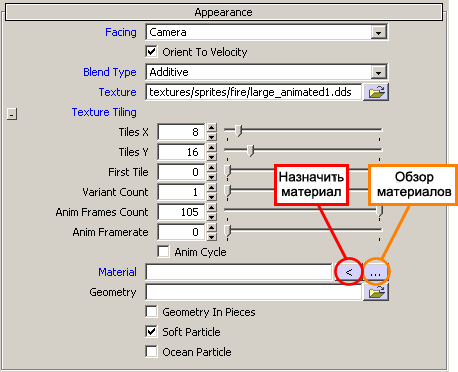
You can apply materials to the particle. For example, if you select a refractive material, it will apply refraction to your particle.
Clicking the Browse Material button will open the Material Editor. Select a material from there, then go back to your particle in the database view. Now, click Assign Material.
