Настройка И.И. с более продвинутым поведением
Материал из CryWiki Russia
Eis (Обсуждение | вклад) (→Запретные области) |
Eis (Обсуждение | вклад) (→Запретные области) |
||
| Строка 84: | Строка 84: | ||
[[Файл:Sandbox_SimpleAI_image023.png]] | [[Файл:Sandbox_SimpleAI_image023.png]] | ||
| - | Как только ваша [[Sandbox_ForbiddenArea|ForbiddenArea]] будет создана, а уровень будет триангулирован, ИИ не будет | + | Как только ваша [[Sandbox_ForbiddenArea|ForbiddenArea]] будет создана, а уровень будет триангулирован, ИИ не будет врезаться в стены. |
[[Файл:Sandbox_SimpleAI_image025.png]] | [[Файл:Sandbox_SimpleAI_image025.png]] | ||
Версия 12:36, 19 марта 2011
Статью пометил сам автор статьи.
Содержание |
Настройка И. И. с более продвинутым поведением
Введение
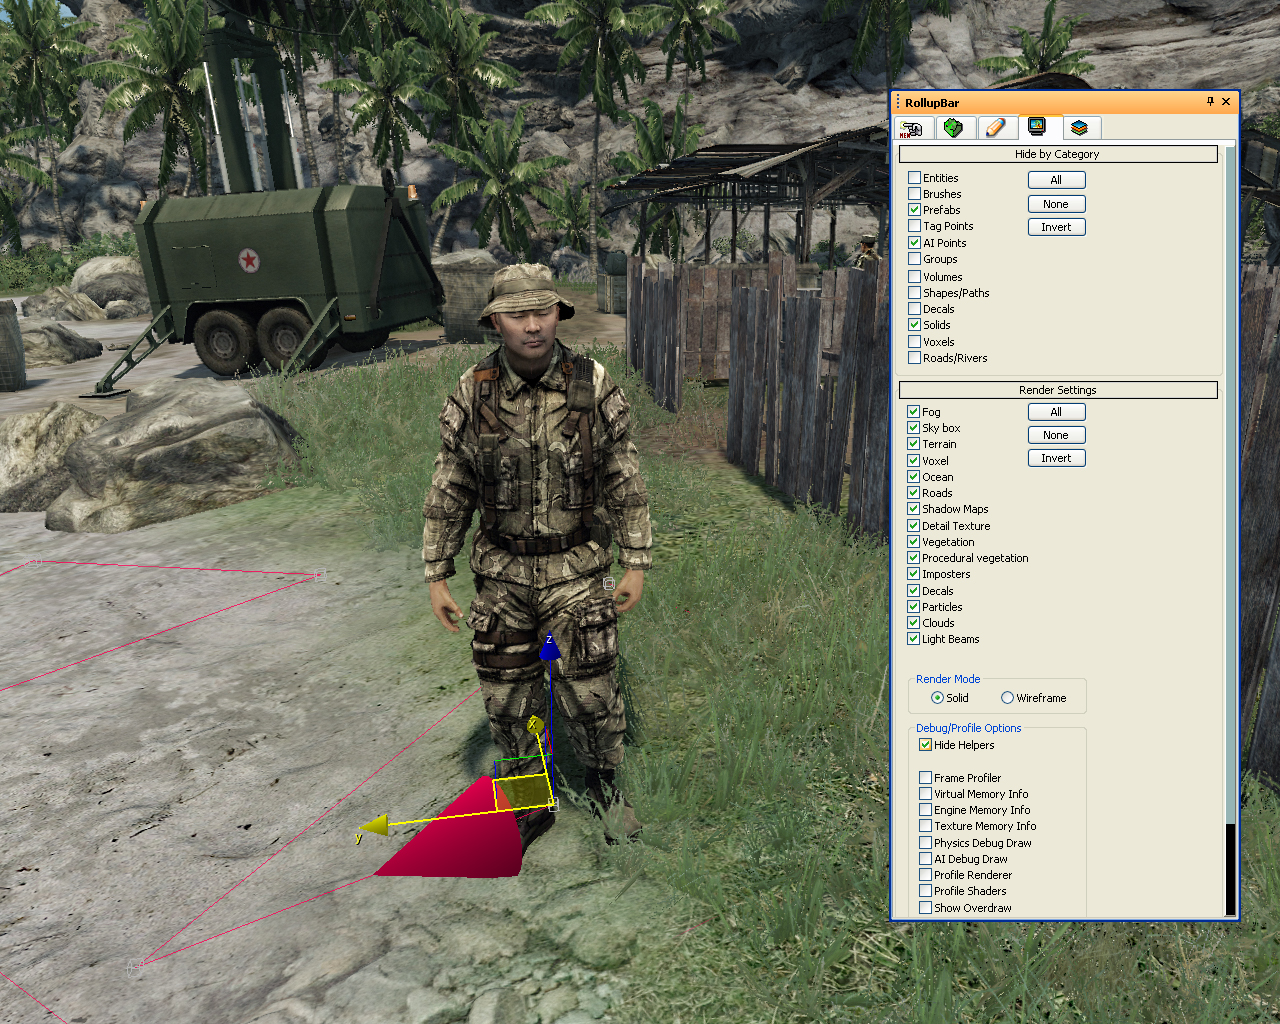
Это учебное пособие покажет вам, как разместить врагов на карте и указать им, куда они могут идти или где могут скрываться. По умолчанию они запрограммированы стрелять в игрока, как только он попадёт в зону их видимости.
Типы характеров искусственного интеллекта, их взаимодействие с оружием, как далеко они могут видеть и слышать, продвинутое поведение, такое как групповая тактика, переговоры между ИИ, использование транспортных средств и взаимодействий с сложными объектами, описано в других обучающих программах и справочной библиотеке.
Добавление противника на карту
Размещение ИИ на ваш уровень
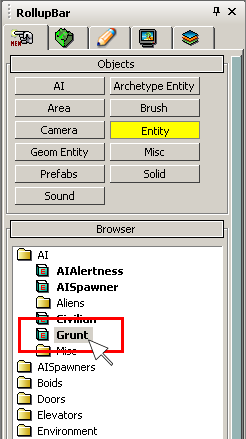
Для размещения ИИ в RollupBar выберите Objects затем Entity, в папке AI выберите Grunt и перетащите в окно перспективы.
Снабжение ИИ оружием
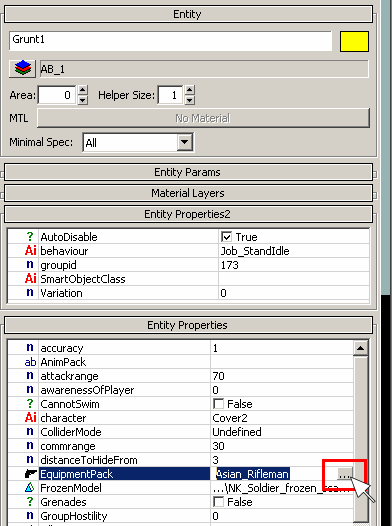
Для снабжения ИИ оружием нажмите кнопку … в поле EquipmentPack откроется диалоговое окно пакетов экипировки. Для получения дополнительной информации о настройке пакетов экипировки, прочтите учебное пособие по Equipment Pack.
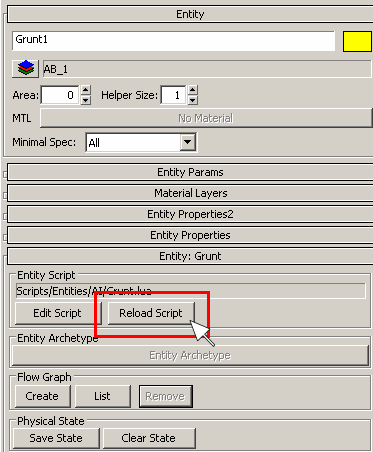
Важно: Чтобы изменения вступили в силу нажмите кнопку Reload Script (расположена ниже свойств сущности) чтобы Grunt начал использовать выбранный пакет оружия.
Архетипы противников
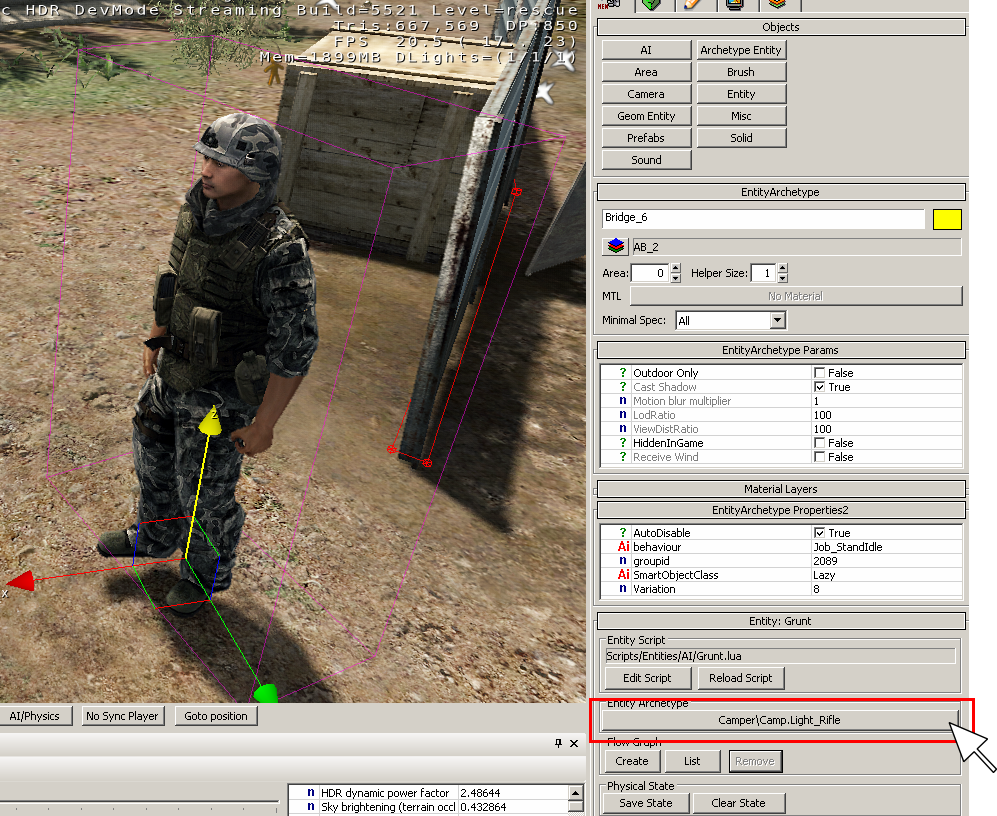
Все ИИ-персонажи Crysis размещены как архетип-объекты, это означает, что настроить параметры нужно всего один раз, чтобы использовать на разных уровнях. Чтобы увидеть параметры, которые они используют, просто нажмите на окно Entity Archetype (в следующем скриншоте текст CAMPER/CAMP.Light_Rifle).
Генерация навигации ИИ
Даже на равнинном ландшафте, убедитесь, что вы генерируете новую навигацию ИИ, хотя бы один раз после создания карты, а также после любых изменений на ландшафте.
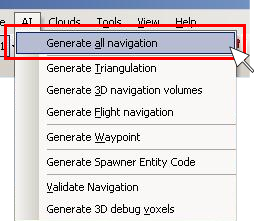
Навигация ИИ может быть сгенерирована нажатием элемента Generate All Navigation, из меню AI.
Тестирование результатов
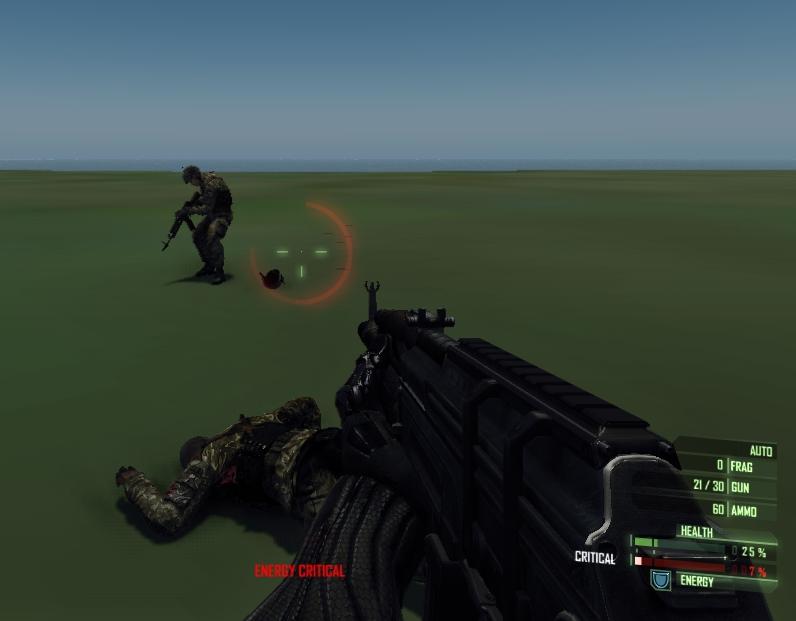
Перейдите в режим игры (CTRL+G) и подойдите к ИИ, если вы всё правильно настроили, то ИИ будет стрелять в игрока, когда он его увидит или услышит.
Настройка навигации
Введение
Чтобы ваш ИИ работал правильно на вашем уровне, вы должны настроить различные типы навигации.
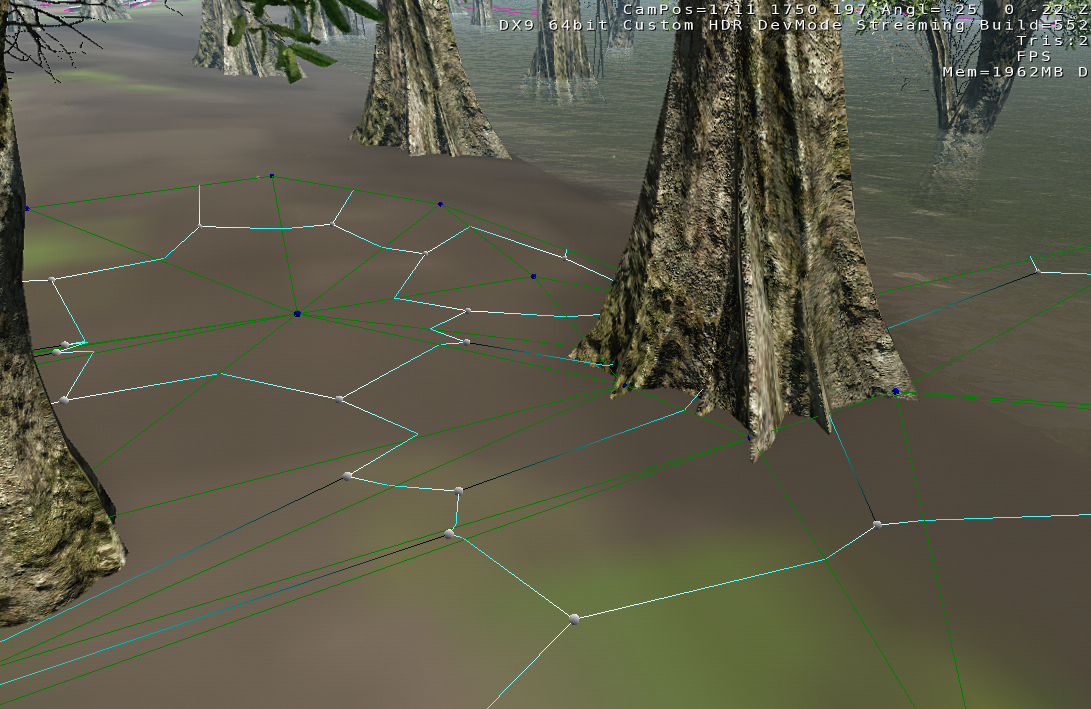
Введение ai_DebugDraw=79 в консоль покажет вам, настроена ли уже триангуляция, это означает, что ИИ сможет найти свой путь из одной точки в другую не натыкаясь на препятствия.
Растительность
ИИ автоматически обходит объекты растительности, если всё настроено правильно.
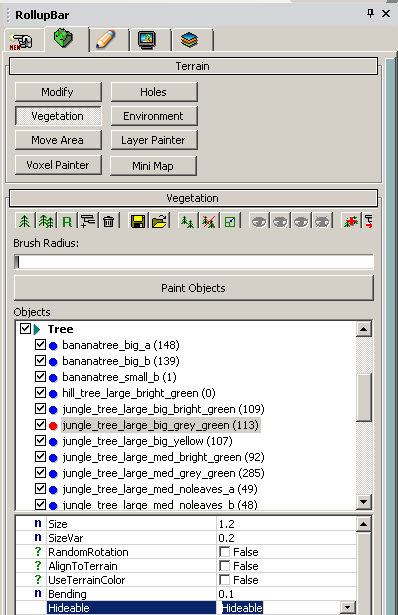
Если Вы хотите, чтобы ИИ скрылись за деревьями установите флаг Hideable в свойствах Vegetation.
Затем, скорректируйте AIRadius Vegetation, чтобы ИИ понимал, насколько большой объект растительности.
ИИ будет так же автоматически обходить более сложные объекты, такие как транспортные средства.
Утесы и большие твердые объекты
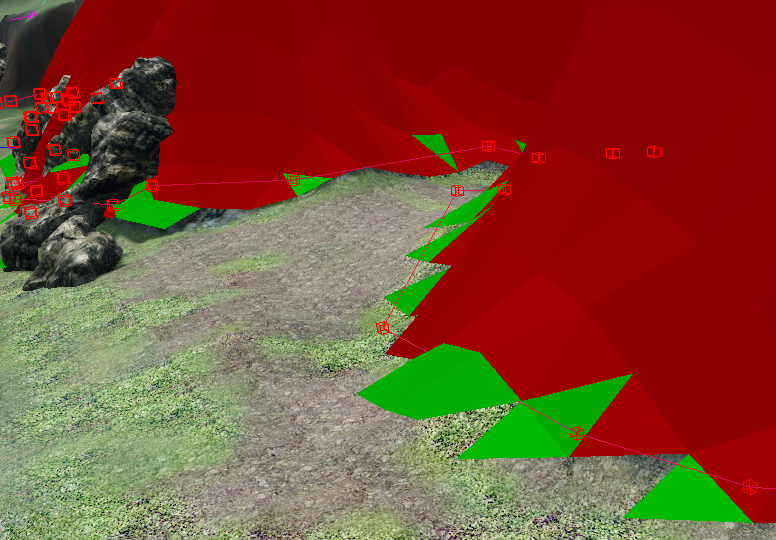
Введение ai_debugdraw 85 в Консоль выведет на экран все области, которые слишком круты, чтобы подняться (показаны красным цветом) и области которые могут вызвать скольжение (зеленый).
Теперь мы должны изолировать все такие области запретными областями ForbiddenAreas (см. раздел ниже).
Запретные области
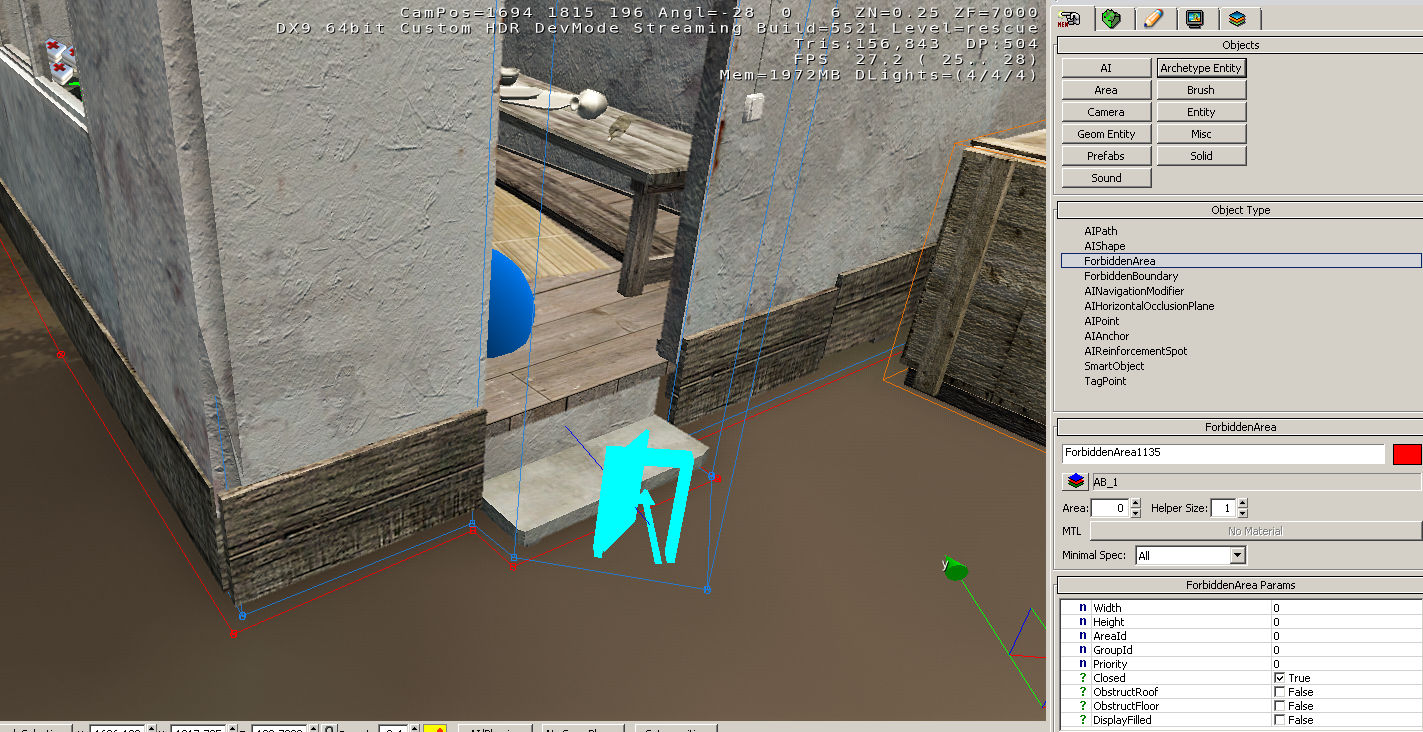
Вы должны окружить каждую внутреннею область точки пути с ForbiddenArea, таким образом, ИИ не будет тыкаться в стены и другие объекты.
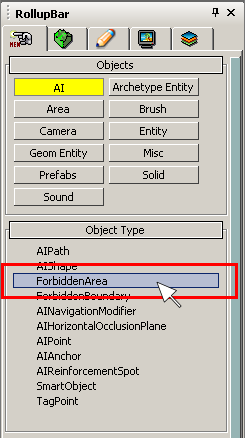
Нажмите на AI/ForbiddenArea и создайте форму вокруг области, которую вы хотите сделать непроходимой (например, внешние стены здания). Выберите ForbiddenArea из меню, как показано ниже.
Как только ваша ForbiddenArea будет создана, а уровень будет триангулирован, ИИ не будет врезаться в стены.
Настройка точек пути во внутренних областях
Чтобы ИИ смог входить в двери и перемещаться внутри здания необходимо добавить Waypoint Region. You need to extend one section of this Waypoint Region outside of the forbidden area, as an entryway for the AI, as below.
The 3 things you need to setup a Waypoint Region are:
- AI Navigation Modifier Area
- AIWaypoints (of various types)
- AIWaypoint Entry/Exit points
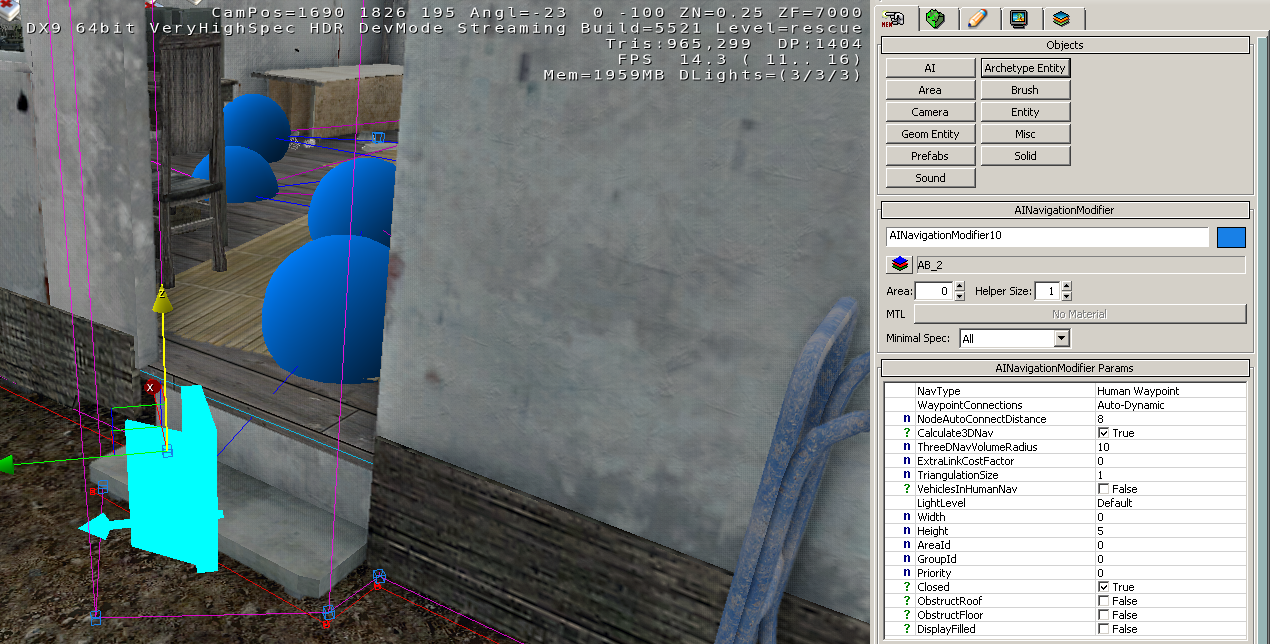
You need to surround each waypoint region with an AI Navigation Modifier «Human Waypoint». (The blue shape).
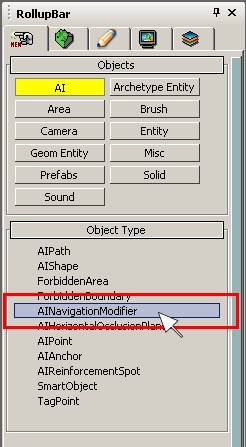
Click on AI/AINavigationModifier and create an area shape of that type.
By default the NavType is set to «Human Waypoint» so no need to modify anything.
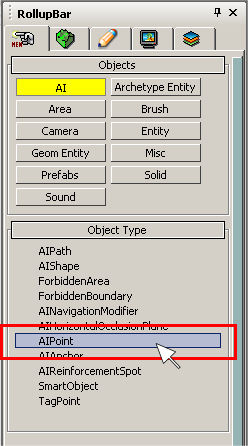
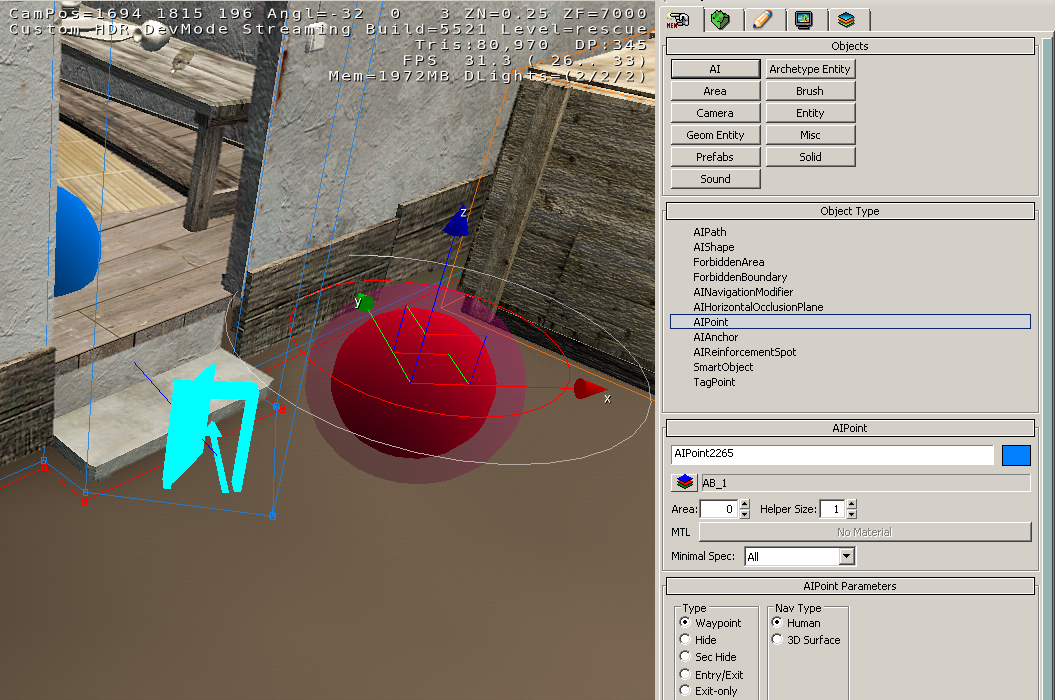
Place AI/AIpoints inside your area. You will see they turn blue once they are in a valid area.
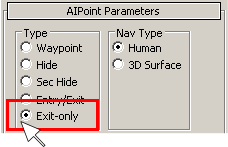
At the place where AI should be able to enter and exit the area change the type of the AIPoint to Entry/Exit (a door symbol will be displayed instead of the blue ball.
One part of the AINavigation modifier area should be outside the forbidden area shape (red line) so the AI can reach the point.
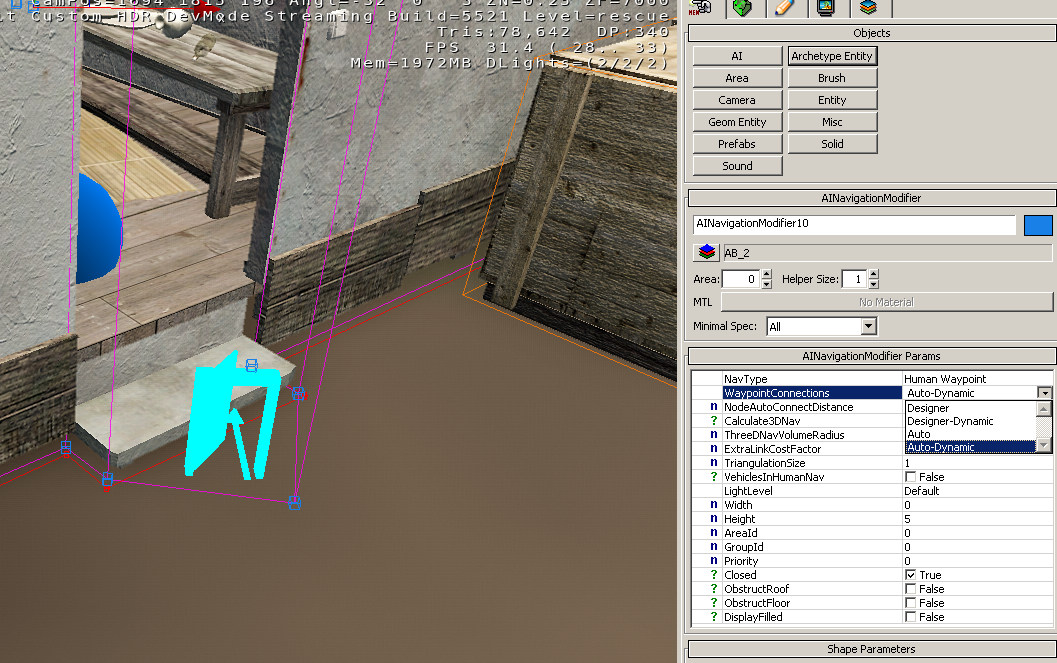
To generate the connection between all points select the AINavigationModifier shape you placed and set Auto-Dynamic in the Waypoint Connection Parameters.
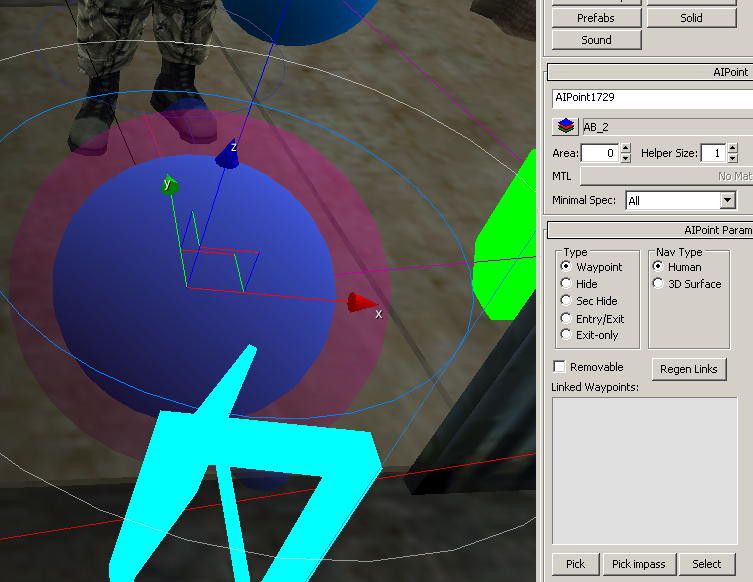
And finally click on one of the points and press the Regen Links Button:
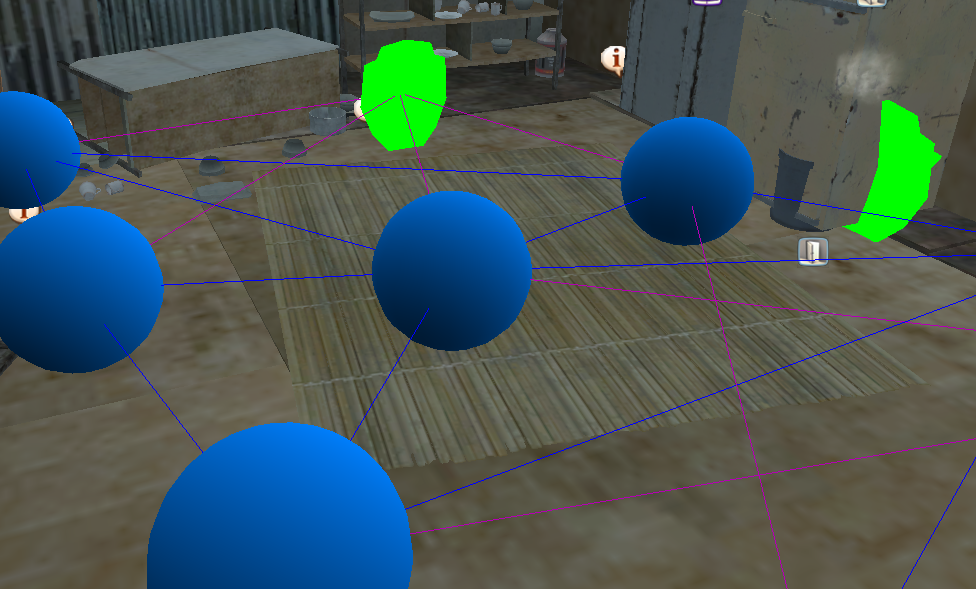
All Points should now be connected like this and the AI will be able to navigate inside the area and enter/exit it at the points where you set the specific entry and exit points.
See the section below on how ForbiddenAreas and Waypoints should be setup in terms of placement.
You need to surround every area where you want something to fly with an AI Navigation Modifier shape called Flight. You also need to give this area a height.
Water Navigation
You need to surround every area where you want something to navigate on water (i.e. boats) with an AI Navigation Modifier shape called Water.
Paths and Roads
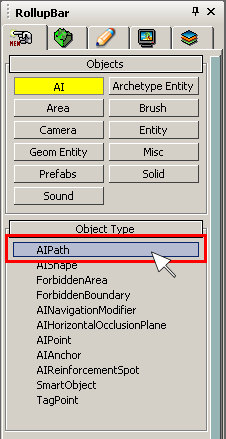
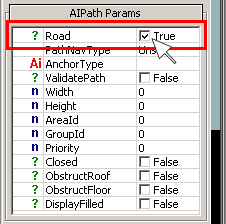
Create an AIPath with the Road box ticked, and vehicles will automatically have a strong preference to use the road/path. AI can also be made to follow the path using the AIFollowPath flowgraph node
External Hide Points
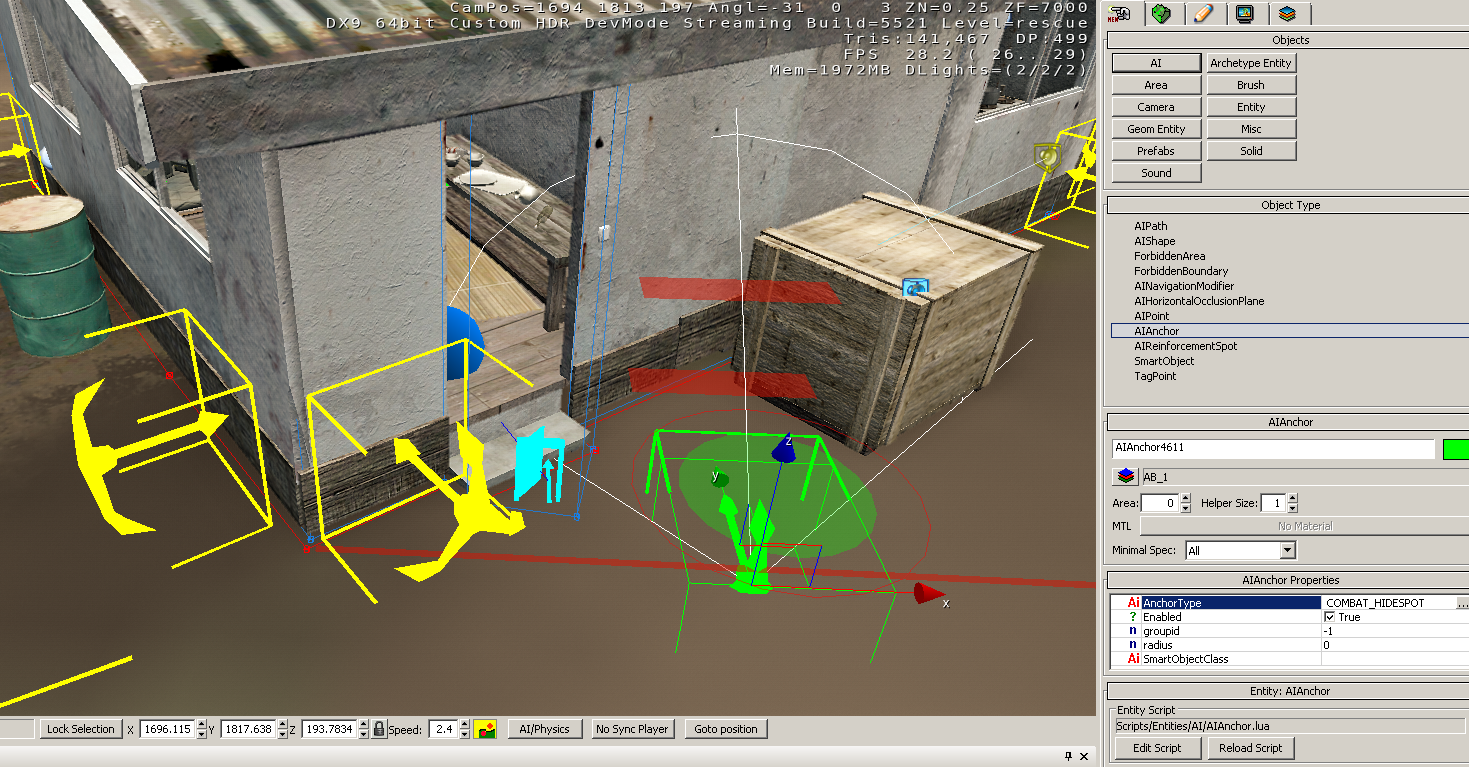
To make AI hide at specific spots you have to place AIAnchor (outside of waypoint areas).
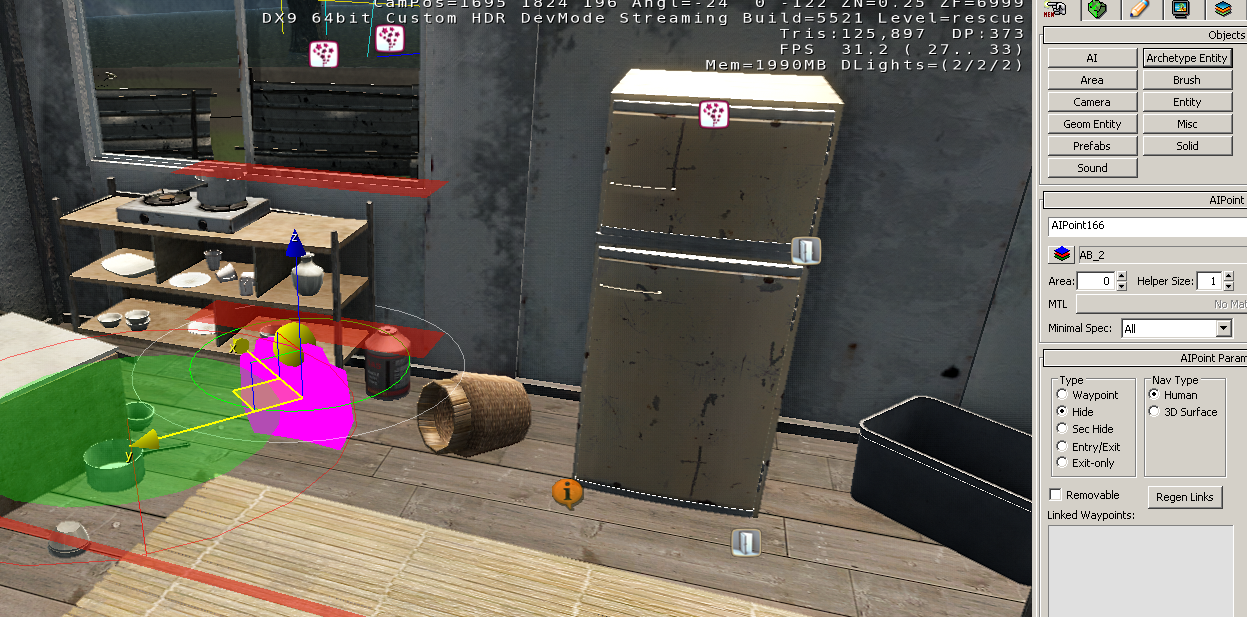
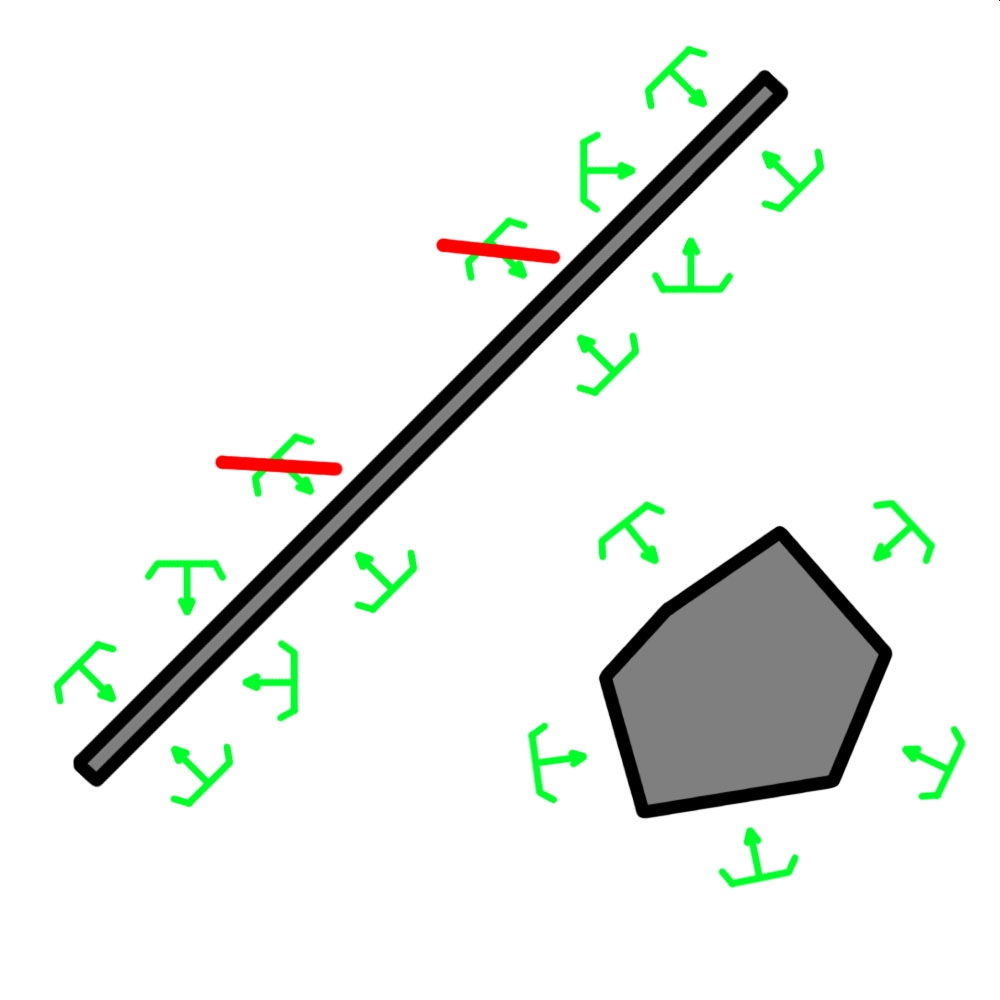
Place an AI/AIAnchor next to any solid object. Now, notice the two red bars in front of the hide point, which indicates if the AI can use a crouch/hide animation, or a left/right strafe animation. The red line on the front of a hide point shows that there is left an right enough space the strafe left and right. Make sure the Green Area is not blocked by anything, so that the AI can actually use it.
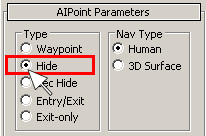
The same concept for AIAnchors applies to the AIPoint Hide Points. So, change one waypoint within a nav area to a Hide Point, by changing the Type in the AIPoint Properties.
How to setup AI correctly – Advanced tips
Forbidden Areas
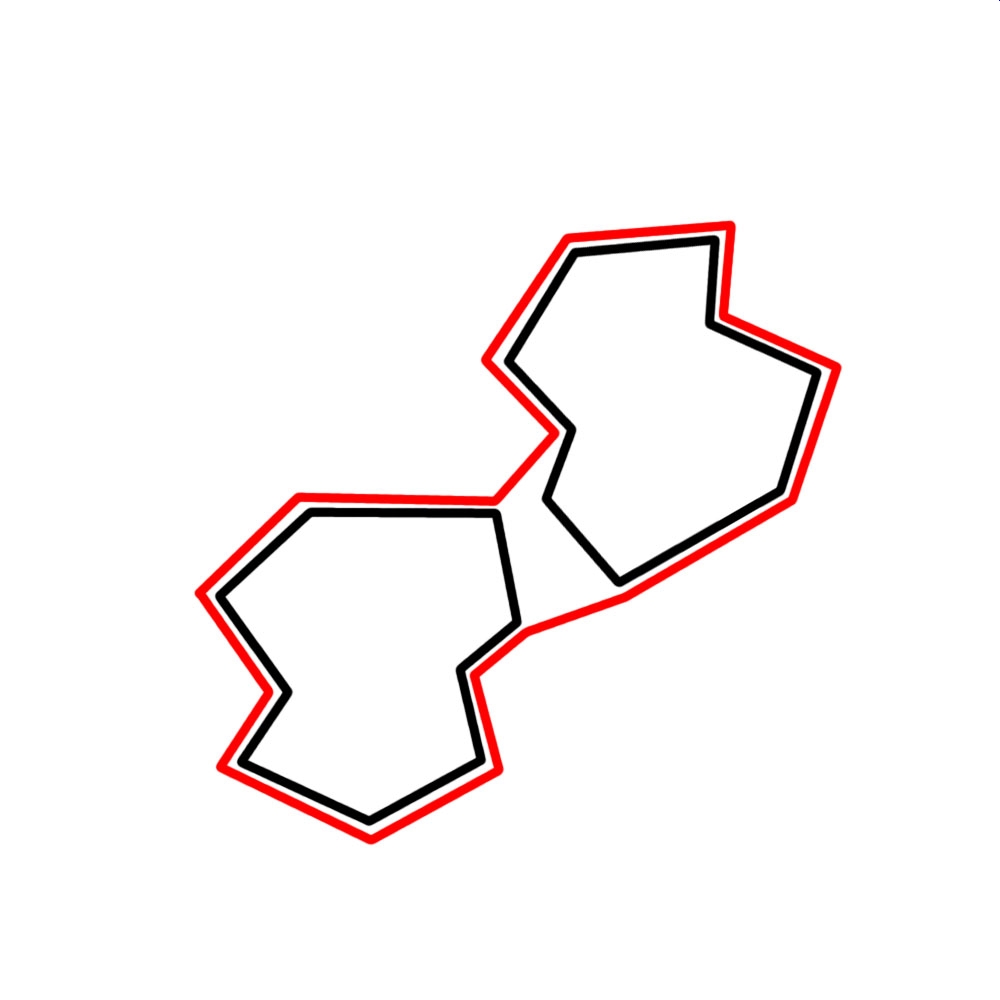
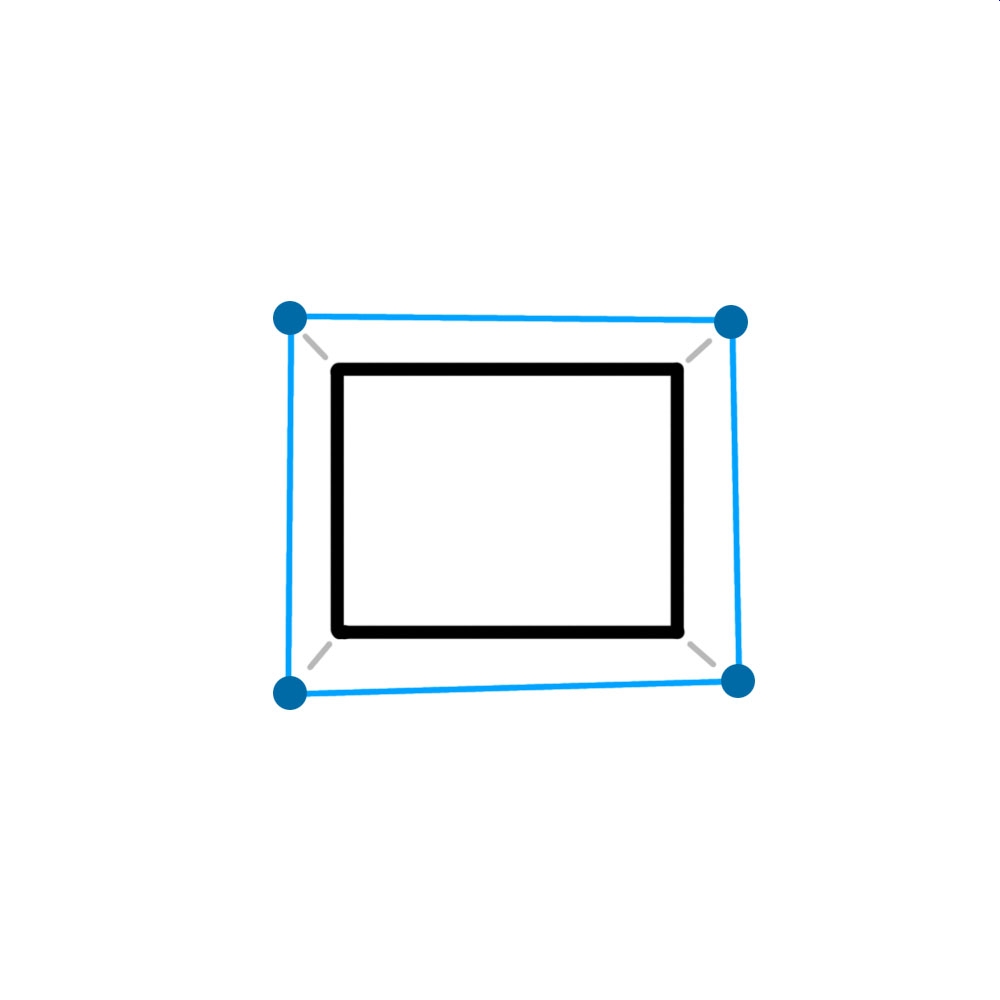
Here the forbidden area is placed too far away from the actual object.
Instead place them closer the the edges of the objects. This avoids that the AI might slip in the gaps. Now the AI navigates way better around these objects.
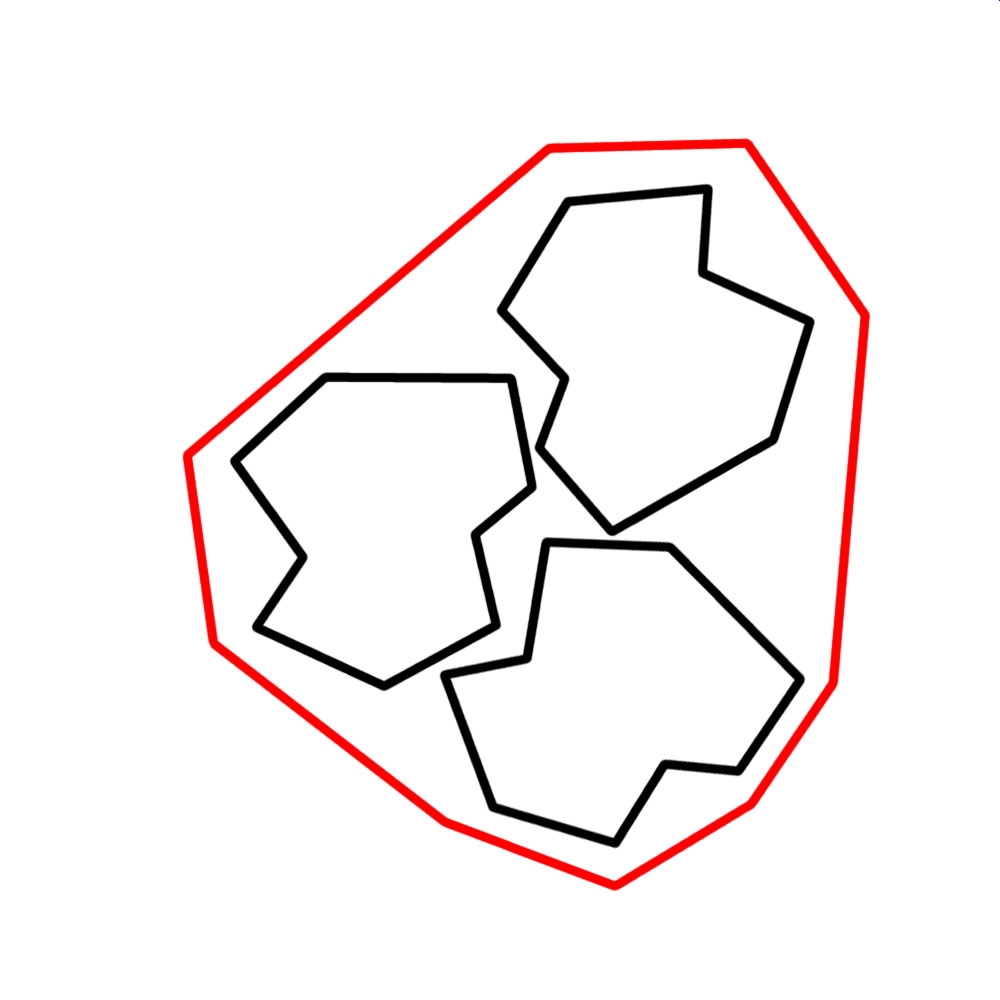
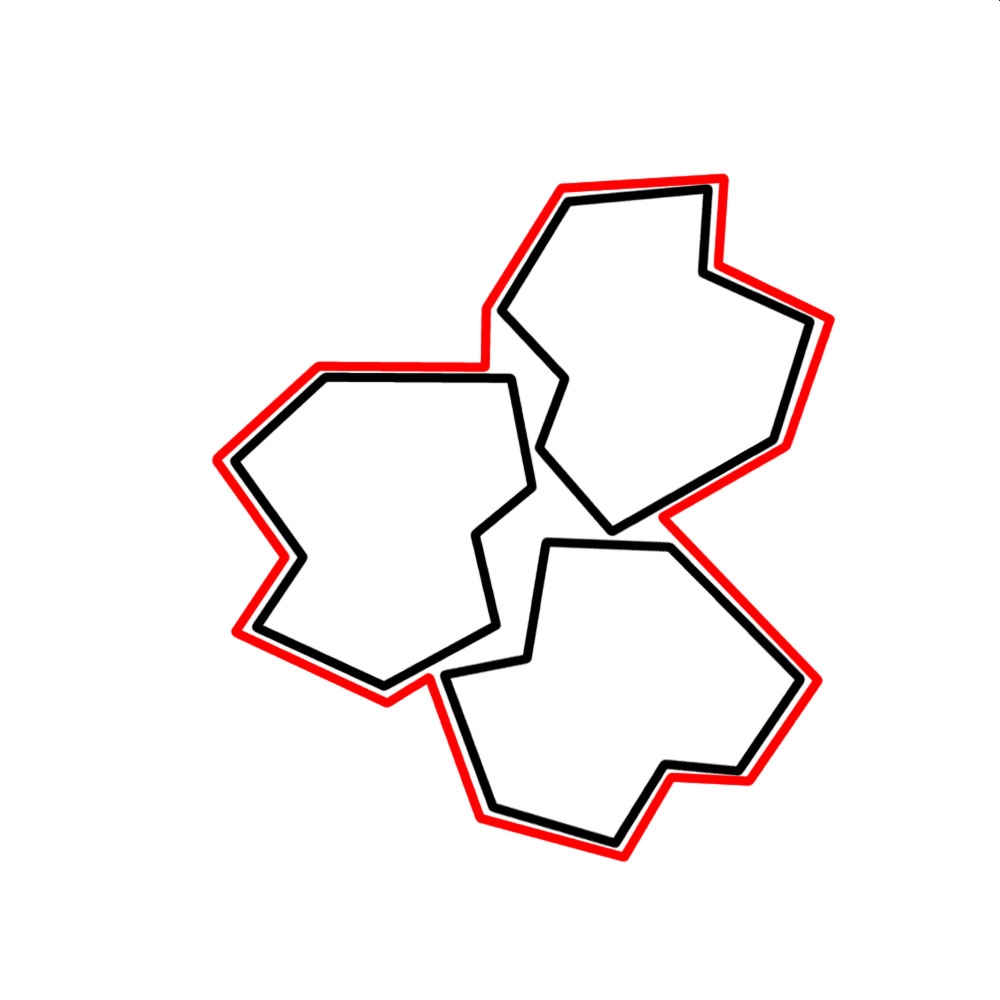
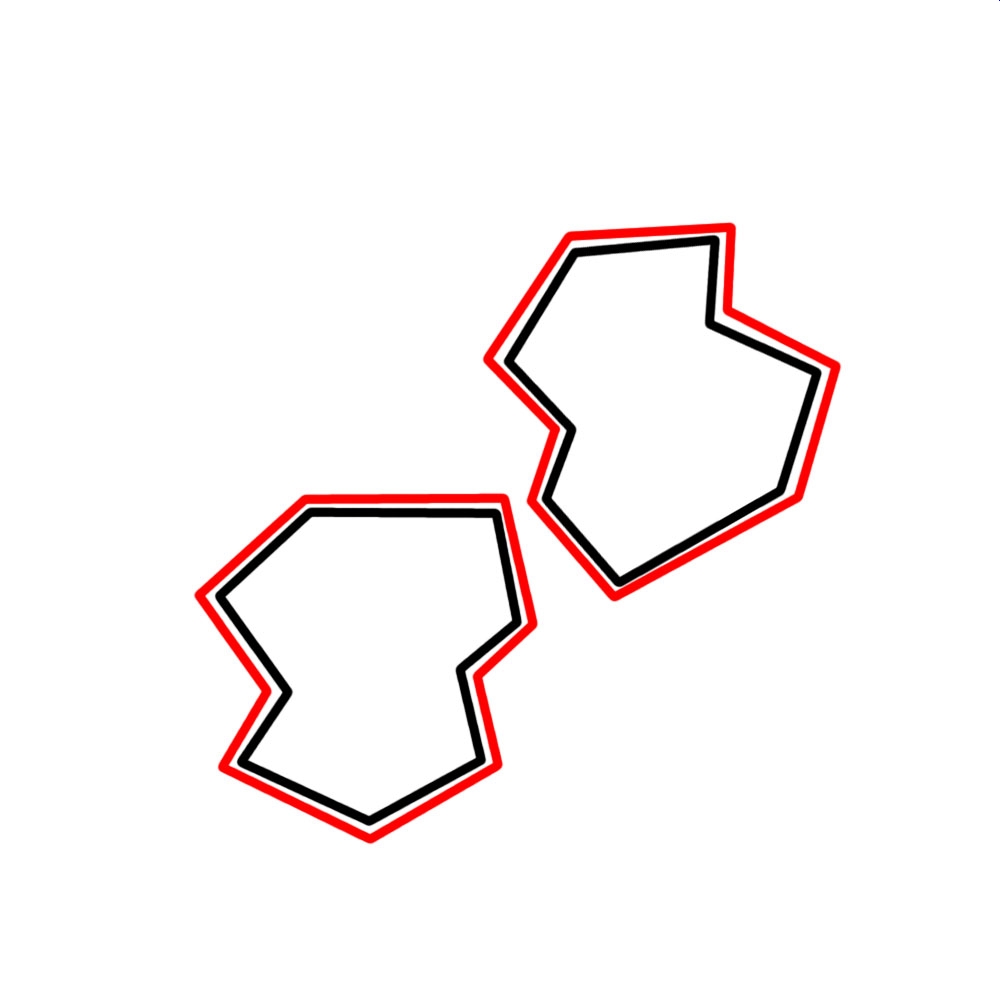
Do not place two forbidden areas so close to each other. Even if the AI can‘t fit through, the navigation will still trace a path in between.
Instead delete one forbidden area. Make one big forbidden area which contains both objects.
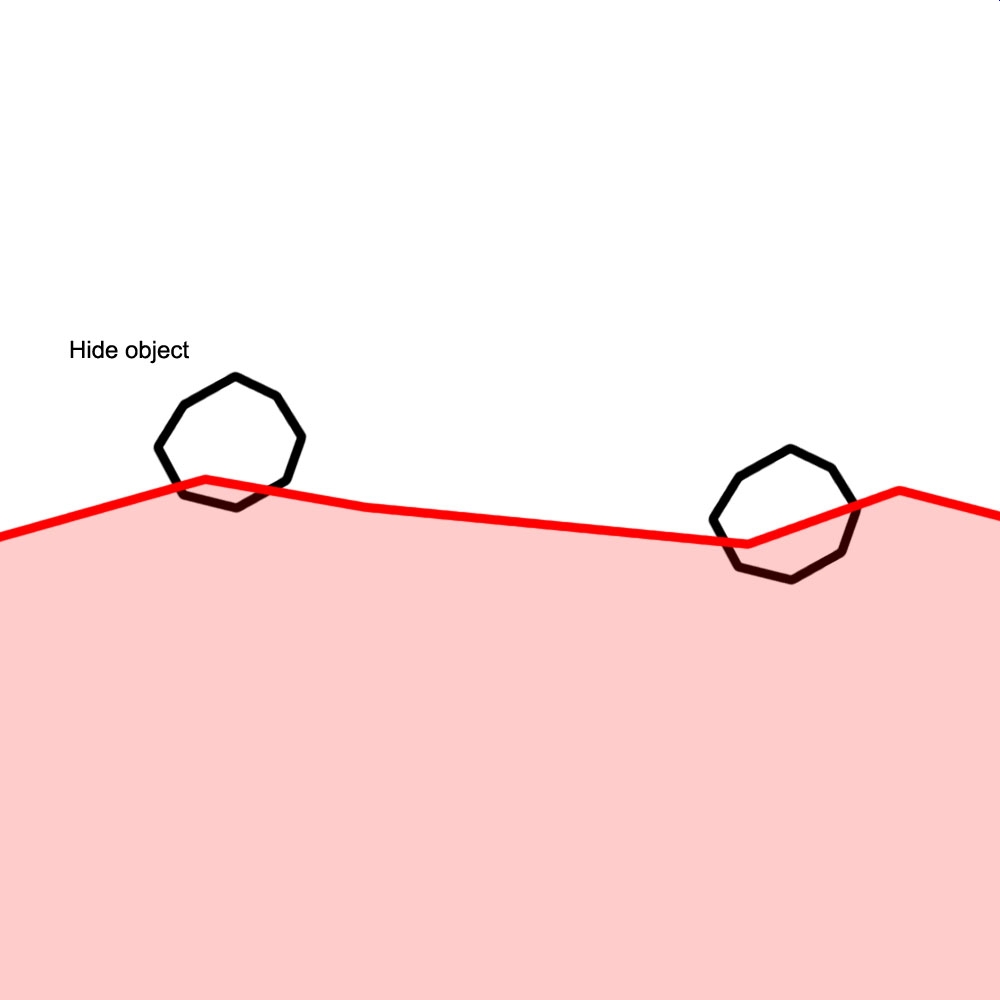
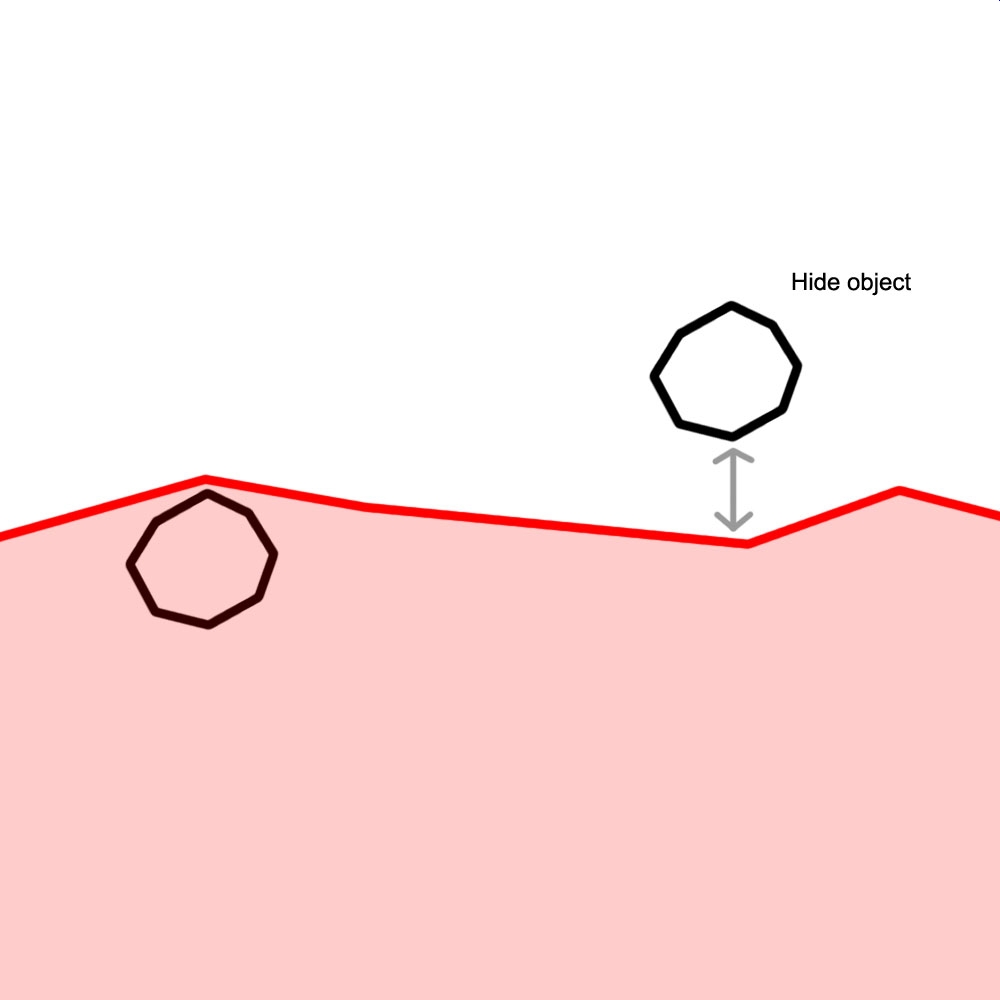
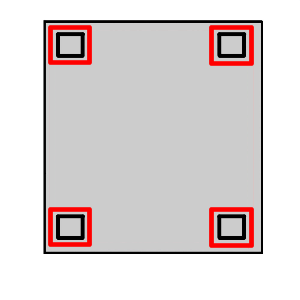
Do not place objects close on the edge of a forbidden area. Otherwise the AI circles around the hide objects and can slip in the forbidden area.
Place the hide objects either inside the forbidden area or outside of the forbidden area. Make sure that if the AI circles around the hide object it doesn‘t slip in the forbidden area
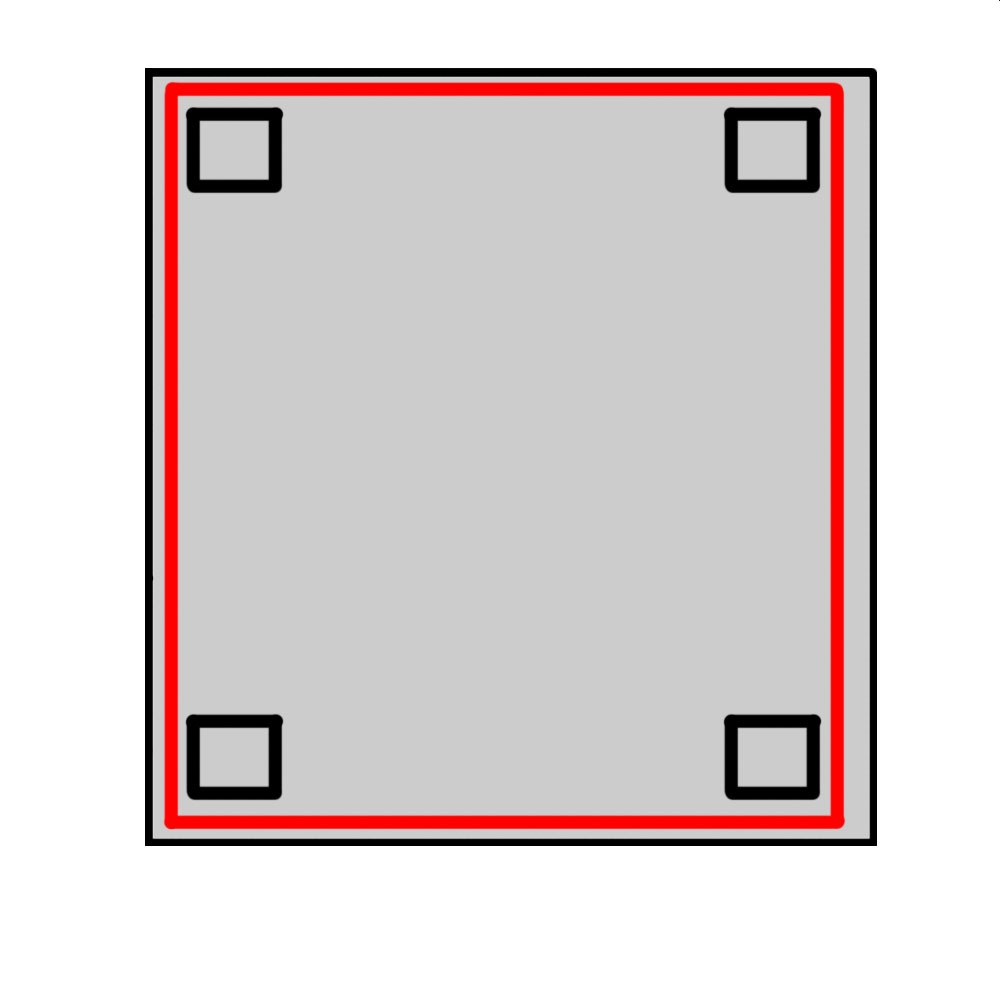
Large open sided structures should not have one big forbidden area around them.
Rather, place smaller forbidden areas around them.
Hide Anchors
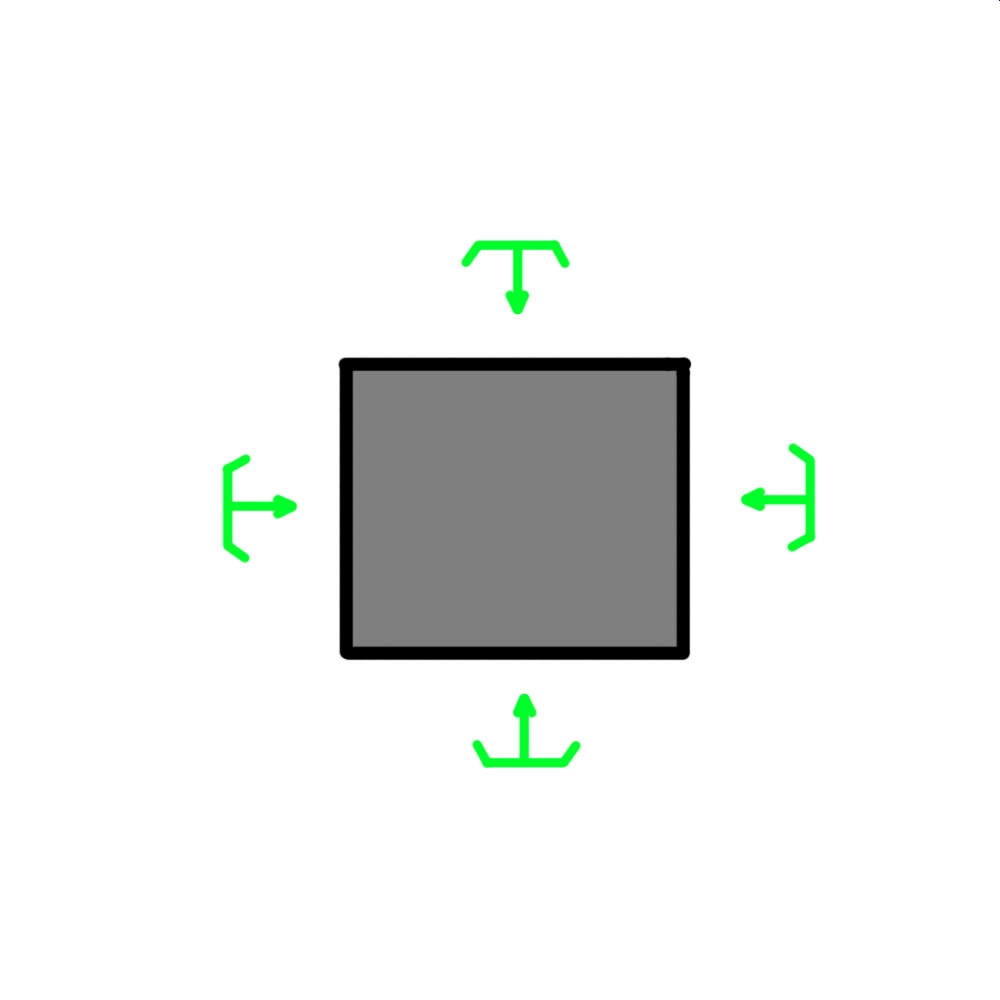
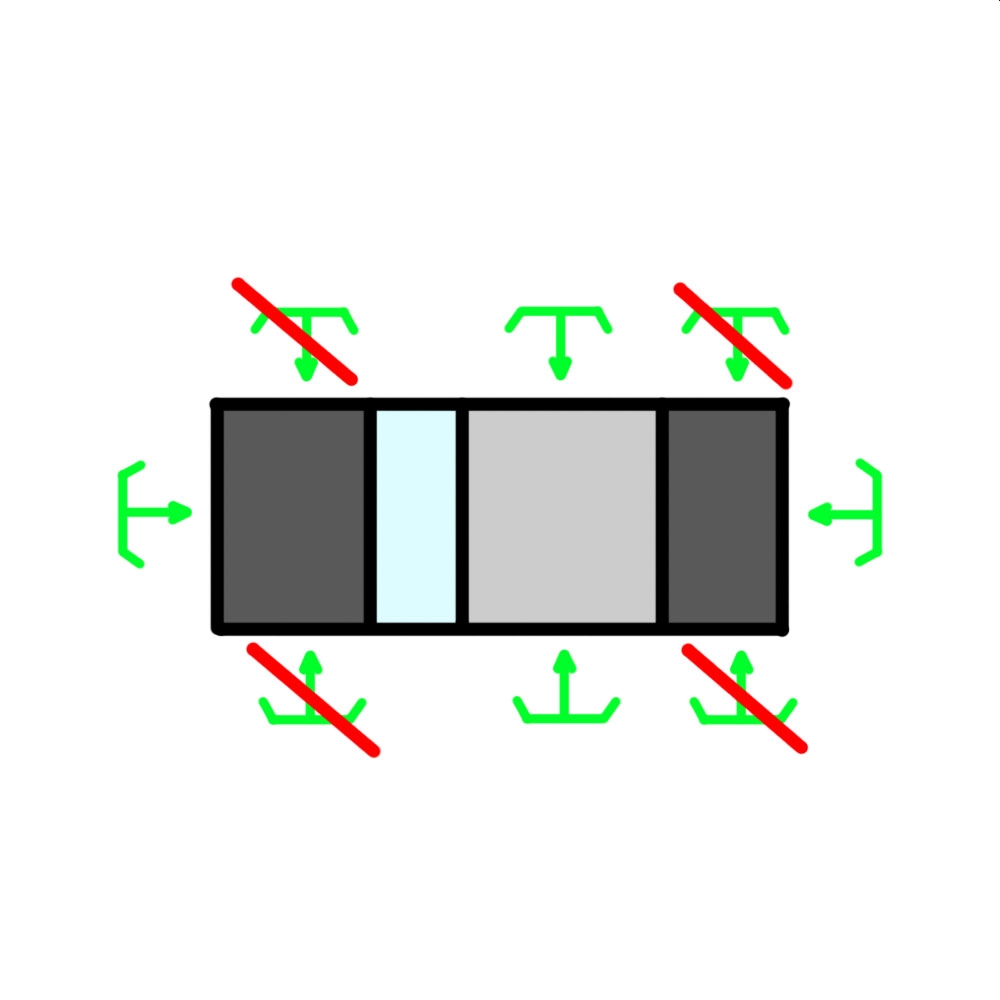
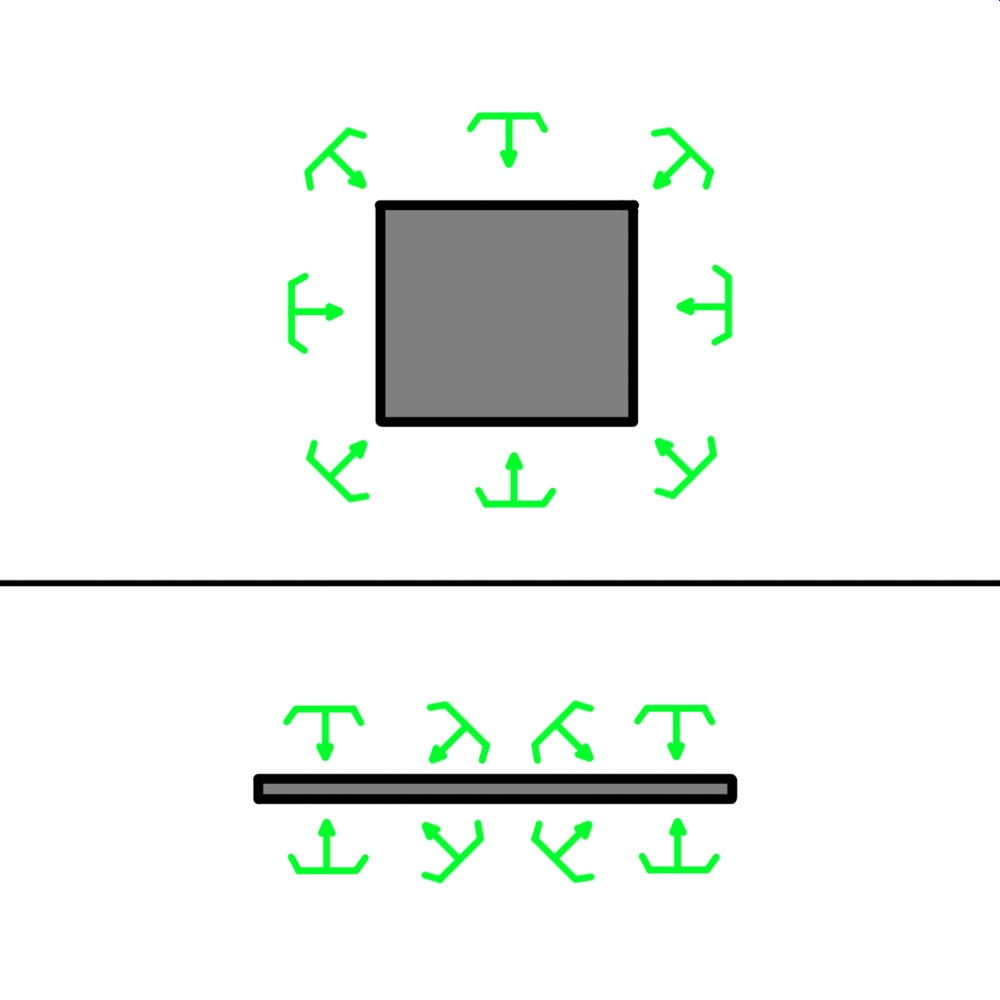
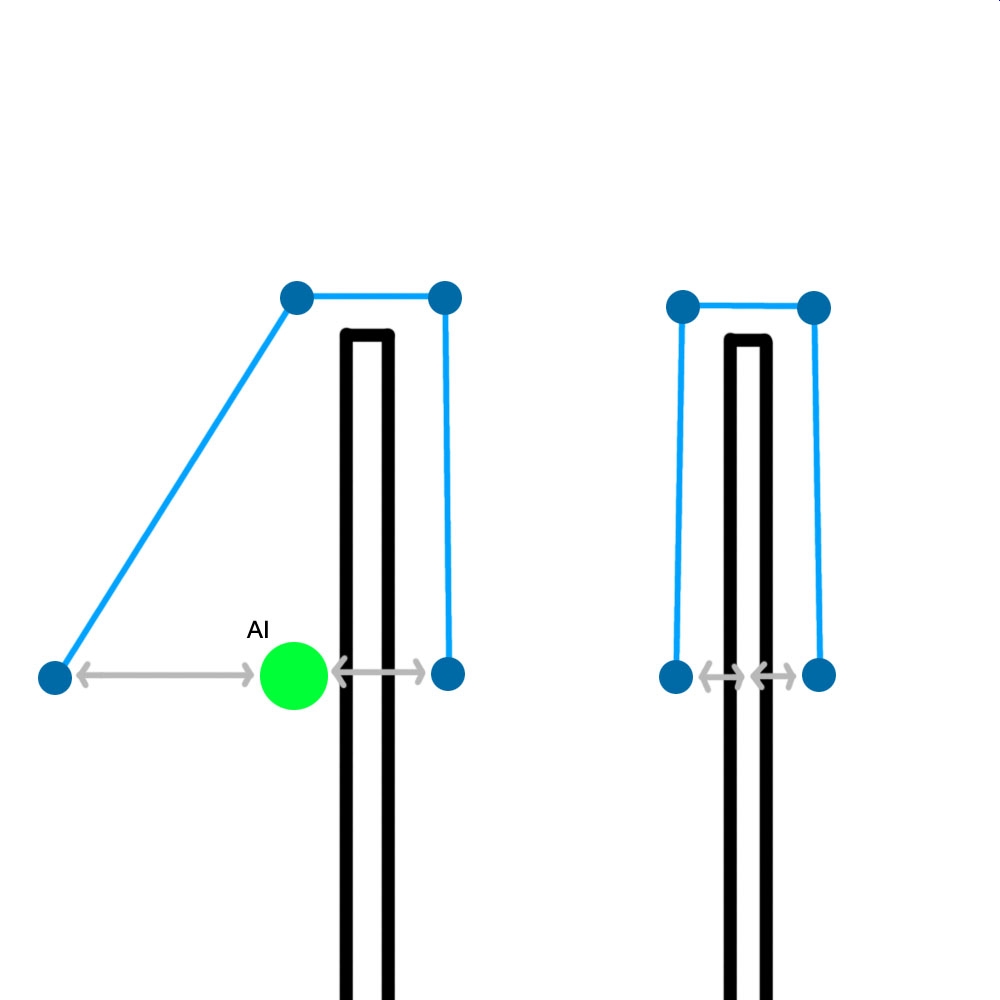
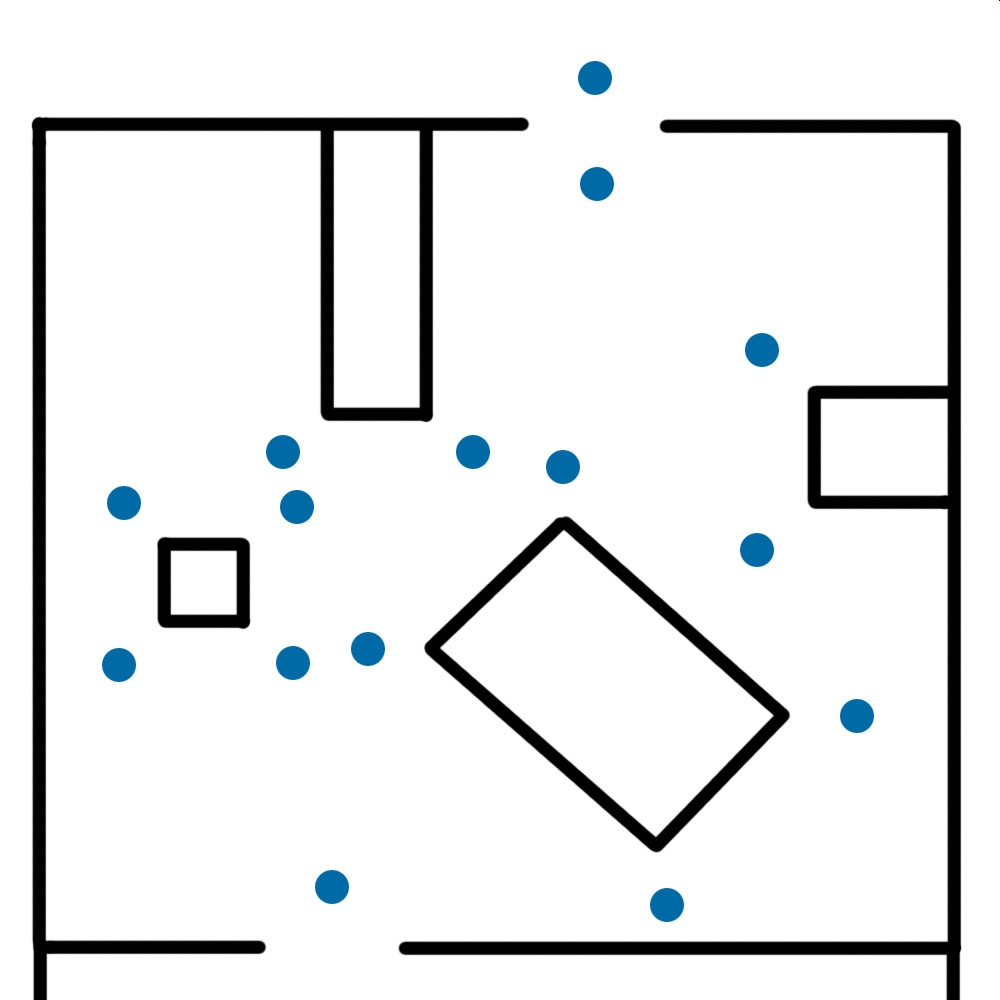
The AI hides at the hide anchor if an enemy is the cone. The more AI guys you have the more hide anchors you have to place. Do not place hide anchors for just one direction. Place them for all possible directions.
Place hide anchors at the sides of an object not only at the edges. Sides provide better cover than edges.
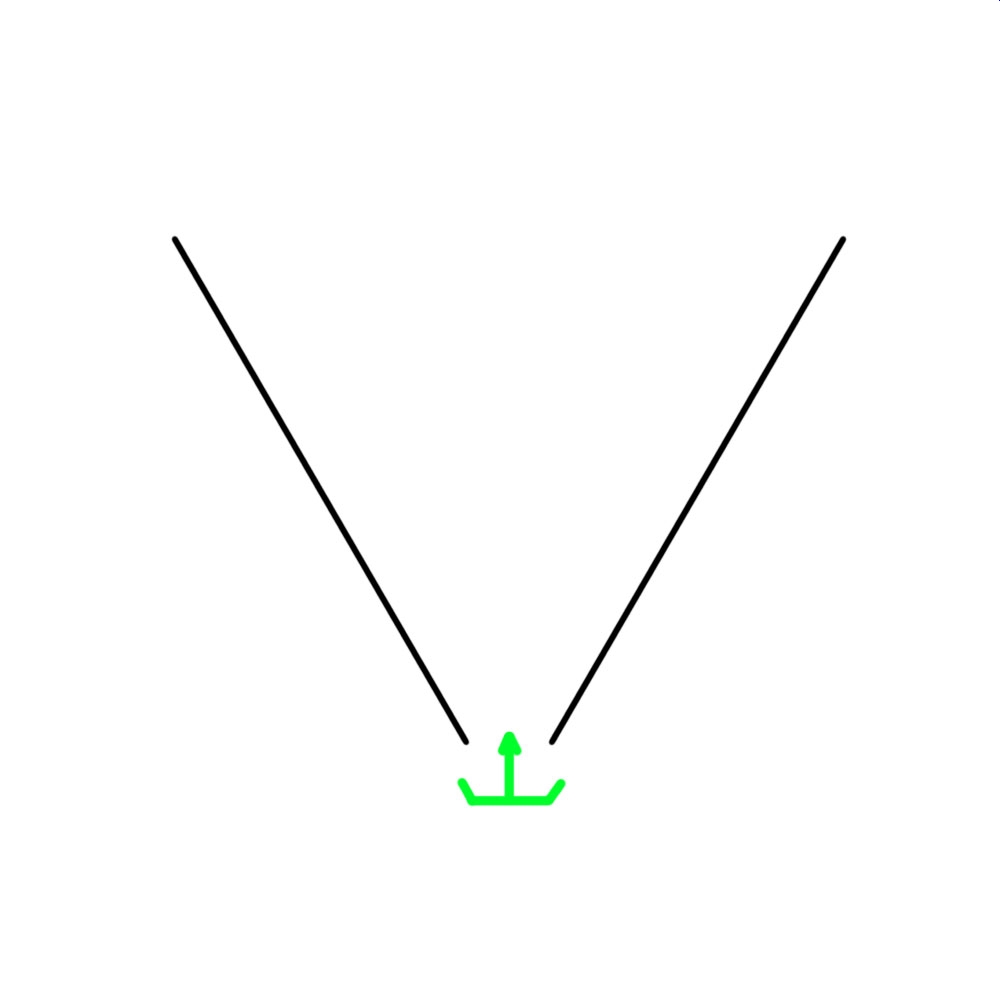
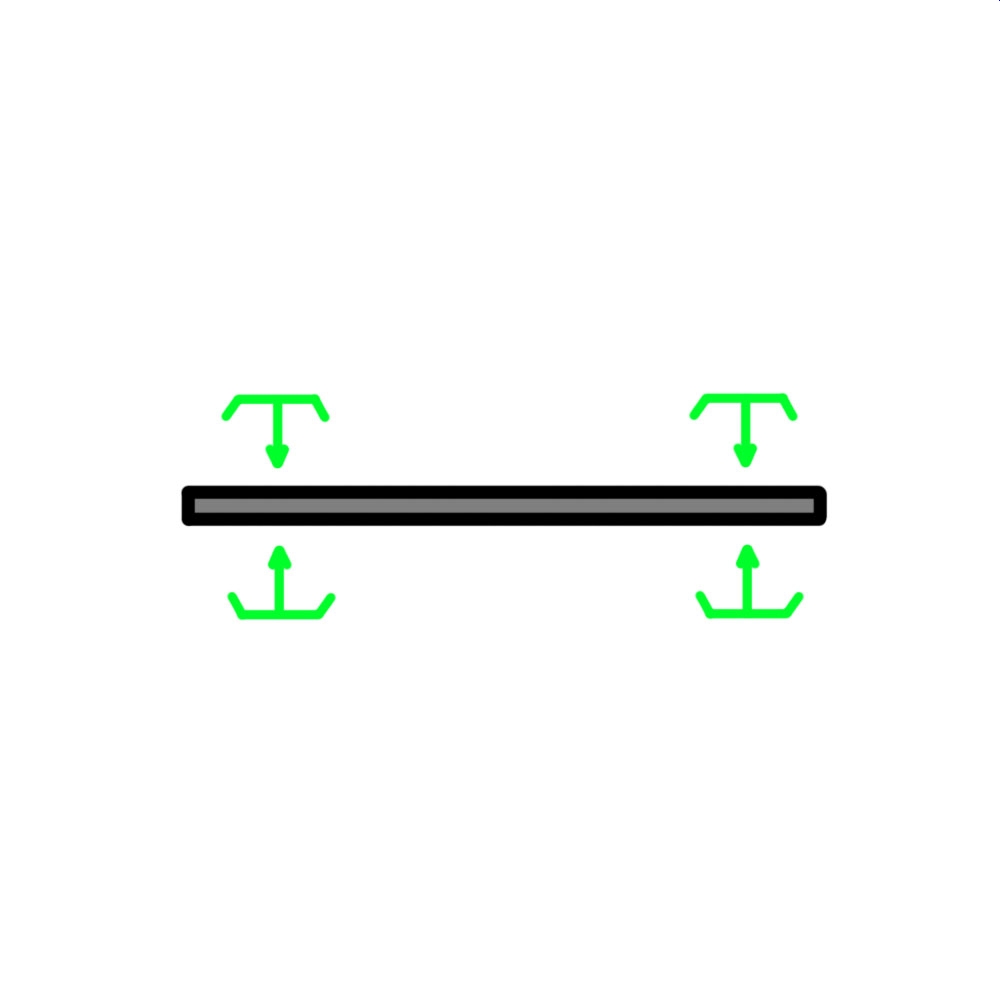
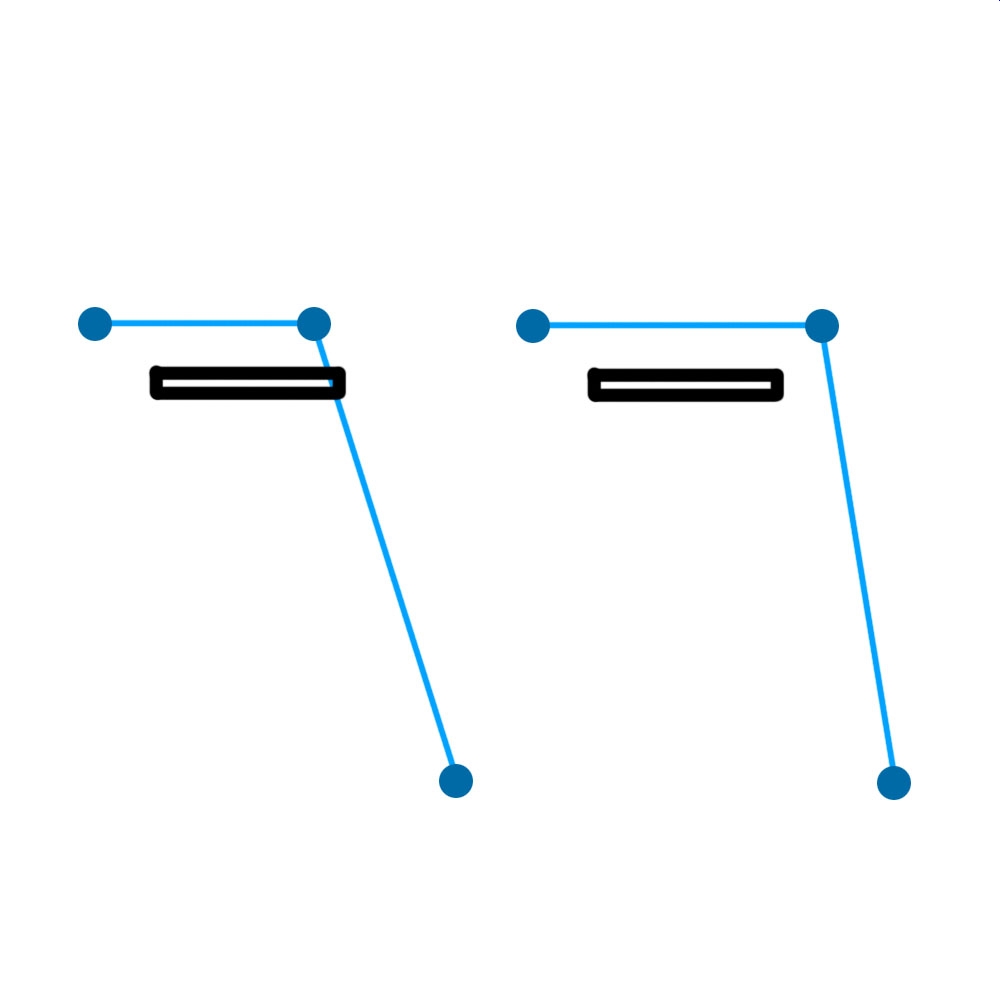
For thin objects place hide anchors close to the edges so the AI can leave their positions quickly. Do not forget to place them on both sides pointing at each other
Place hide anchors only at position where the AI has real cover. The front and the back of e.g. a car provide less cover. The middle provides better cover.
Normaly edges of a house provide less cover. First place hide anchors close to the edge pointing directly in the direction. Then place hide anchors with 45� rotation slightly away from the edge.
If you do not have enough hide anchors for many AI guys you can increase the hide anchors. The basic hide anchors are most important. Then you can increase the number hide anchors with the 45� ones.
If you have long objects do not place hide anchors in the middle, otherwise the AI has to move to far to change position. Only if there is other cover in the area can place them in the middle.
Waypoints
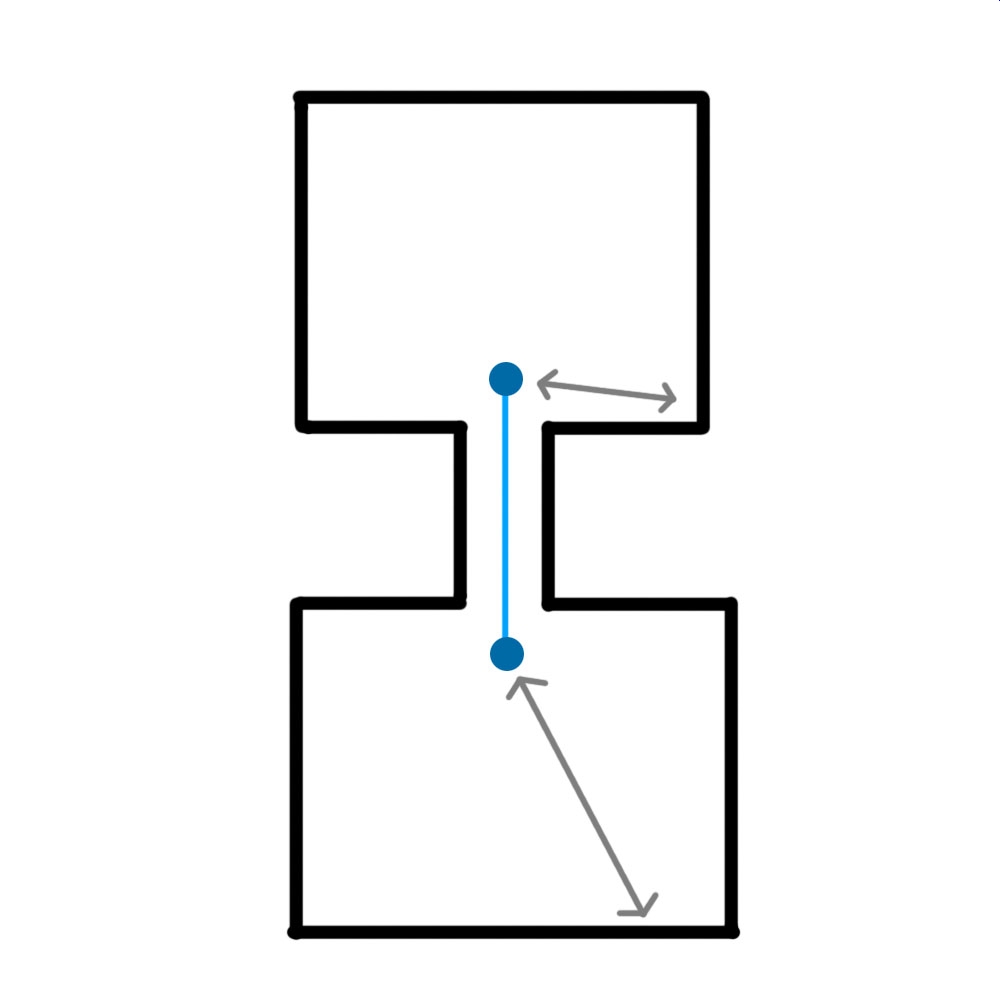
For two rooms it is enough to place these two waypoints. From every corner of the rooms the AI can reach the closest waypoint. The link gives the AI the possibility to switch rooms.
Place waypoints at the edges of objects. The AI will have no problems going around and never gets stuck.
The AI in this example is at the wall and is looking for the closest waypoint. Accidently the closest waypoint is behind an obstacle. In the new engine the AI would still find the correct one but it costs more performance. Instead place the waypoints with the same distance next to thin objects.
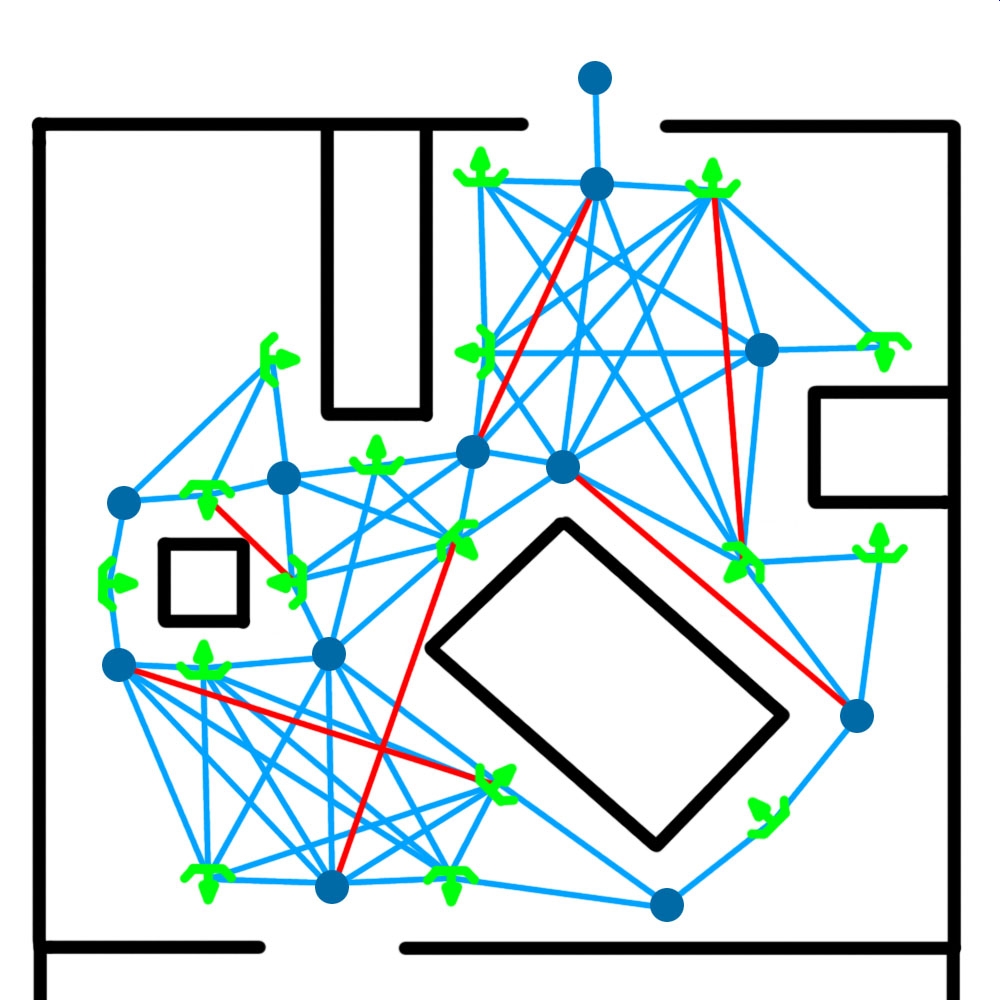
Take care when you link waypoints. The links should never go through or go very close to physical objects.
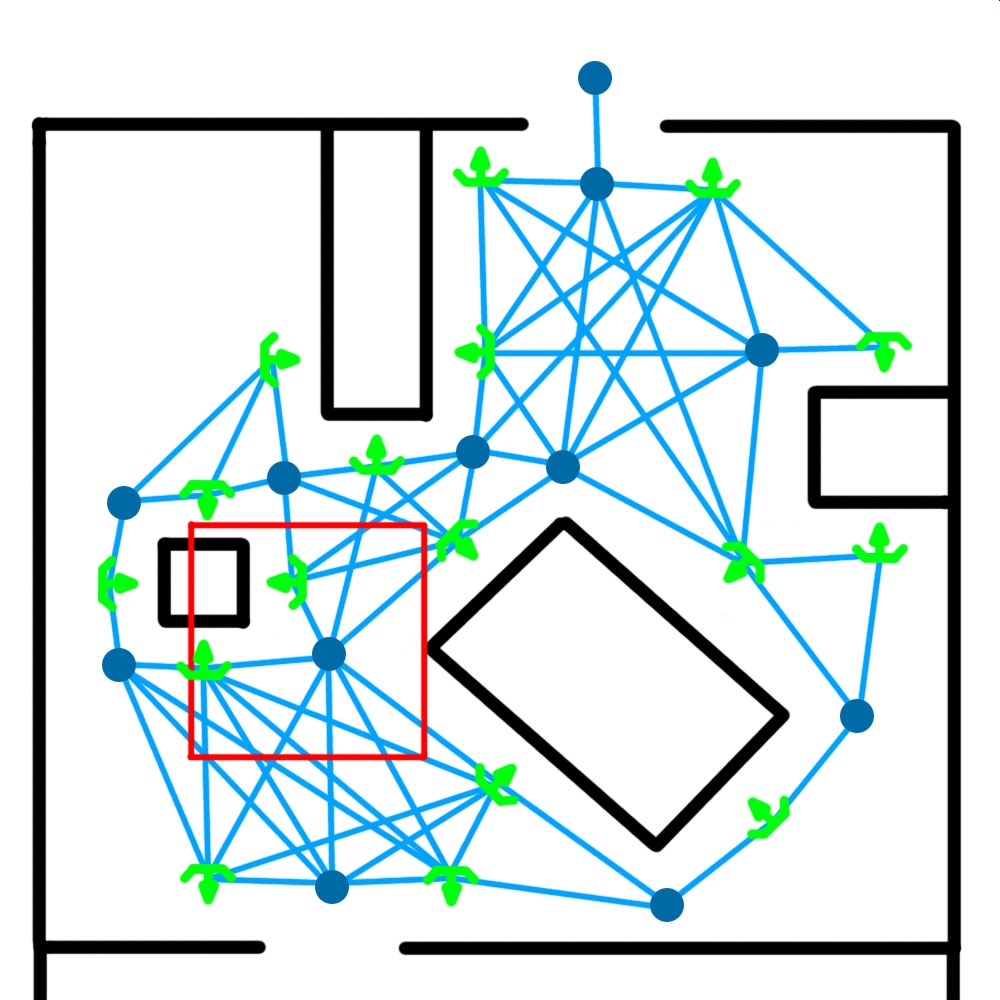
Avoid waypoints that are to close to links. If two AI gyus start moving they might collide because the links are running to close next to each other.
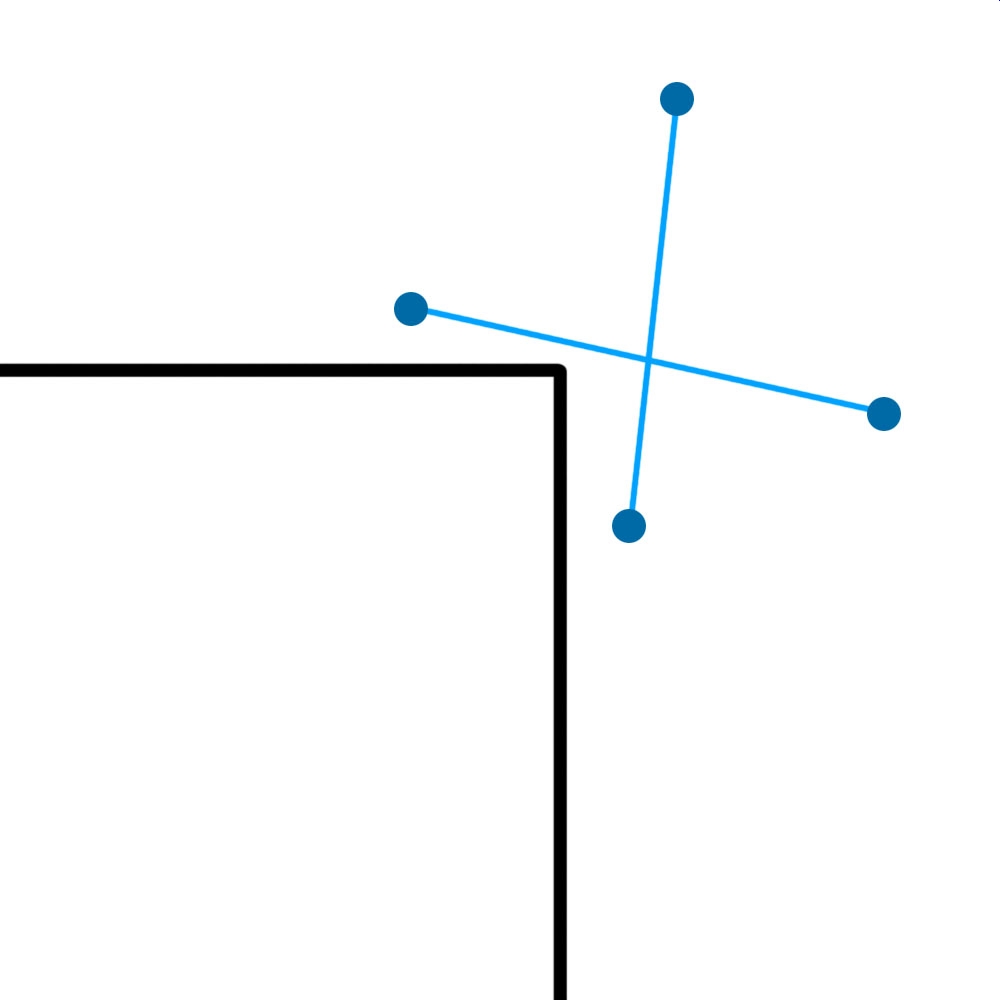
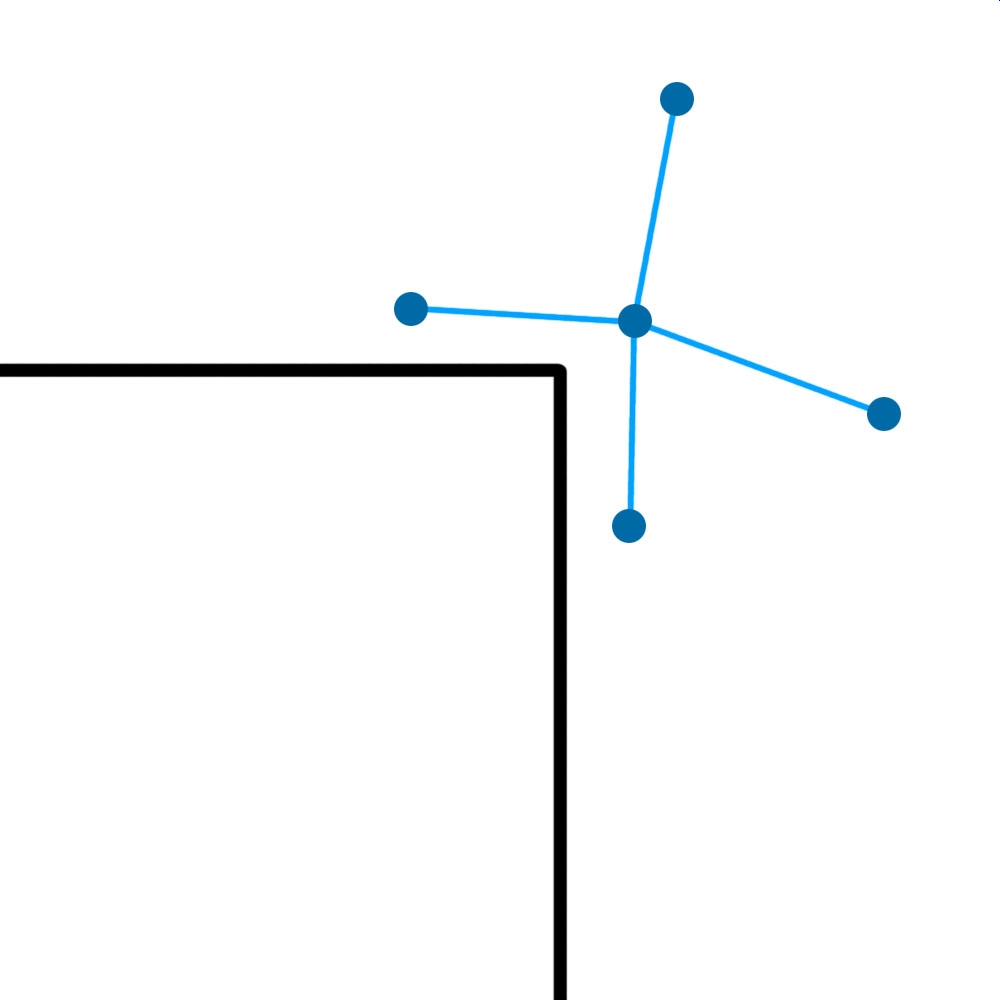
Avoid such crossing links at object corners. AI might run into each other at intersections.
You can easily solve this by adding a new waypoint at the edge (You should have a waypoint at the edge anyway).
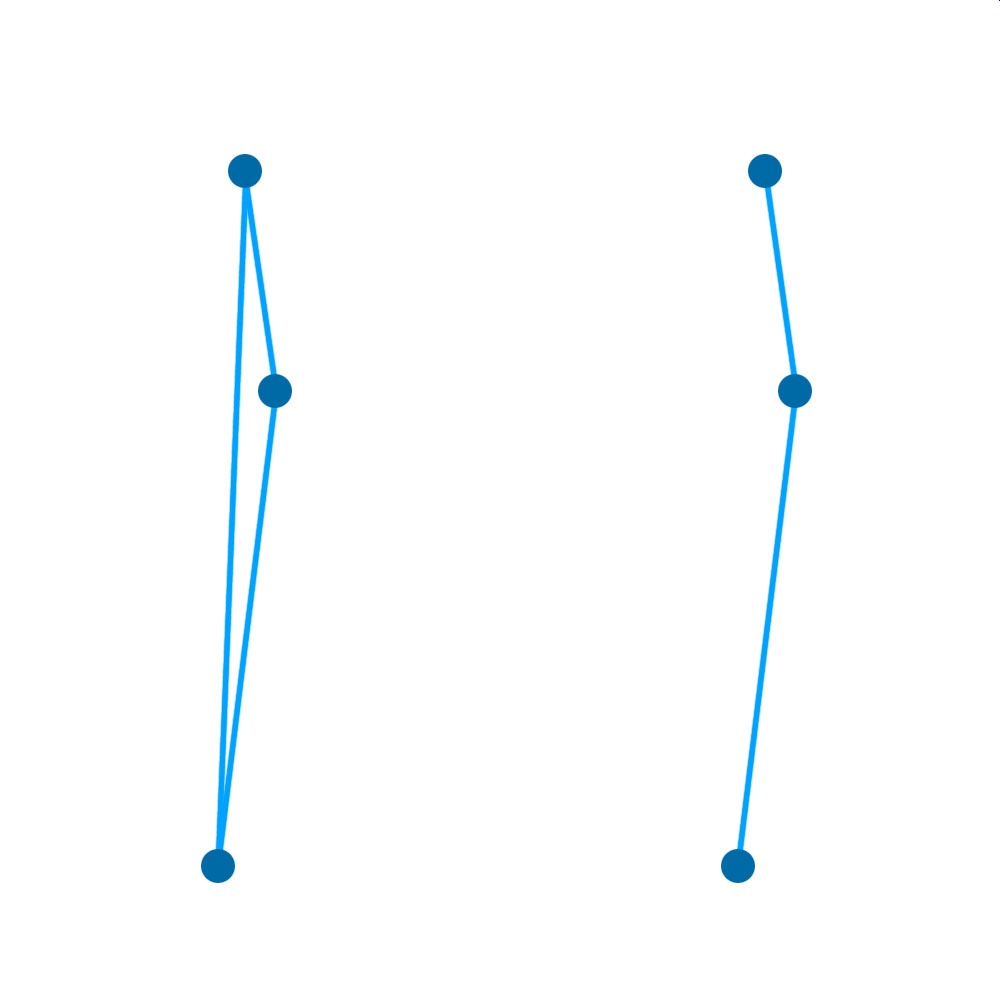
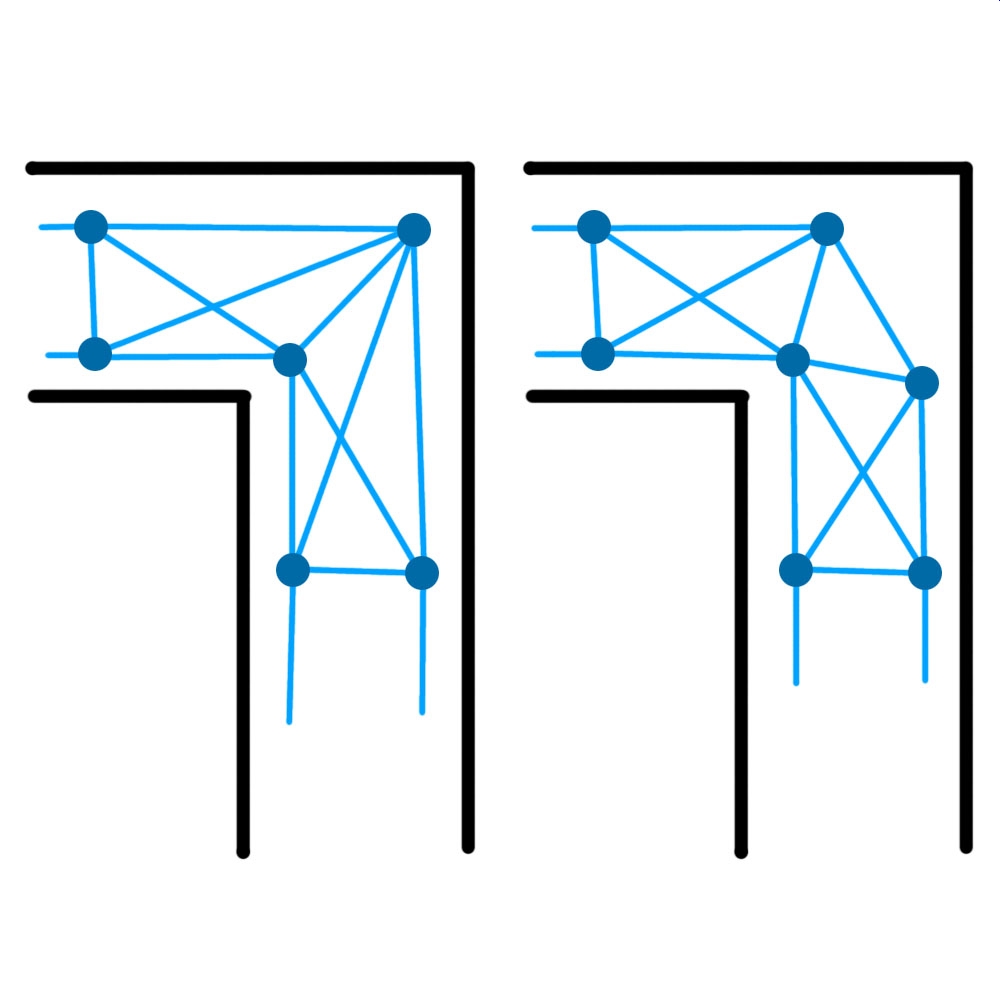
If you have alternative routes think how it would look like if you would walk exactly along the lines. Sometimes it is better to use more waypoints to simulate a more natural movement like the right example.
If you have a room first place all waypoints at all edges of objects. Only do this with objects you can‘t walk over.
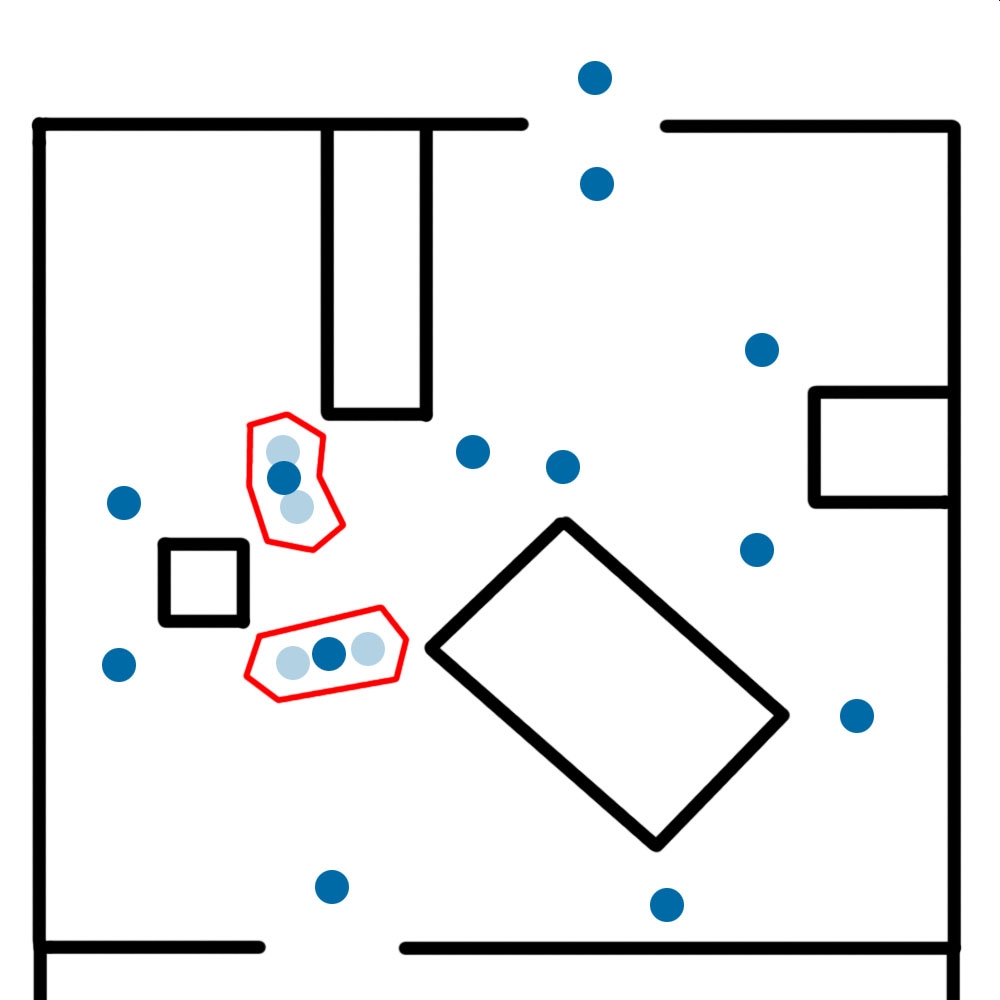
Then you look for waypoints which are to close to each other. If they are close together use one waypoint instead of two for cleaner navigation and less chance for the AI to get stuck.
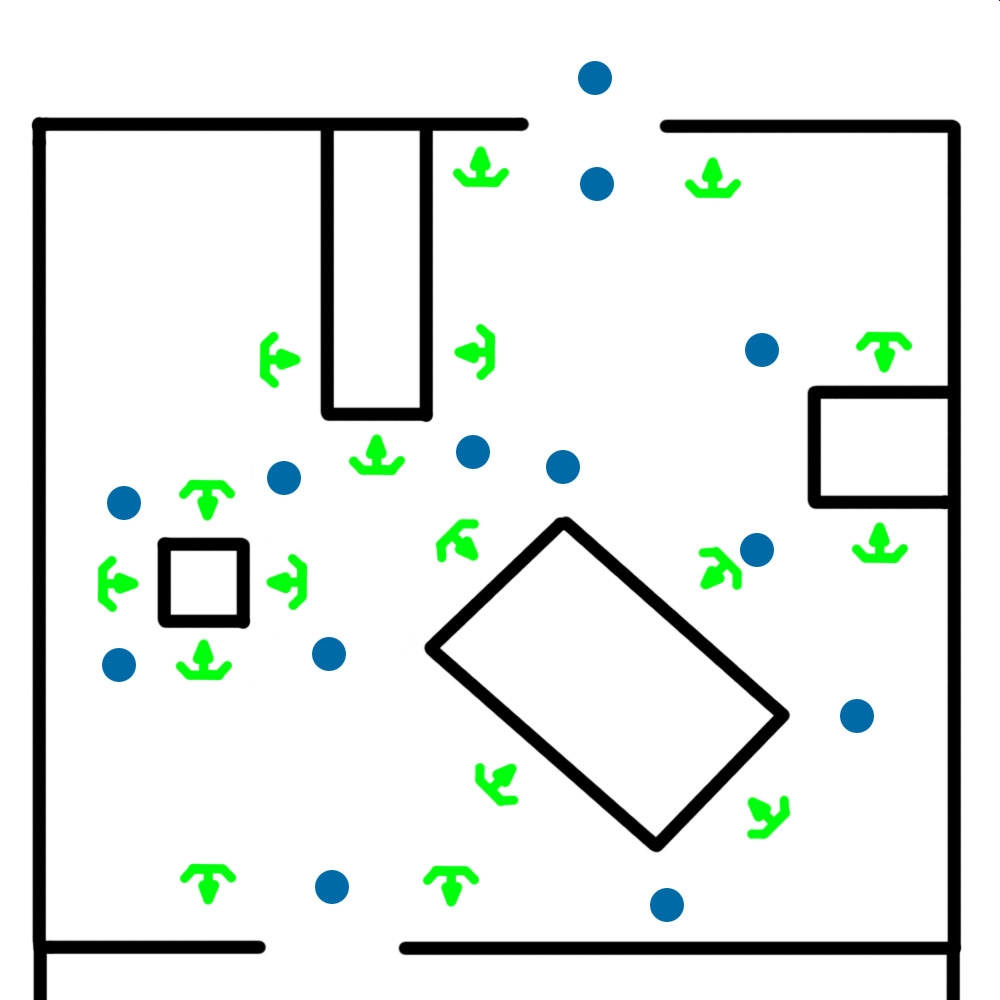
After the waypoints place the hide points, follow the general rules from the hideanchors.
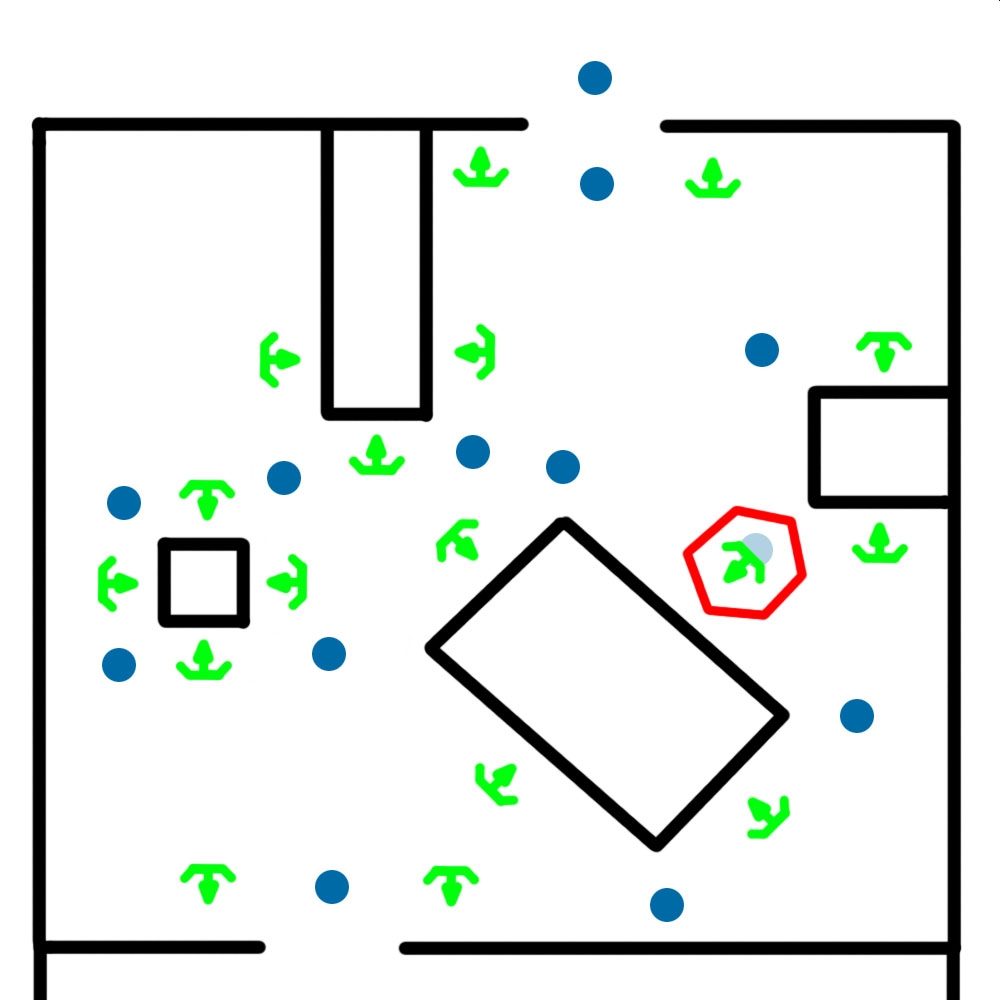
Hidepoints are also part of the navigation, merge hidepoints and waypoints if they are too close to each other.
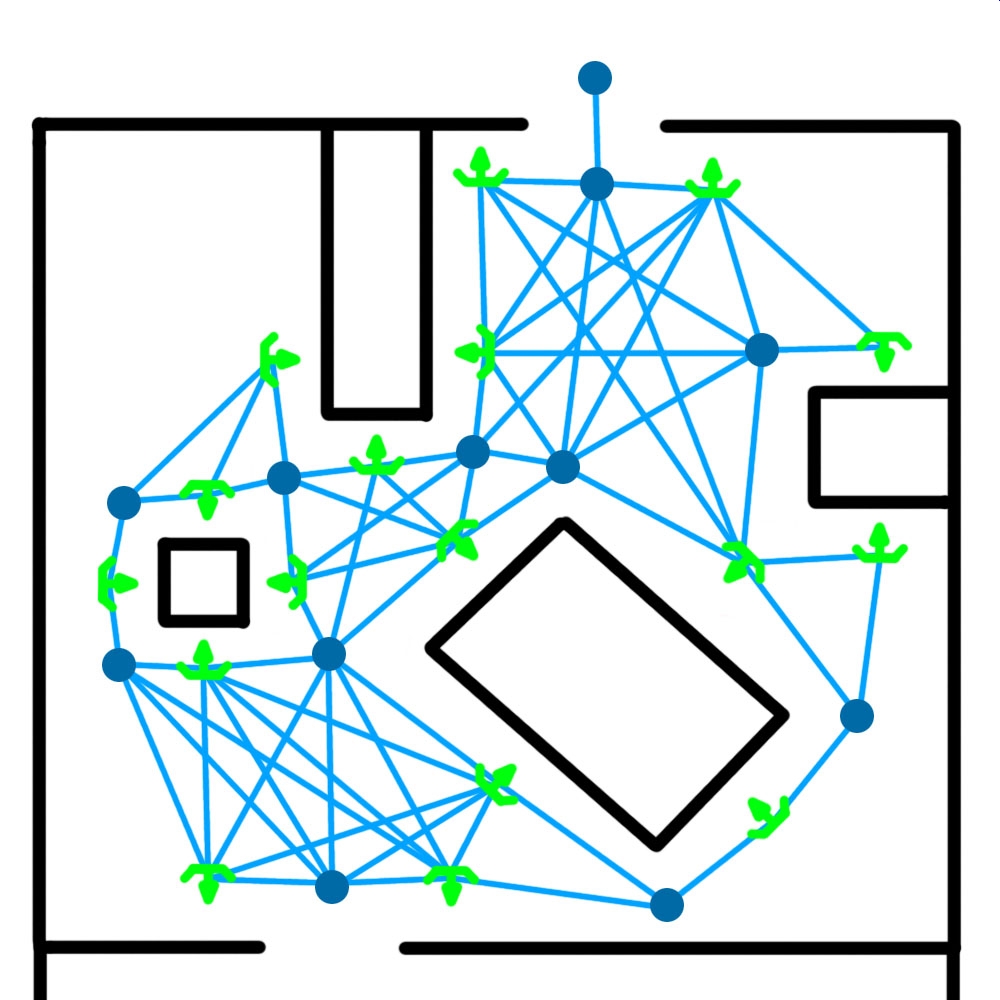
If all navigation points are placed, start linking them.
This waypoint in the middle may not provide perfect movement but it is better then AI getting stuck.
The red lines show bad links: either the links go through/close to geometry, or they are too close other links. It is okay if the AI first has to take 1-2m step(s) before walking in the right direction. That is better than AI getting stuck.
Result
Having all this setup properly the AI will be able to walk to any point and fight against the player. The better you place the waypoints, hide points the more realistic and challenging it will be for the player to fight against the AI.
