Настройка заданий миссии
Материал из CryWiki Russia
DCamer (Обсуждение | вклад) (Новая страница: «== Настройка заданий миссии == === Overview === В этом руководстве будет описан процесс настроки т...») |
DCamer (Обсуждение | вклад) (→The Objectives.xml file) |
||
| Строка 13: | Строка 13: | ||
When you open up the file in a text editor, you will see lots of text. Don’t worry we’ll break it up into useful chunks. | When you open up the file in a text editor, you will see lots of text. Don’t worry we’ll break it up into useful chunks. | ||
| - | The example objectives.xml file used in this tutorial can be downloaded from [ | + | The example objectives.xml file used in this tutorial can be downloaded from [[:Файл:Objectives.xml|here]]. |
==== Setting up the file. ==== | ==== Setting up the file. ==== | ||
Версия 10:52, 24 февраля 2011
Содержание |
Настройка заданий миссии
Overview
В этом руководстве будет описан процесс настроки текста задания для вашего уровня. В этом руководстве предпологается что вы имеете базовые знания потокового графа и размещения объектов.
This technique will only work after applying Crysis patch 2
How to create custom objective text for your level
The Objectives.xml file
The file that will contain all the information for your objective is called Objectives.xml. This will need to be placed in the same folder as the .cry file for your level. Please note, these new objectives will not over-write existing objectives.
When you open up the file in a text editor, you will see lots of text. Don’t worry we’ll break it up into useful chunks.
The example objectives.xml file used in this tutorial can be downloaded from here.
Setting up the file.
The text in your file will look like this, but with many different level name tags.
<Root>
<Levelname>
 <Objective_01 Name="Mission Objective Title" Description="Mission Objective Description" Secondary="true/false" />
</Levelname>
</Root>
At the start and end of the objectives file, you need to place <Root> and </Root> tags.
Next, you need to create a tag for your level. If your level is called “Levelname”, the tags will be <Levelname> and </Levelname> .
Objective number
<Root>
<Levelname>
 <Objective_01 Name="Mission Objective Title" Description="Mission Objective Description" />
</Levelname>
</Root>
Now, we will set up the objective and its text.
Within the level tags, you’ll place another tag, containing a short reference number for the objective. For example, if it is the first objective in your level, open the tag with <Objective_01 .
Please note, if you want multiple objectives in your level, just clone this entire line, with a second objective line, as shown below:
<Root>
<Levelname>
 <Objective_01 Name="Mission Objective Title" Description="Mission Objective Description" />
 <Objective_02 Name="Mission Objective Title" Description="Mission Objective Description" />
</Levelname>
</Root>
Objective Name
<Root>
<Levelname>
 <Objective_01 Name="Mission Objective Title"</b> Description="Mission Objective Description" />
</Levelname>
</Root>
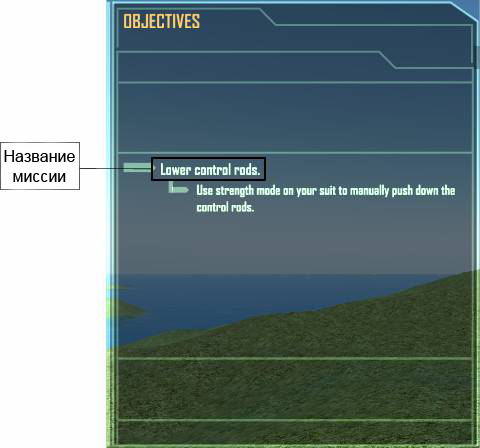
Next, we need to add Name for your objective. After your <Objective_01 , addName="Mission Objective Title" , where Mission Objective Title is the name of your objective – “Lower Control Rods”, in the below example.
You may notice that objectives have @ at the start in the existing Objectives.xml. Do not include these in your objectives, as they are only used for text localization.
Objective Description
<Root>
<Levelname>
 <Objective_01 Name="Mission Objective Title" <b>Description="Mission Objective Description" />
</Levelname>
</Root>
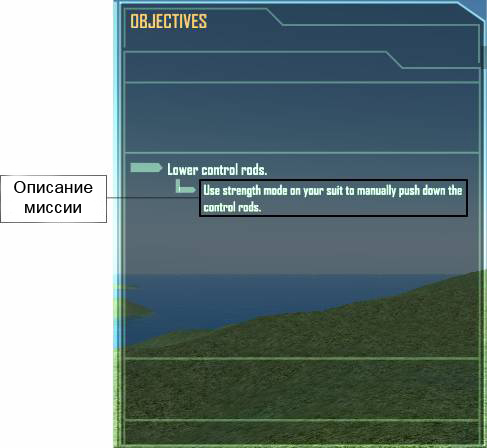
Now we need to create the description of the objective. The description is the longer text under the name of the objective. Replace Mission Objective Description with the required text. To finish off, close the tag with />
Secondary True/False
Set this to true if you want the objective to appear as a secondary (yellow) mission. This defaults to false, so is not necessary if you want a standard objective.
Mission Objective Entity
Placing the Mission Objective Entity
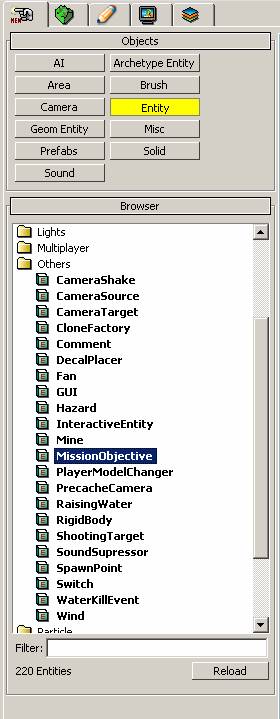
Now you have your XML file set up, lets get it into game. Place an Entity/MissionObjective in your level.
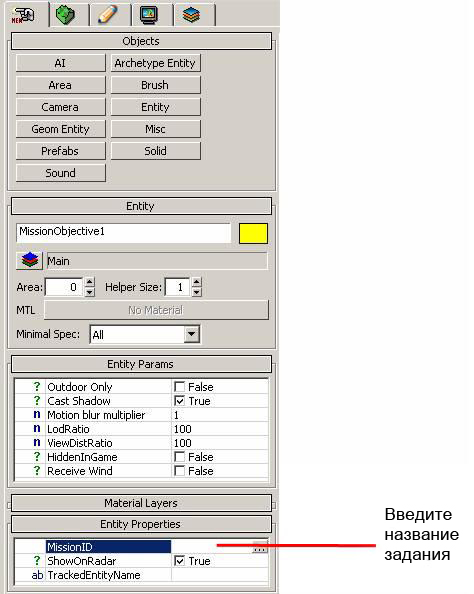
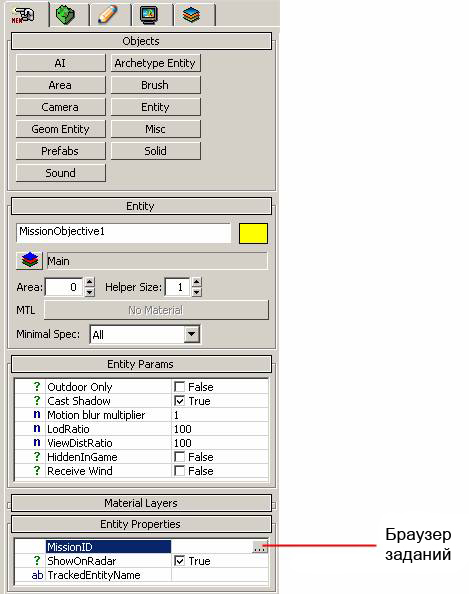
Now, go into Entity Properties and type in the name of your objective in the following format, to the box shown in the image below.
Levelname.Objective_Number
For example, if I needed to use Objective_03 in my level called Test, I would type this.
Test.Objective_03
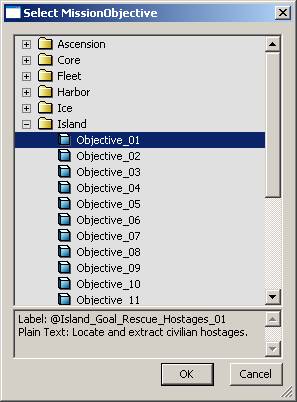
Now, go into the entity properties, and click the Objectives Browser button, shown in the image below.
And select the desired objective from the list.
More details on setting up a mission objective can be found [Gamelogic here].
Mission Goals
What is a Mission Goal?
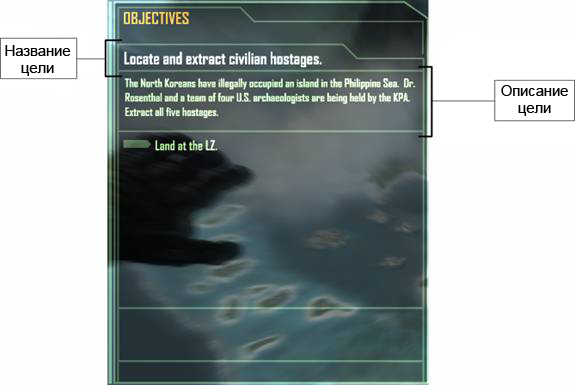
A mission goal is the piece of text above the objectives section, as shown below.
You should give a summary of what you want to achieve overall in your level.
Triggering a Mission Goal
You need to set up an objective in exactly the same way as before, but to trigger it, we need to trigger a flowgraph node.
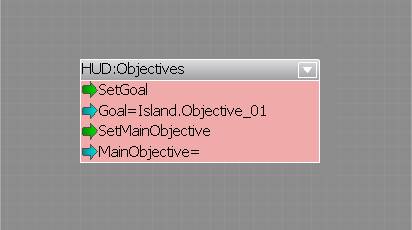
Place a Hud/Objectives node into your level, set its properties to the objective you want, and trigger the SetGoal input port.
