Покраска ландшафта
Материал из CryWiki Russia
DCamer (Обсуждение | вклад) |
DCamer (Обсуждение | вклад) |
||
| Строка 1: | Строка 1: | ||
| - | {{В процессе перевода|дата=24 декабря 2010}} | + | {{В процессе перевода|дата=24 декабря 2010|автор=1}} |
| - | + | ||
| - | + | == Рисование ландшафта == | |
| - | + | [[Файл:Sandbox_Paint_image001.jpg]] | |
| - | + | === Обзор === | |
| - | ===Приготовление ландшафтных слоев=== | + | Этот документ даст вам короткий обзор как добавить слои на ландшафт и рисовать ими на ландшафте. Создание различных типов ландшафта работает как рисование слоев в 2D графических редакторах. Для рисование на ландшафте нужно использовать несколько различных компонентов '''Sandbox2'''. |
| + | |||
| + | === Приготовление ландшафтных слоев === | ||
Откройте редактор слоев ландшафта | Откройте редактор слоев ландшафта | ||
| - | Нажав на'''Texture''' из | + | Нажав на'''Texture''' из '''Terrain''' меню. |
| - | [[ | + | [[Файл:Sandbox_Paint_image003.png]] |
| - | ==== | + | ==== Добавление нового слоя ==== |
| - | Должно открыться окно | + | Должно открыться окно показанное ниже |
| - | [[ | + | [[Файл:Sandbox_Paint_image005.jpg]] |
By clicking on the icon to the left of the red X a new layer will be created. By default the cursor will jump into that bar of the new layer so it can be named directly after creation. It is suggested to name the layers in a way that declares what it is used for. | By clicking on the icon to the left of the red X a new layer will be created. By default the cursor will jump into that bar of the new layer so it can be named directly after creation. It is suggested to name the layers in a way that declares what it is used for. | ||
| - | ==== | + | ==== Добавление материала ==== |
After you create and name a new Layer, its settings will be shown in the dialog of the '''Static''' field next to the '''Layers''' overview. | After you create and name a new Layer, its settings will be shown in the dialog of the '''Static''' field next to the '''Layers''' overview. | ||
| - | [[ | + | [[Файл:Sandbox_Paint_image007.jpg]] |
| - | The '''LayerID''' will be set to | + | The '''LayerID''' will be set to −1 by default. This '''LayerID''' will be changed automatically when the '''Layer''' is used first time. It is generally not a good idea to change the '''LayerID''' by hand. |
Click the '''Edit Surface Type''' button again. Note: Immediately after creating a layer, some of the '''Terrain Layers Editor''', including the '''Edit Surface''' type button, becomes unselectable. Select another layer and then select the previous one again to enable the inactive components. | Click the '''Edit Surface Type''' button again. Note: Immediately after creating a layer, some of the '''Terrain Layers Editor''', including the '''Edit Surface''' type button, becomes unselectable. Select another layer and then select the previous one again to enable the inactive components. | ||
| Строка 34: | Строка 35: | ||
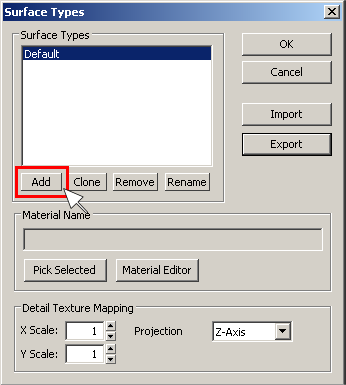
Now, click '''Add''' in the '''Surface Types''' window, to create a new type and then click '''Rename''' and type an appropriate name. | Now, click '''Add''' in the '''Surface Types''' window, to create a new type and then click '''Rename''' and type an appropriate name. | ||
| - | [[ | + | [[Файл:Sandbox_Paint_image009.png]] |
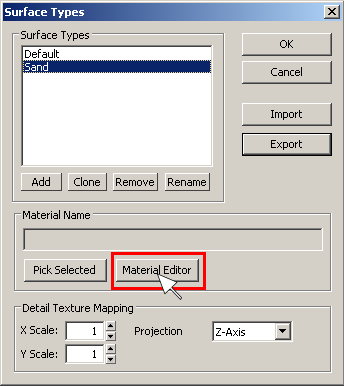
Next, open the '''Material Editor''' | Next, open the '''Material Editor''' | ||
| - | [[ | + | [[Файл:Sandbox_Paint_image011.png]] |
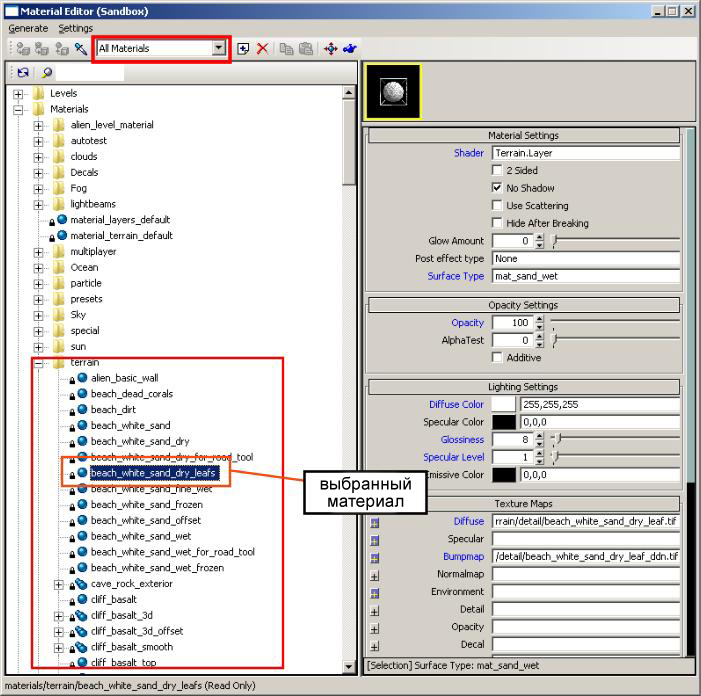
Now, select a material from the terrain folder. | Now, select a material from the terrain folder. | ||
| - | [[ | + | [[Файл:Sandbox_Paint_image013.jpg]] |
After choosing the desired material by highlighting it, close the '''Material Editor''', and the previous window will show again. | After choosing the desired material by highlighting it, close the '''Material Editor''', and the previous window will show again. | ||
| Строка 48: | Строка 49: | ||
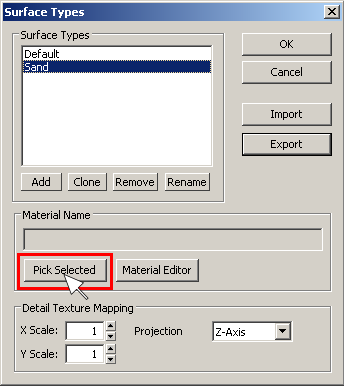
Now, click the '''Pick Selected''' button and then '''OK'''. If you click only '''OK''' then the material you highlighted will not be saved. | Now, click the '''Pick Selected''' button and then '''OK'''. If you click only '''OK''' then the material you highlighted will not be saved. | ||
| - | [[ | + | [[Файл:Sandbox_Paint_image015.png]] |
Now you have created your surface type, you need to assign it to your '''Terrain Layer''', by selecting it from the '''Surface Type''' drop-down list. | Now you have created your surface type, you need to assign it to your '''Terrain Layer''', by selecting it from the '''Surface Type''' drop-down list. | ||
| - | [[ | + | [[Файл:Sandbox_Paint_image017.jpg]] |
| - | [[ | + | [[Файл:Sandbox_Paint_image018.jpg]] |
| - | ====Добавление текстур==== | + | ==== Добавление текстур ==== |
Click the '''Load Texture''' button to the right of the image previewer. | Click the '''Load Texture''' button to the right of the image previewer. | ||
| - | [[ | + | [[Файл:Sandbox_Paint_image019.jpg]] |
A list of available textures will appear – select one and click '''Open'''. | A list of available textures will appear – select one and click '''Open'''. | ||
| - | [[ | + | [[Файл:Sandbox_Paint_image020.jpg]] |
| - | Now click '''OK''' until you arrive back at the main perspective viewport, and you will have a complete terrain layer, ready for use. | + | Now click '''OK''' until you arrive back at the main perspective viewport, and you will have a complete terrain layer, ready for use. |
| - | ===Рисование=== | + | === Рисование === |
Access the layer painter under '''[[Sandbox_RollupBar|RollupBar]] > Terrain > Layer Painter'''. | Access the layer painter under '''[[Sandbox_RollupBar|RollupBar]] > Terrain > Layer Painter'''. | ||
| - | [[ | + | [[Файл:Sandbox_Paint_image021.png]] |
After selecting this, a little way below the available materials can be found. | After selecting this, a little way below the available materials can be found. | ||
| - | [[ | + | [[Файл:Sandbox_Paint_image023.png]] |
In the now available '''Brush Settings''' menu are two sliders to modify your brush. | In the now available '''Brush Settings''' menu are two sliders to modify your brush. | ||
| - | [[ | + | [[Файл:Sandbox_Paint_image025.jpg]] |
The '''Radius''' slider changes the size of the brush | The '''Radius''' slider changes the size of the brush | ||
| - | [[ | + | [[Файл:Sandbox_Paint_image026.jpg]] |
| - | [[ | + | [[Файл:Sandbox_Paint_image027.jpg]] |
The '''Hardness''' slider changes the strength of the brush. A lower value will give a softer effect. | The '''Hardness''' slider changes the strength of the brush. A lower value will give a softer effect. | ||
| - | [[ | + | [[Файл:Sandbox_Paint_image028.jpg]] |
| - | And a higher value makes it stronger. | + | And a higher value makes it stronger. |
| - | [[ | + | [[Файл:Sandbox_Paint_image029.jpg]] |
Now, click and hold the mouse button in the perspective viewport and move the mouse around. The terrain will change the texture wherever the brush is. | Now, click and hold the mouse button in the perspective viewport and move the mouse around. The terrain will change the texture wherever the brush is. | ||
| - | [[ | + | [[Файл:Sandbox_Paint_image030.jpg]] |
The '''Filter''' option gives the ability to modify the basic color of the paintbrush. | The '''Filter''' option gives the ability to modify the basic color of the paintbrush. | ||
| - | [[ | + | [[Файл:Sandbox_Paint_image032.jpg]] |
Select the color tab in the Tool. The color selection box will be open. | Select the color tab in the Tool. The color selection box will be open. | ||
| - | [[ | + | [[Файл:Sandbox_Paint_image033.jpg]] |
Chose a new color in the main window and tweak the brightness to what ever you want. | Chose a new color in the main window and tweak the brightness to what ever you want. | ||
| - | [[ | + | [[Файл:Sandbox_Paint_image034.jpg]] |
Click '''OK'''. The '''Filter''' option will show the new selected color. | Click '''OK'''. The '''Filter''' option will show the new selected color. | ||
| - | [[ | + | [[Файл:Sandbox_Paint_image035.jpg]] |
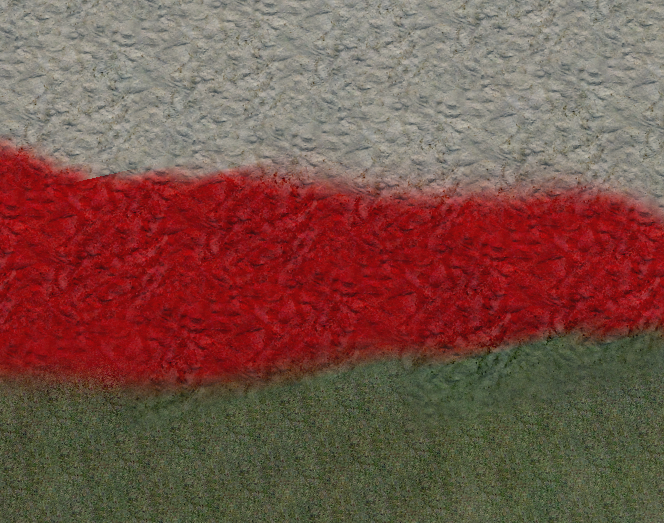
Now, click and hold the mouse button in the perspective viewport and move the mouse around. The terrain will change the texture with the new color wherever the brush is. | Now, click and hold the mouse button in the perspective viewport and move the mouse around. The terrain will change the texture with the new color wherever the brush is. | ||
| - | [[ | + | [[Файл:Sandbox_Paint_image036.png]] |
| - | + | ||
| - | + | ||
| - | + | ||
| - | + | ||
| - | + | ||
| - | + | ||
| - | + | ||
| - | + | ||
| - | + | ||
| - | + | ||
| - | + | ||
| - | + | ||
| - | + | === Результат === | |
| - | + | As you can see, a well painted terrain can look very realistic. If you have a good vegetation setup and good brush placement, you can achieve incredible results. | |
| - | [[ | + | [[Файл:Sandbox_Paint_image038.png]] |
| - | [[ | + | [[Файл:Sandbox_Paint_image040.png]] |
| - | [[ | + | [[Категория:Официальная документация:Основы - Настройка окружения]] |
| - | [[ | + | == См. также == |
| + | * [[Изменение ландшафта]] | ||
| + | * [[Создание базового уровня]] | ||
| + | * [[Геометрия ландшафта]] | ||
| + | * [[Цвет ландшафта]] | ||
| + | * [[Редактирование ландшафта]] | ||
| + | * [[Текстурирование ландшафта]] | ||
Версия 10:25, 24 декабря 2010
Статью пометил сам автор статьи.
Содержание |
Рисование ландшафта
Обзор
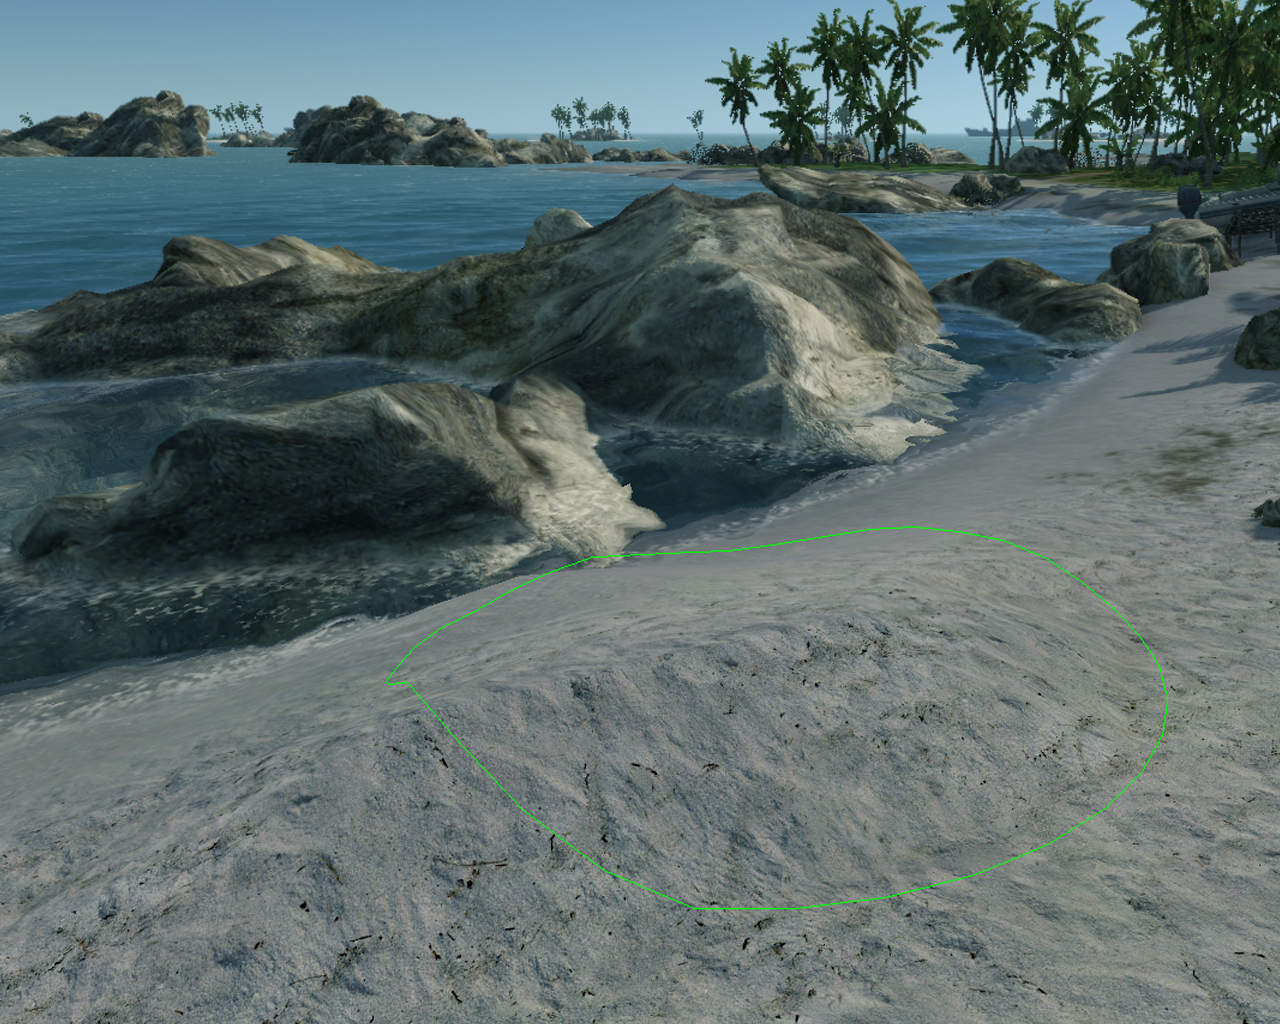
Этот документ даст вам короткий обзор как добавить слои на ландшафт и рисовать ими на ландшафте. Создание различных типов ландшафта работает как рисование слоев в 2D графических редакторах. Для рисование на ландшафте нужно использовать несколько различных компонентов Sandbox2.
Приготовление ландшафтных слоев
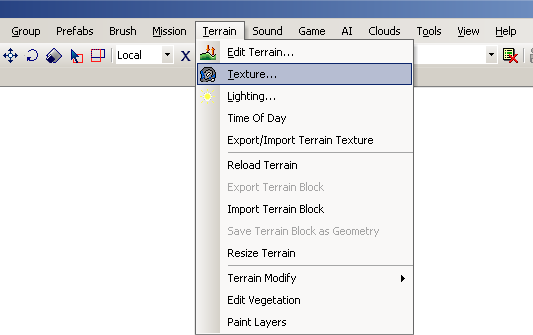
Откройте редактор слоев ландшафта Нажав наTexture из Terrain меню.
Добавление нового слоя
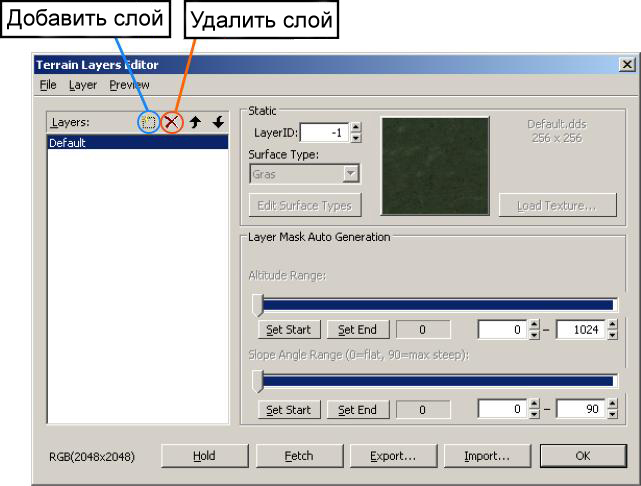
Должно открыться окно показанное ниже
By clicking on the icon to the left of the red X a new layer will be created. By default the cursor will jump into that bar of the new layer so it can be named directly after creation. It is suggested to name the layers in a way that declares what it is used for.
Добавление материала
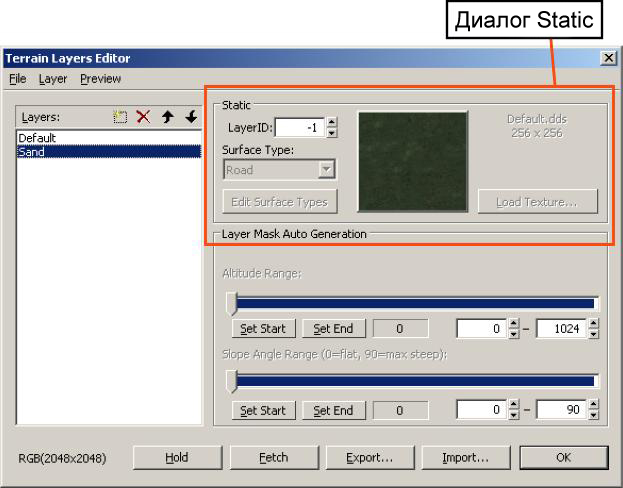
After you create and name a new Layer, its settings will be shown in the dialog of the Static field next to the Layers overview.
The LayerID will be set to −1 by default. This LayerID will be changed automatically when the Layer is used first time. It is generally not a good idea to change the LayerID by hand.
Click the Edit Surface Type button again. Note: Immediately after creating a layer, some of the Terrain Layers Editor, including the Edit Surface type button, becomes unselectable. Select another layer and then select the previous one again to enable the inactive components.
Now, click Add in the Surface Types window, to create a new type and then click Rename and type an appropriate name.
Next, open the Material Editor
Now, select a material from the terrain folder.
After choosing the desired material by highlighting it, close the Material Editor, and the previous window will show again.
Now, click the Pick Selected button and then OK. If you click only OK then the material you highlighted will not be saved.
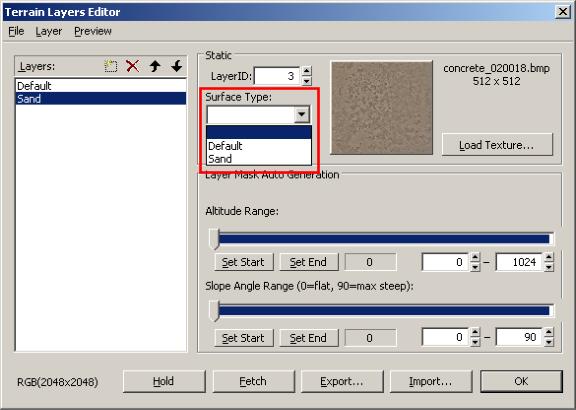
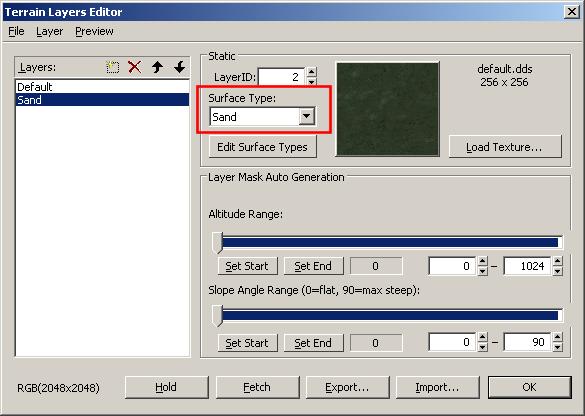
Now you have created your surface type, you need to assign it to your Terrain Layer, by selecting it from the Surface Type drop-down list.
Добавление текстур
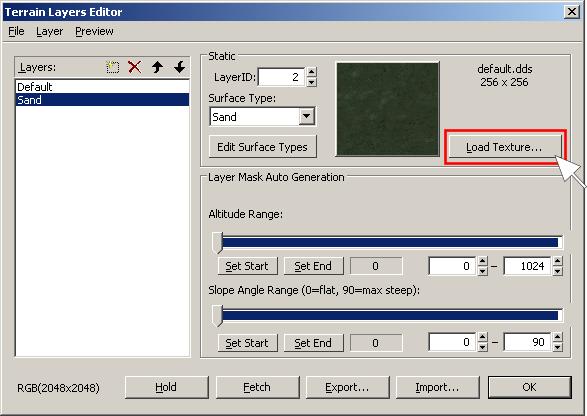
Click the Load Texture button to the right of the image previewer.
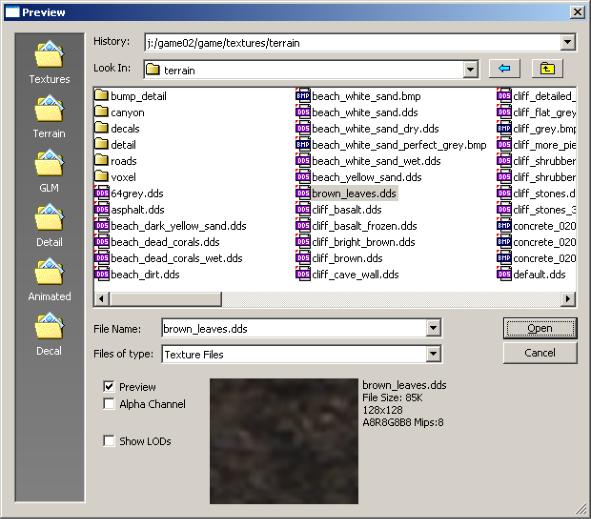
A list of available textures will appear – select one and click Open.
Now click OK until you arrive back at the main perspective viewport, and you will have a complete terrain layer, ready for use.
Рисование
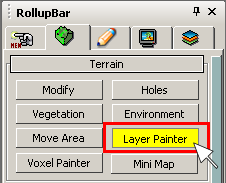
Access the layer painter under RollupBar > Terrain > Layer Painter.
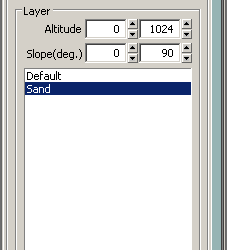
After selecting this, a little way below the available materials can be found.
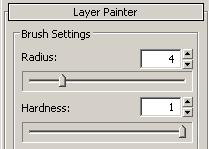
In the now available Brush Settings menu are two sliders to modify your brush.
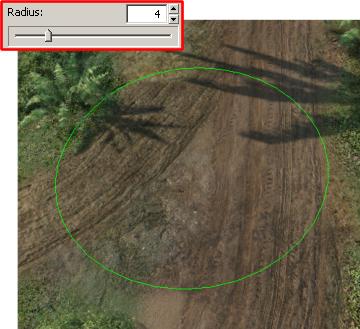
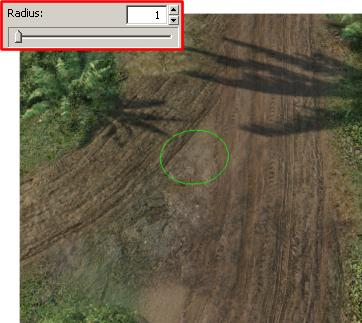
The Radius slider changes the size of the brush
The Hardness slider changes the strength of the brush. A lower value will give a softer effect.
And a higher value makes it stronger.
Now, click and hold the mouse button in the perspective viewport and move the mouse around. The terrain will change the texture wherever the brush is.
The Filter option gives the ability to modify the basic color of the paintbrush.
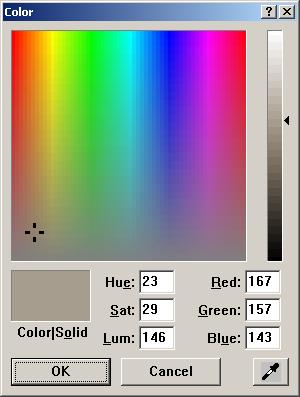
Select the color tab in the Tool. The color selection box will be open.
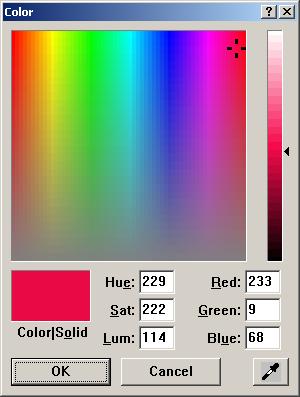
Chose a new color in the main window and tweak the brightness to what ever you want.
Click OK. The Filter option will show the new selected color.
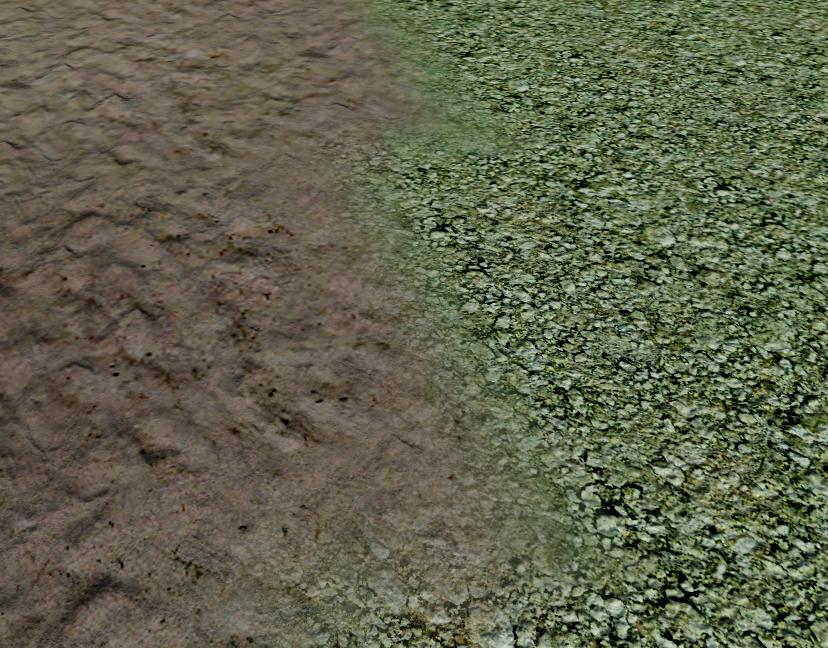
Now, click and hold the mouse button in the perspective viewport and move the mouse around. The terrain will change the texture with the new color wherever the brush is.
Результат
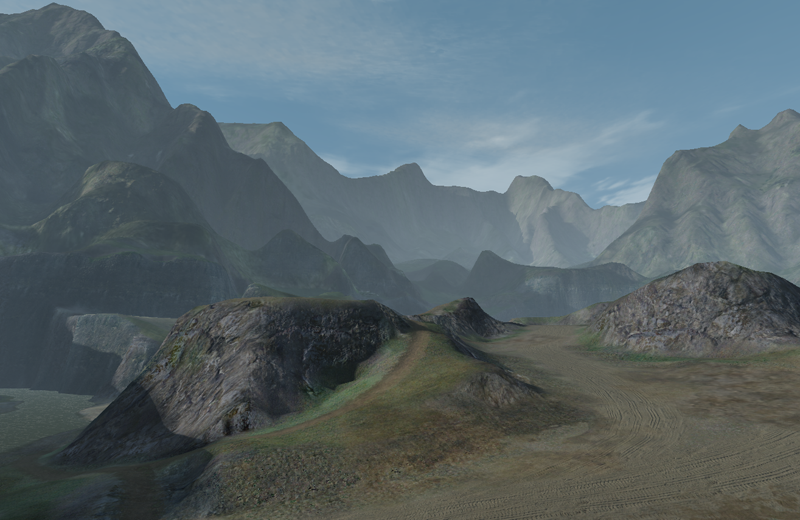
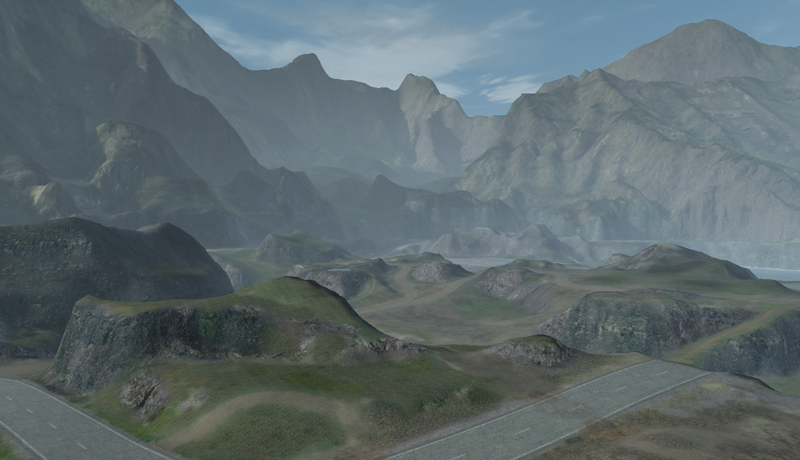
As you can see, a well painted terrain can look very realistic. If you have a good vegetation setup and good brush placement, you can achieve incredible results.
