Руководство по редактору кат-сцен
Материал из CryWiki Russia
DCamer (Обсуждение | вклад) (Новая страница: «= Руководство по редактору кат-сцен = == Введение == Следующее руководство опишет вам по шаг...») |
DCamer (Обсуждение | вклад) |
||
| Строка 54: | Строка 54: | ||
В этом примере, мы добавим человека с простой анимацией ходьбы. | В этом примере, мы добавим человека с простой анимацией ходьбы. | ||
| - | + | Для персонажей в кат-сценах используется '''AnimObject''', используется вместо ИИ сущностей из соображений производительности, также как и '''AnimObject''', система ИИ не будут конфликтовать с системой кат-сцен. | |
[[Файл:Sandbox_TrackviewPrimerTutorial_image011.jpg]] | [[Файл:Sandbox_TrackviewPrimerTutorial_image011.jpg]] | ||
| - | + | Выберите '''AnimObject''' в '''RollupBar''' и зажав левую кнопку мыши, перетащите его в окно перспективы. | |
| - | + | Замените стандартный прямоугольный объект моделью персонажа, для этого выберите '''AnimObject''', и в разделе '''Entity Properties''' (в '''RollupBar'''), щелкните по значку папки в поле '''Model'''. | |
[[Файл:Sandbox_TrackviewPrimerTutorial_image012.jpg]] | [[Файл:Sandbox_TrackviewPrimerTutorial_image012.jpg]] | ||
| - | + | Далее, мы выберем персонажа чтобы добавить его в сцену. Для нашей сцены мы используем нанокостюм игрока. | |
| - | + | Найдите файл '''objects/characters/human/us/nanosuit'''. | |
[[Файл:Sandbox_TrackviewPrimerTutorial_image013.jpg]] | [[Файл:Sandbox_TrackviewPrimerTutorial_image013.jpg]] | ||
| - | + | Далее, мы добавим персонажа в кат-сцену, выберите '''AnimObject''' и в кат-сцене щелкните '''Add Selected Node'''. | |
[[Файл:Sandbox_TrackviewPrimerTutorial_image014.jpg]] | [[Файл:Sandbox_TrackviewPrimerTutorial_image014.jpg]] | ||
| - | + | Кат-сцена станет выглядеть как на скриншоте ниже. | |
[[Файл:Sandbox_TrackviewPrimerTutorial_image015.jpg]] | [[Файл:Sandbox_TrackviewPrimerTutorial_image015.jpg]] | ||
| - | + | Далее, мы выберем анимацию для персонажа. Дважды щелкните по кадру 0, чтобы добавить ключ в трек анимации, затем щелкните правой кнопкой мыши по ключу, при этом появится окно '''Key Properties''', затем щелкните по выпадающему списку и прокрутите вниз, и выбери анимацию «relaxed_walk_nw_forward_slow_01», также поставьте галочку '''Loop Animation''', чтобы анимация вечно повторялась, а также поставьте галочку '''Root not move''', так анимацию не сдвинется и исчезнет после проигрывания. | |
[[Файл:Sandbox_TrackviewPrimerTutorial_image016.jpg]] | [[Файл:Sandbox_TrackviewPrimerTutorial_image016.jpg]] | ||
Версия 19:54, 4 мая 2011
Содержание |
Руководство по редактору кат-сцен
Введение
Следующее руководство опишет вам по шагам, как настроить основные кинематографические сцены в CryEngine 2.
Создание новой кат-сцены
Прежде чем начать
- Создайте новый слой в панели слоев, назовите новый слой «cinematic».
- Чтобы создать новую сцену, для начала откройте панель «TrackView», через «View->Open View Panel->Track View».
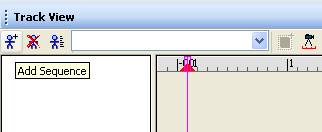
После открытия TrackView нажмите на иконку Add Sequence.
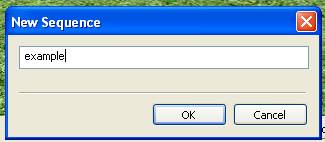
Назовите кат-сцену «example», затем щелкните OK.
После того, как вы создали новую сцену, пришло время настроить свойства для данной конкретной сцены, нажмите на иконку Edit Sequence.
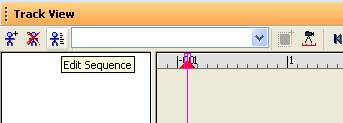
В появившемся окне Sequence Properties, отметьте следующие флажки:
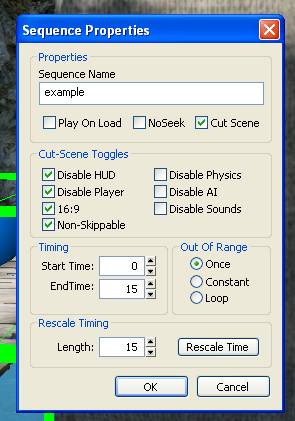
Отметьте Disable HUD, это отключит стандартный интерфейс игрока, Disable Player скроет игрока при проигрывании сцены, 16:9 включает широкоформатный эффект сцены, и Non_Skippable означает, что если игрок нажмёт пробел, чтобы пропустить сцену, она продолжит проигрываться, EndTime была скорректирована и длительность сцена стала 15 секунд.
Первый элемент, который надо добавить в сцену, это Scene Node. Он позволяет нам переключать камеры.
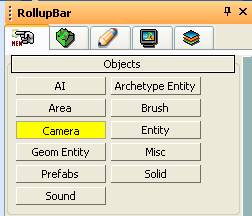
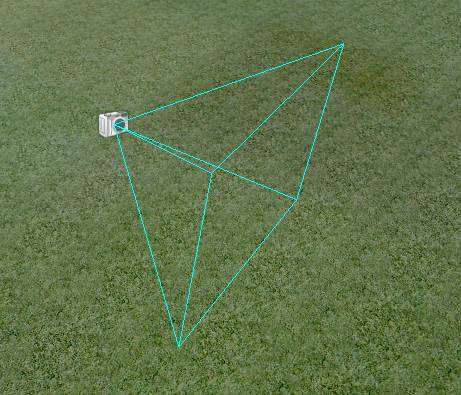
Однако, не добавленные в сцену камеры не могут быть выбраны. Далее, нам нужно добавить камеру, в RollupBar выберите Camera и поместите её на ваш уровень.
| Сущность Camera в редакторе Sandbox 2.
|
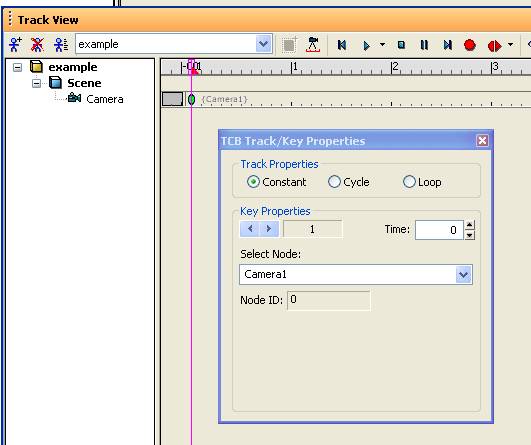
Далее, мы выберем сцену для использования этой камеры, дважды щелкните по шкале времени на кадре 0, чтобы добавить ключ, как только ключ будет добавлен, нажмите правой кнопкой мыши по ключу, чтобы открыть «Key Properties», щелкните по выпадающему списку и выберите только что добавленную «Camera1»;
Далее, мы добавим камеру в кат-сцену, так мы сможем «оживить» камеру.
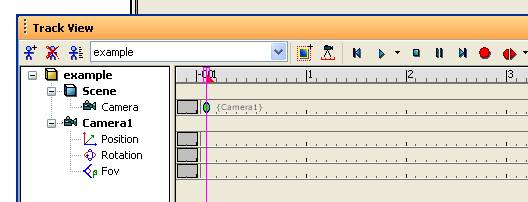
Выберите камеру, чтобы добавить её трек в кат-сцену, затем нажмите иконку Add Selected Node в TrackView.
Камера должна появится в TrackView, как показано ниже.
Далее, мы добавим интересующий нас объект в сцену, чтобы сфокусировать на нём камеру.
В этом примере, мы добавим человека с простой анимацией ходьбы.
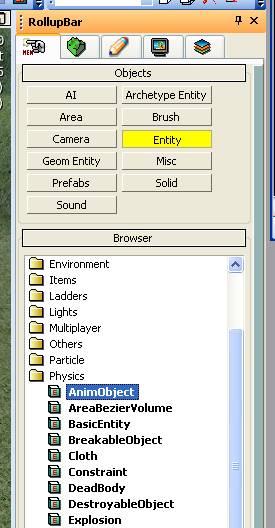
Для персонажей в кат-сценах используется AnimObject, используется вместо ИИ сущностей из соображений производительности, также как и AnimObject, система ИИ не будут конфликтовать с системой кат-сцен.
Выберите AnimObject в RollupBar и зажав левую кнопку мыши, перетащите его в окно перспективы.
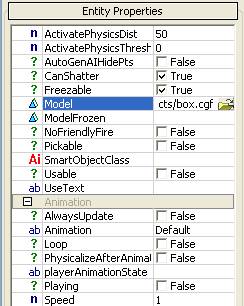
Замените стандартный прямоугольный объект моделью персонажа, для этого выберите AnimObject, и в разделе Entity Properties (в RollupBar), щелкните по значку папки в поле Model.
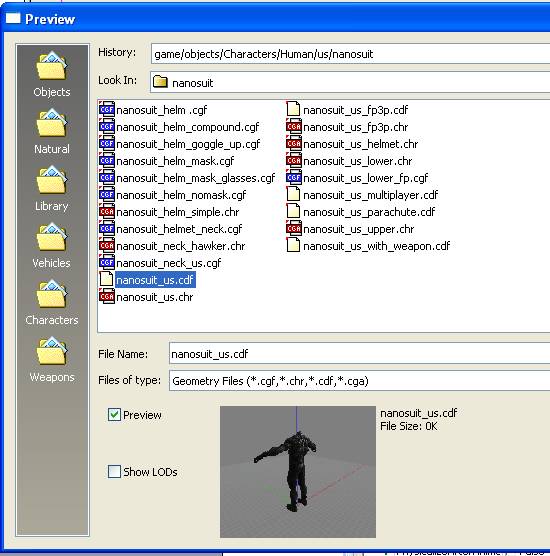
Далее, мы выберем персонажа чтобы добавить его в сцену. Для нашей сцены мы используем нанокостюм игрока.
Найдите файл objects/characters/human/us/nanosuit.
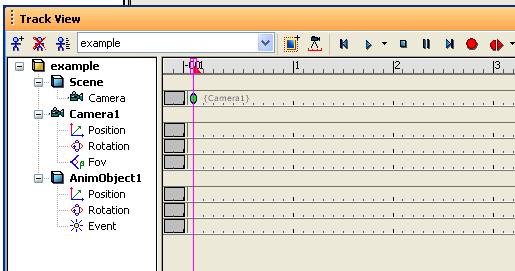
Далее, мы добавим персонажа в кат-сцену, выберите AnimObject и в кат-сцене щелкните Add Selected Node.
Кат-сцена станет выглядеть как на скриншоте ниже.
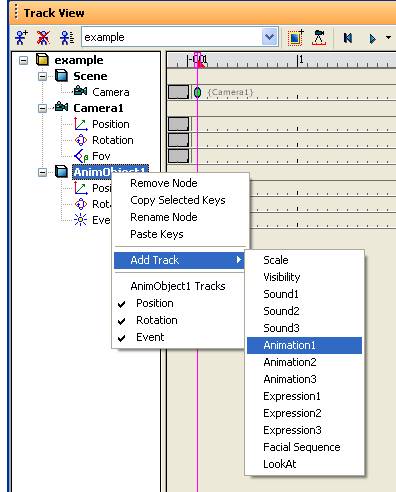
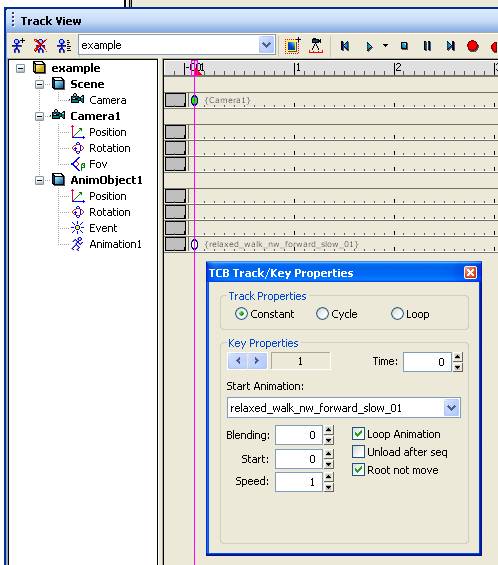
Далее, мы выберем анимацию для персонажа. Дважды щелкните по кадру 0, чтобы добавить ключ в трек анимации, затем щелкните правой кнопкой мыши по ключу, при этом появится окно Key Properties, затем щелкните по выпадающему списку и прокрутите вниз, и выбери анимацию «relaxed_walk_nw_forward_slow_01», также поставьте галочку Loop Animation, чтобы анимация вечно повторялась, а также поставьте галочку Root not move, так анимацию не сдвинется и исчезнет после проигрывания.
Key framing in Track view
The next step is to key frame the character as he walks across the ground, currently as the character walks he is sliding on a spot.
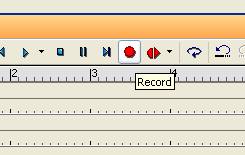
First make sure the character is selected and the Track view slider is set to frame 0, once selected click the Record button in the Trackview editor.
In the perspective view, move the character to the desired starting position at frame 0, this will record the position and add a positional key for the character, next drag the time slider in the Track view to the final frame at 15 seconds, you should notice a key appearing at frame zero, now at frame 15 with the record button still depressed move the character to the desired end position.
If you now scrub through the scene with the time slider the character should now appear to be walking between two points, adjust the end position to get a natural looking walk.
Animating the camera
With the character now walking along we want to have the camera following him and panning around as he walks.
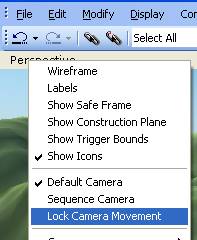
To look through the perspective of the new camera right click on perspective to bring down a menu for the view port configuration, then select Camera > Camera1, you will now be looking through the new Camera1.
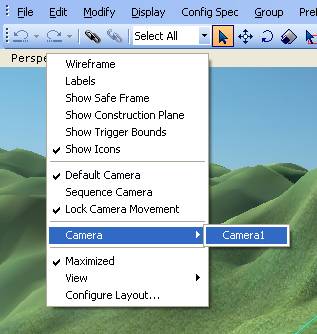 At first the camera is locked and can not be manipulated like a standard perspective viewport, to unlock the camera first uncheck the Lock Camera Movement.
As a built in safety measure to stop the user accidentally moving the camera thinking it’s the perspective window, the button in the Track view must also be depressed.
We are now ready to animate the camera, set the time slider to frame 0 and make sure you have the camera selected and the button depressed in the Track view, with the viewport set to, move the viewport as desired to frame the shot,
Next drag the time slider in the Track view to 5 seconds and position the camera as desired, continue this process at times 10 seconds and 15 seconds.
Uncheck the record button to avoid accidentally animating the camera, if you now scrub the time slider in the Track view back and forth you should see the camera animating along the new path and the character walking along.
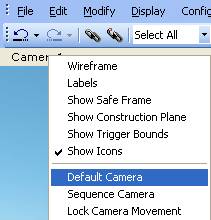
Next we want to set the camera back to the default perspective, right click on Camera1 and select Default Camera.
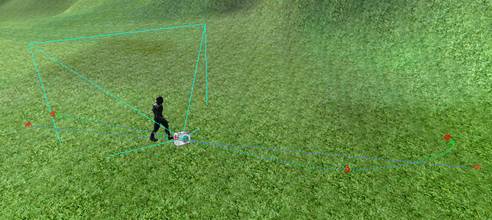
We should see an overview of the scene with splines depicting the path of the camera and character.
Playing the scene
If we simply drop into game «crtl+g» the scene will not play by default, we first have to set up logic using the Flow Graph editor.
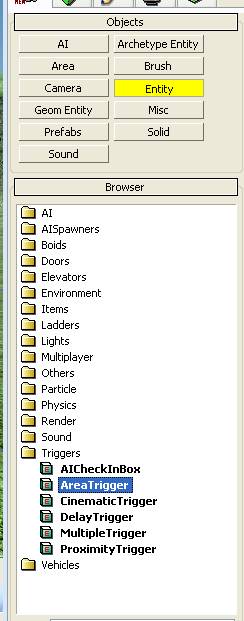
First we need to add an Entity to contain the Flow Graph, it is possible to contain the Flow Graph within the AnimObject character, however having a specific entity is safer as it generally will be harder to delete by accident, for this setup we usually use an AreaTrigger.
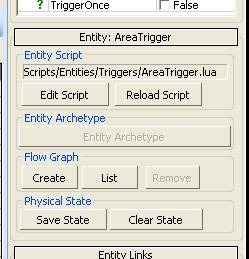
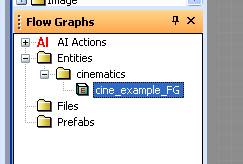
Select the AreaTrigger and drag it into the view port, rename «cine_example_FG» next we need to create the flow graph, click on the CreateStyle icon under Flow Graph.
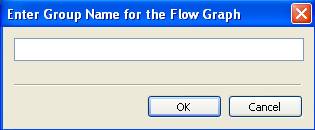
A window called Enter Group Name for the Flow Graph will pop up, call it "cinematics” this is useful to contain all your flow graphs that are related to cinematics.
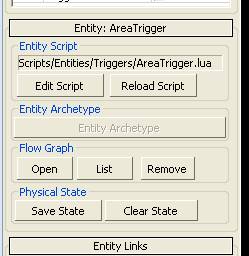
With the AreaTrigger selected click on the Open button to start working on the Flow Graph for the scene
The Flow Graph editor will now open, make sure that you have your newly created flow graph selected to start working on it.
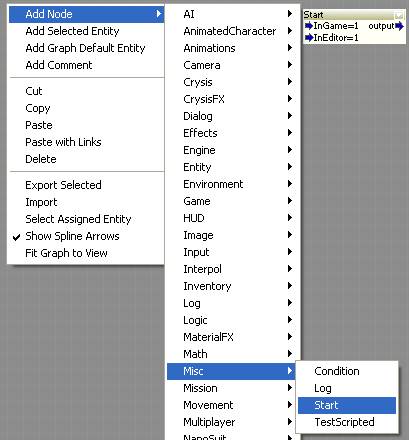
For this tutorial we simple want the scene to start as soon as the player drops into game, for this functionality we will add a Misc>Start node.
Right click on the grey area to add a new node and select the Start node, this will trigger as soon as the player drops into game.
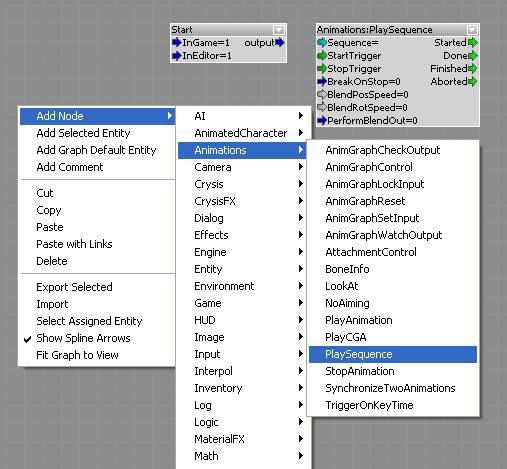
Next we need the start node to trigger the sequence to play, by adding a Animations:PlaySequence node.
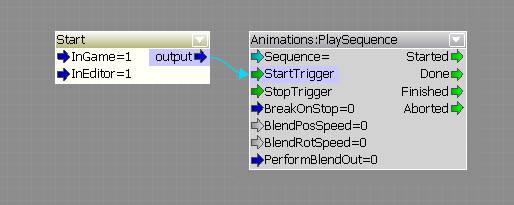
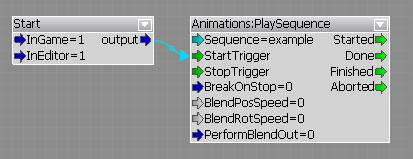
With the two nodes added we need to connect them to setup the logic, simply click and hold on the blue arrow port and drag it into the green StartTrigger input port.
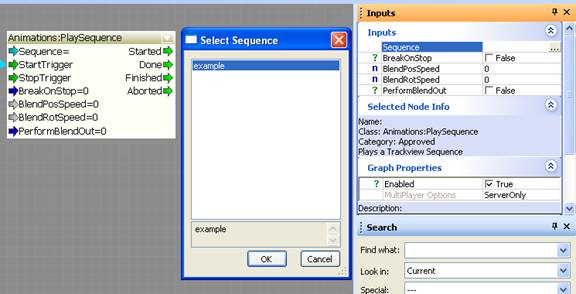
Next we need to select which Sequence to play, double click on the Animations:PlaySequence node, in the Inputs settings on the right, click on the three dots … to open the Select Sequence pop up, select the sequence that you have created and click ok.
This is what the current flow graph should look like.
Testing the scene
If you now drop into game "ctrl+g” the scene should play automatically on start.
Post scene setup
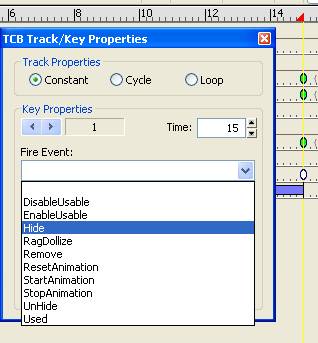
In this scene we are creating the illusion that the character in the scene is the player, thus after the scene has finished we want to hide the AnimObject character, we can do this in the Track view. Open the Track view and select the AnimObject character entity, in the event track double click to add a key frame at 15 seconds, right click on the key frame to bring up the Key Properties, under the Fire Event: drop down box select Hide.
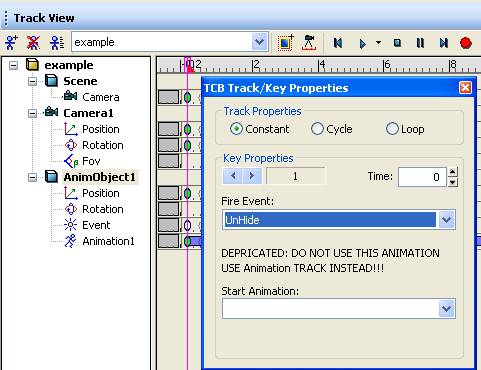
This will hide the character when the scene gets to the last frame, however if you scrub over the scene in the Track view the character will now disappear, thus we need to add an Unhide event at frame 0, again double click in the event track to add a key frame, right click on the key frame to bring up the Key Properties, under the Fire Event drop down box select Unhide.
Now the character will unhide and hide accordingly.
To complete the illusion we need to make the player start/continue from where the actor finished in the scene. Currently the player will start from where they dropped into game which creates a break the illusion.
First we need to get the end position of the AnimObject character, scrub the timeline in the track view to 15 seconds, next we need to reference this point,
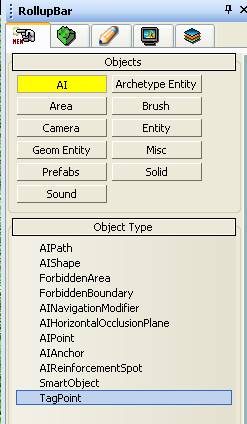
A useful object to use is an AI TagPoint as it is hidden in game mode, select the tag point and place near the character, rename «cine_character_endpoint»
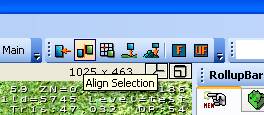
To get perfect alignment to the character we will use the Align Selection tool select the tag point and then click the align selection icon then click on the character, this should move the tag point to the correct position.
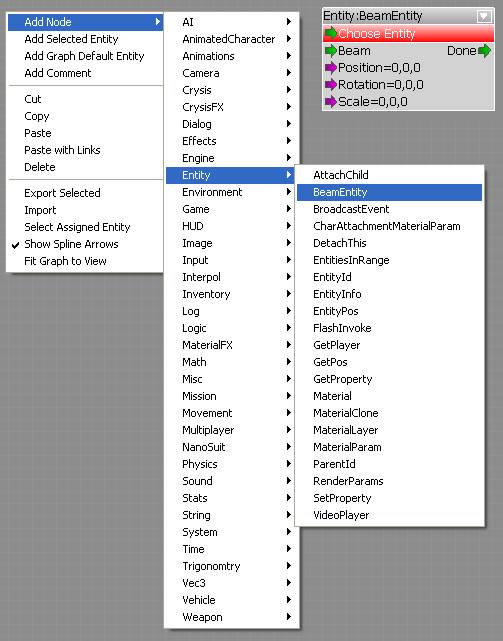
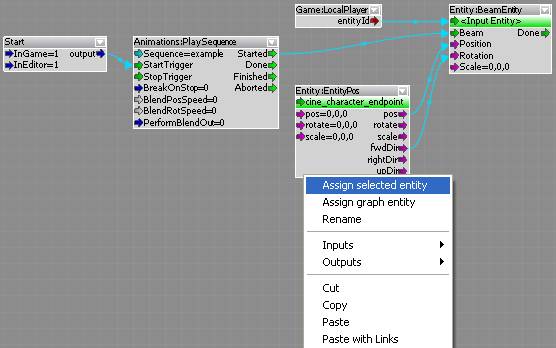
Next we need to add logic in the flow graph to the player to this position after the scene, open the flow graph editor and select the flow graph, right click on the grey area to add a new node Entity:BeamEntity.
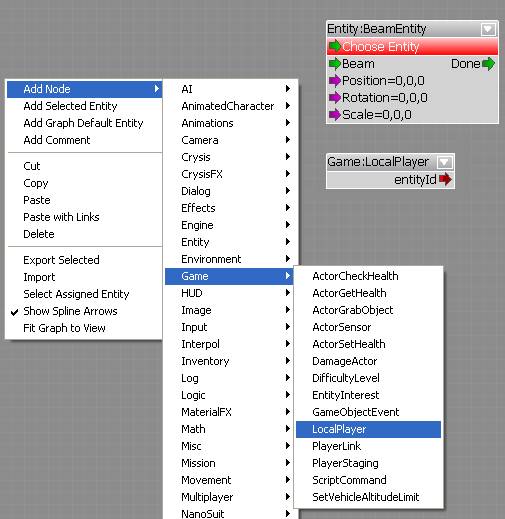
The Entity we want to be beaming is the player, add the node Game:LocalPlayer
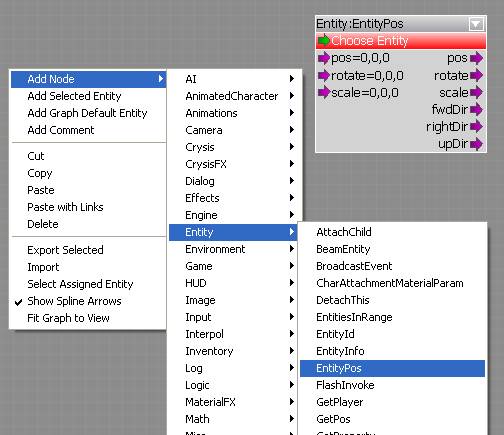
Last we need to add a node which references the position of the AI TagPoint where the player ends, add the node Entiy:EntityPos.
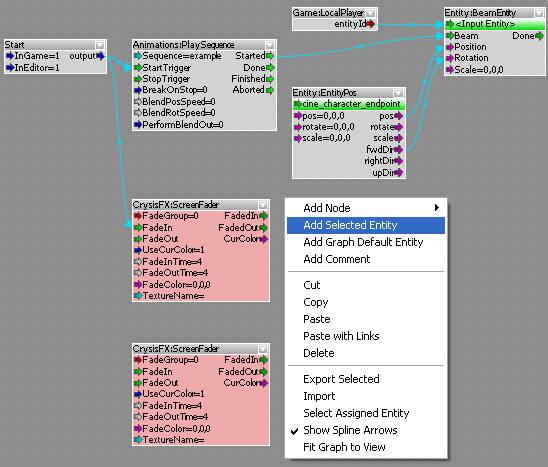
With these new nodes added connect the flow graph as shown below by linking the output to inputs, to assign the tag point to the Entity:EntityPos node, select the AI TagPoint in the viewport, then right click on the Entity:EntityPos flow graph node and select Assign Selected Entity.
Now when the scene has completed the player will be located at the position of the tag point.
Adding Screen FX
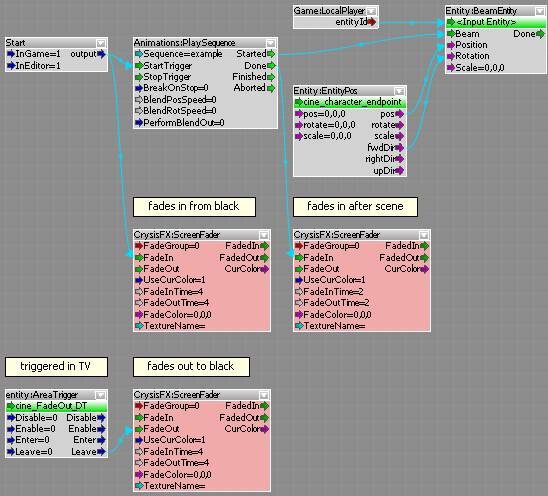
For this scene we will fade in from black at start and then fade out again to black at the end and finally fade in from black once the player has control.
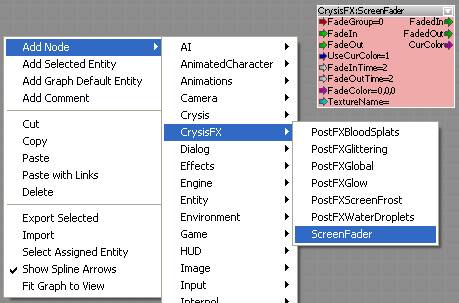
Open the flow graph editor and select the flow graph you have been working on, right click to add a new CrysisFX>ScreenFader node.
Select the new CrysisFX>ScreenFader node and in the inputs setting adjust the fade in and fade out times to 4.
Next duplicate the CrysisFX>ScreenFader node by right clicking on it and clicking copy, then right click on the grey area and click paste, do this twice so there are a total of three ScreenFader nodes.
Next we need to add a new AreaTrigger to trigger the fade out logic in the flow graph from the Track view.
Add a new AreaTrigger into the viewport and rename "cine_FadeOut_DT” DT is for Dummy Trigger which is used to send events from the track view to the flow graph.
Next add the cine_FadeOut_DT to the track view by clicking the Add Selected Node icon.
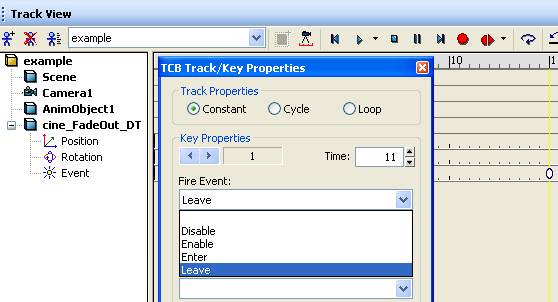
Under the event track for the cine_FadeOut_DT add a key frame at 11 seconds. right click on the key frame to bring up the Key Properties and under Fire Event: set to Leave.
Next open the flow graph editor, right click on the grey space and select Add Selected Entity. This will add the AreaTrigger to the flow graph.
With all the nodes now added to the flow graph, it is now time to link the logic together, setup the flow graph as pictured below,
Simply click and drag the output from a node to the corresponding node input to make a connection.
