Создание новой карты
Материал из CryWiki Russia
DCamer (Обсуждение | вклад) (Новая страница: «== Создание новой карты == Image:Sandbox_Newmap_image001.jpg === Overview === The following walkthrough will show you the fastest way to crea...») |
DCamer (Обсуждение | вклад) |
||
| Строка 1: | Строка 1: | ||
== Создание новой карты == | == Создание новой карты == | ||
| - | [[ | + | [[Файл:Sandbox Newmap image001.jpg]] |
| - | === | + | === Описание === |
| - | + | ||
| - | + | Следующее руководство опишет процесс быстрого создания новой карты. | |
| - | + | Все карты в игре Crysis основаны настоящих картах высот, для получения реалистично ландшафта. | |
| - | + | === Создание файла и папки новой карты === | |
| - | + | В меню '''File''' выберите '''New'''. | |
| - | + | [[Файл:Sandbox Newmap image003.png]] | |
| - | + | Введите название вашей карты в диалоговом окне '''Level Name''', и затем щелкните '''OK'''. | |
| - | + | [[Файл:Sandbox Newmap image005.png]] | |
| - | + | После того, как вы нажмёте '''OK''', редактор создаст новую папку в каталоге «Levels», с названием вашей карты, содержащую все необходимые файлы. Самый важный файл в папке карты — это '''CRY'''-файл, содержащую всю значительную информацию для редактора. | |
| - | + | ||
| - | + | ||
| - | + | === Добавление ландшафт на карту === | |
| - | + | ==== Генерация ландшафта ==== | |
| - | + | Теперь у нас есть новая пустая карту, и нам нужен ландашафт, по которому мы будем ходить, в этом нам поможет автоматическая генерация. | |
| - | + | Чтобы создать ландшафт, выберите '''Edit Terrain''' в меню '''Terrain'''. | |
| - | + | [[Файл:Sandbox Newmap image007.png]] | |
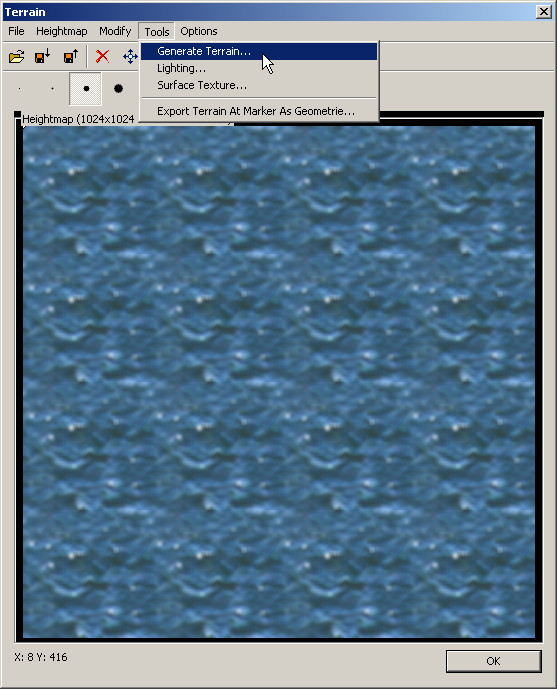
| - | + | Далее, выберите '''Generate Terrain''' в меню '''Tools'''. | |
| - | + | [[Файл:Sandbox Newmap image009.png]] | |
| - | ''' ''' | + | Также попасть в окно '''Terrain''' вы можете нажав кнопку '''Terrain''', по умолчанию находящуюся в основной панели редактирования. |
| - | ''' ''' | + | |
| - | + | ||
| - | + | ||
| - | + | ||
| - | + | ||
| - | + | ||
| - | [[ | + | [[Файл:Sandbox Newmap image011.png]] |
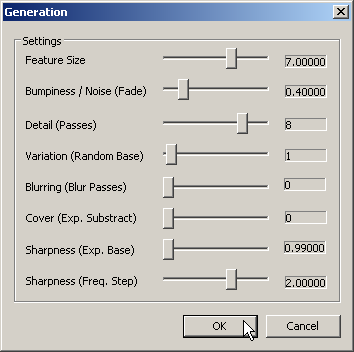
| - | + | Это действие откроет диалоговое окно '''Generation''', в котором вы можете повлиять на внешний вид ландшафта следующими параметрами: | |
| - | + | ;Feature Size: Определяет количество создаваемой земли | |
| + | ;Bumpiness/Noise: Определяет степень рельефности или деформации поверхности | ||
| + | ;Detail: Определяет, сколько раз будут применены настройки | ||
| + | ;Variation: Случайность разброса островов | ||
| + | ;Blurring: Указывает, сколько раз будет применено сглаживание к шумовому фильтру | ||
| + | ;Sharpness (Exp. Base): Определяет резкость поверхности | ||
| + | ;Sharpness (Freq. Step): Определяет, сколько раз будет применён фильтр резкости к поверхности | ||
| - | Now, close the '''Terrain''' window by clicking '''OK''' and you will see the changes in the 3D view. | + | [[Файл:Sandbox Newmap image013.png]] |
| + | |||
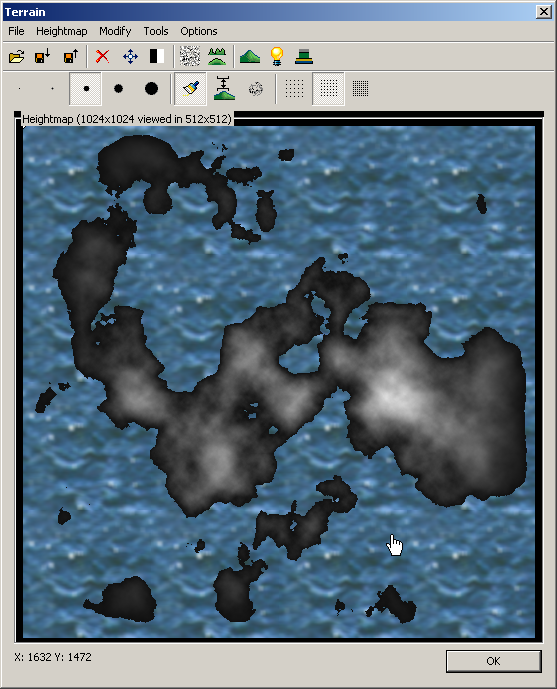
| + | Стандартные настройки будут в самый раз, так что нажимаем '''OK'''. После завершение генерации, вы должны увидеть что-то такое: | ||
| + | |||
| + | [[Файл:Sandbox Newmap image015.png]] | ||
| + | |||
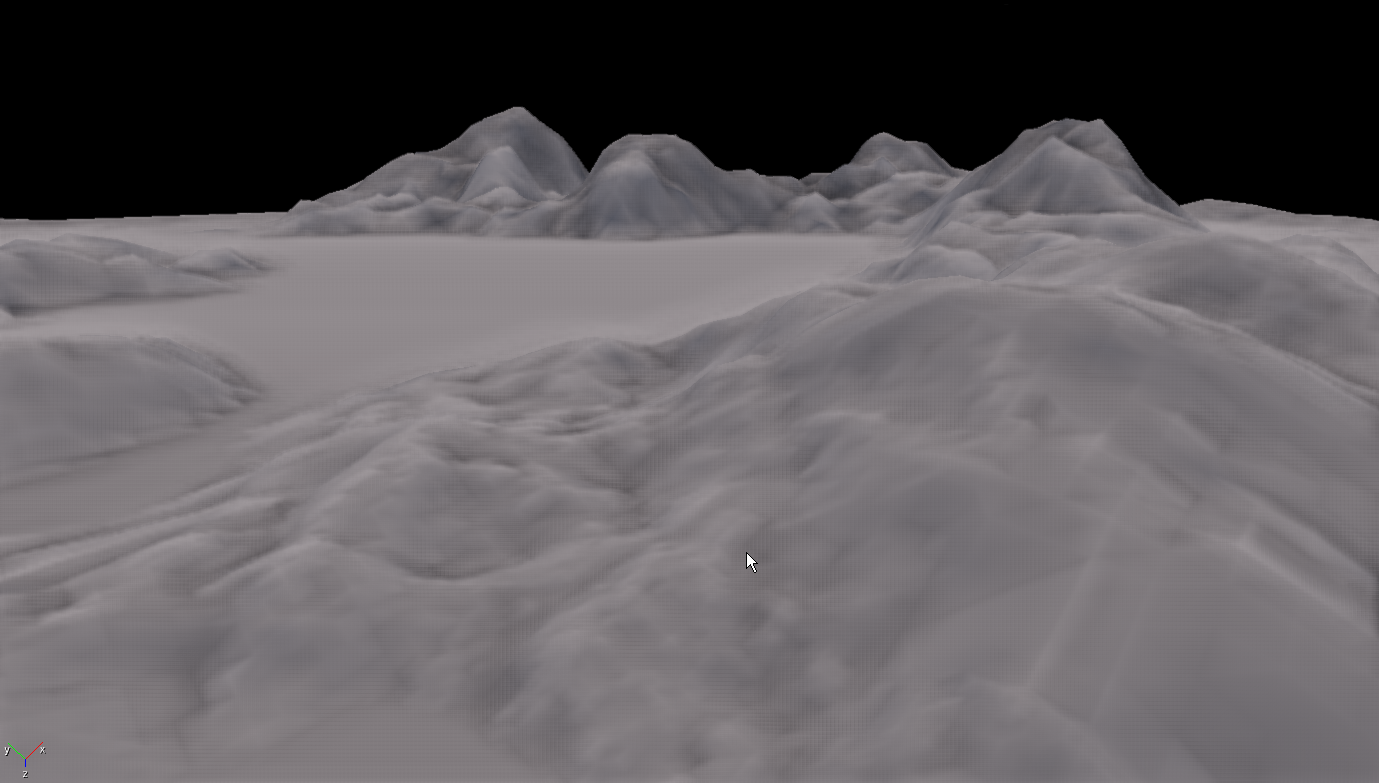
| + | Now, close the '''Terrain''' window by clicking '''OK''' and you will see the changes in the 3D view. | ||
The terrain is now shown in grey, which resembles the height of the terrain. The brighter the terrain is the higher it is. The blue water texture hides all terrain that is below sea level giving you a correct impression on the actual landmasses. | The terrain is now shown in grey, which resembles the height of the terrain. The brighter the terrain is the higher it is. The blue water texture hides all terrain that is below sea level giving you a correct impression on the actual landmasses. | ||
| Строка 58: | Строка 61: | ||
To get a first impression with a default texture applied, you need to regenerate the surface texture of the terrain. | To get a first impression with a default texture applied, you need to regenerate the surface texture of the terrain. | ||
| - | [[ | + | [[Файл:Sandbox Newmap image017.png]] |
==== Generating the surface texture on the terrain ==== | ==== Generating the surface texture on the terrain ==== | ||
| Строка 64: | Строка 67: | ||
Click '''Generate surface texture''' from the '''File''' menu. | Click '''Generate surface texture''' from the '''File''' menu. | ||
| - | [[ | + | [[Файл:Sandbox Newmap image019.png]] |
| - | The dialogue box below will appear | + | The dialogue box below will appear — you don’t have to set anything, but you can select '''High Quality''' if you want (it takes longer but you get higher quality). Click '''OK''' and wait until the calculation is finished. |
| - | [[ | + | [[Файл:Sandbox Newmap image021.png]] |
Your view should now look similar to this, showing you a first impression of your landscape. | Your view should now look similar to this, showing you a first impression of your landscape. | ||
| - | [[ | + | [[Файл:Sandbox Newmap image023.png]] |
=== Results === | === Results === | ||
| - | You are now already able to jump into the game mode by pressing '''CTRL+G''', so you can run around on your new creation. | + | |
| + | You are now already able to jump into the game mode by pressing '''CTRL+G''', so you can run around on your new creation. | ||
Things to experiment with: | Things to experiment with: | ||
| Строка 82: | Строка 86: | ||
* Change the resolution of the created surface texture to either speed up the calculation or increase the quality. | * Change the resolution of the created surface texture to either speed up the calculation or increase the quality. | ||
| + | == See Also == | ||
| - | [[ | + | [[Категория:Official:Basic_-_Level_setup]] |
| - | + | ||
| - | + | ||
Версия 21:19, 31 марта 2011
Содержание |
Создание новой карты
Описание
Следующее руководство опишет процесс быстрого создания новой карты.
Все карты в игре Crysis основаны настоящих картах высот, для получения реалистично ландшафта.
Создание файла и папки новой карты
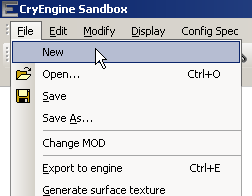
В меню File выберите New.
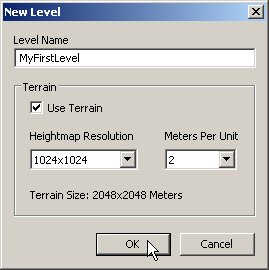
Введите название вашей карты в диалоговом окне Level Name, и затем щелкните OK.
После того, как вы нажмёте OK, редактор создаст новую папку в каталоге «Levels», с названием вашей карты, содержащую все необходимые файлы. Самый важный файл в папке карты — это CRY-файл, содержащую всю значительную информацию для редактора.
Добавление ландшафт на карту
Генерация ландшафта
Теперь у нас есть новая пустая карту, и нам нужен ландашафт, по которому мы будем ходить, в этом нам поможет автоматическая генерация.
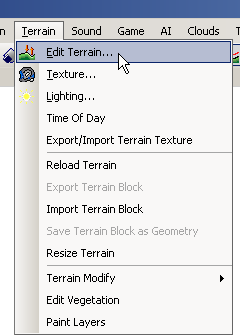
Чтобы создать ландшафт, выберите Edit Terrain в меню Terrain.
Далее, выберите Generate Terrain в меню Tools.
Также попасть в окно Terrain вы можете нажав кнопку Terrain, по умолчанию находящуюся в основной панели редактирования.
Это действие откроет диалоговое окно Generation, в котором вы можете повлиять на внешний вид ландшафта следующими параметрами:
- Feature Size
- Определяет количество создаваемой земли
- Bumpiness/Noise
- Определяет степень рельефности или деформации поверхности
- Detail
- Определяет, сколько раз будут применены настройки
- Variation
- Случайность разброса островов
- Blurring
- Указывает, сколько раз будет применено сглаживание к шумовому фильтру
- Sharpness (Exp. Base)
- Определяет резкость поверхности
- Sharpness (Freq. Step)
- Определяет, сколько раз будет применён фильтр резкости к поверхности
Стандартные настройки будут в самый раз, так что нажимаем OK. После завершение генерации, вы должны увидеть что-то такое:
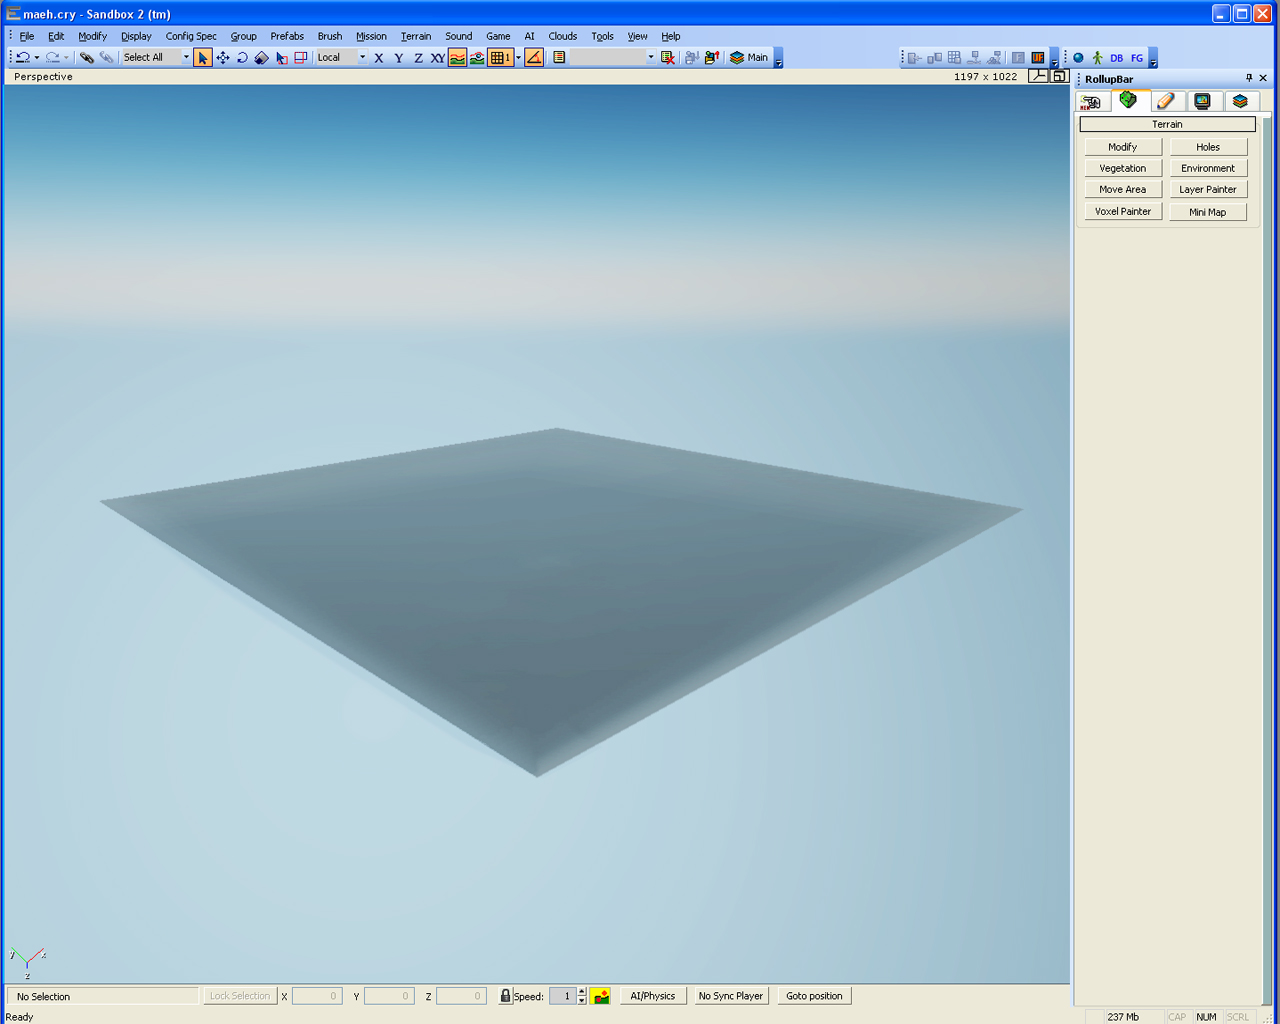
Now, close the Terrain window by clicking OK and you will see the changes in the 3D view.
The terrain is now shown in grey, which resembles the height of the terrain. The brighter the terrain is the higher it is. The blue water texture hides all terrain that is below sea level giving you a correct impression on the actual landmasses.
To get a first impression with a default texture applied, you need to regenerate the surface texture of the terrain.
Generating the surface texture on the terrain
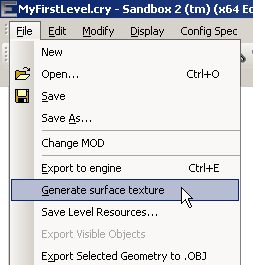
Click Generate surface texture from the File menu.
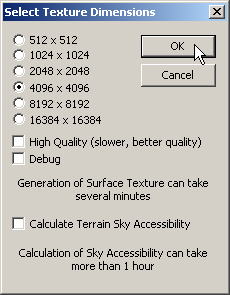
The dialogue box below will appear — you don’t have to set anything, but you can select High Quality if you want (it takes longer but you get higher quality). Click OK and wait until the calculation is finished.
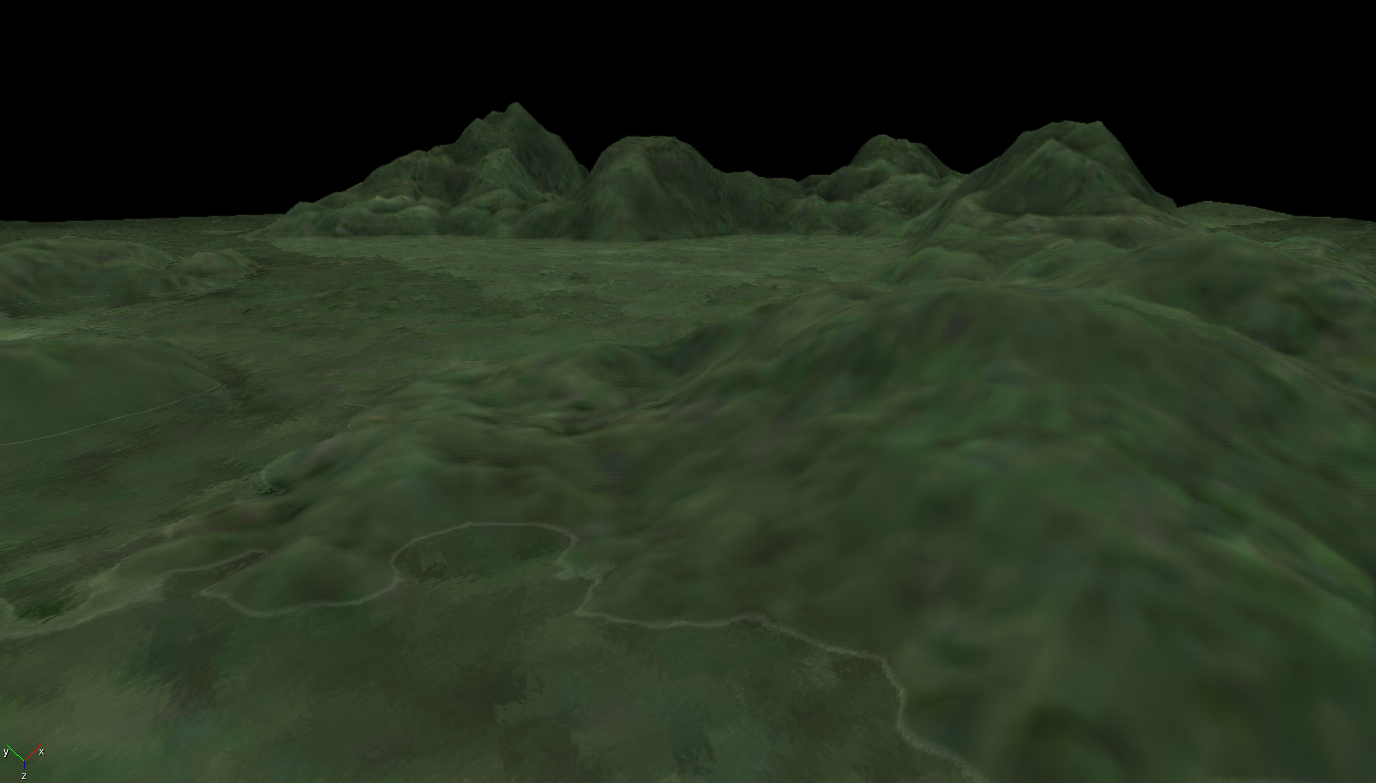
Your view should now look similar to this, showing you a first impression of your landscape.
Results
You are now already able to jump into the game mode by pressing CTRL+G, so you can run around on your new creation.
Things to experiment with:
- Change the parameters when creating the terrain
- Change the resolution of the created surface texture to either speed up the calculation or increase the quality.
