Использование собственной модели в виде от первого и третьего лица
Материал из CryWiki Russia
|
Содержание |
Summary
In this tutorial, I am going to show you how replace the standard nanosuit with almost any humanoid character model that you like: and make it usable in both 3rd and 1st person view inside the game. If you are only interested in setting it up for the first-person view, you can skip ahead to the appropriate section. It's not perfect and, really, is a cheap and dirty hack, but there aren't a lot of options outside of creating a new character model from scratch and setting it up correctly.
Let's Get Started
What We Need
I am going to surmise that you are already acquainted with the basics of the Sandbox Editor and scripting via Flowgraphs (FGs).
The first thing you need to do is to set up a new mod - even if you are only working on just one level. There is a quick and handy guide on how to do this for Crysis Wars here: ZapWizard's Custom Mod Guide.
If you wish to include a 3rd person view in addition to/instead of a 1st person view, you will also need the Flowgraph Plugin System and the accompanying Gears of Crysis (GOC) FG node. To set it up, just follow the instructions in the redistributable and unpack the necessary files into your mod folder.
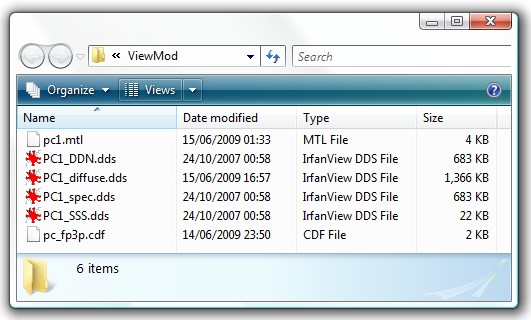
I am calling my mod 'ViewMod' for now, and will refer to the folder as such for this tutorial. Once you are done, that folder should look something like this:
Don't forget to edit your shortcut for the Sandbox Editor before starting work and adding the following commandline parameter so that you will be working with your mod:
"...\Crysis\Bin32\Editor.exe" -mod ViewMod
Preparing the Model
Now we need to get our model ready. Note how I said almost any humanoid character model. Yeah, there's a catch. If you want to see your legs in first-person, you can't use any model that has segmented legs - so that means that unfortunately most of the North Koreans won't work. Other models should be fine however, and this isn't a problem if you don't want to put in a 1st-person view option, or if you're content with the player not having legs in 1st-person view.
The main issue is that the legs need to be part of the 'base' file that the .cdf is made of, rather than a skin attachment, since all attachments become invisible in 1st-person view. So if you can remove the legs in the character editor, that's bad. If you can't, you're good to go.
I'm going to make a female player-character, thanks to sashaNar's Default Crysis Female as AI asset, which suits our purposes just fine. First of all, let's create a new folder:
Crysis/Game/objects/ViewMod/
Where we will store most of the files that we will be working with. Put your the .cdf of your character into this folder. Also, find the .mtl that this character's body is using and put a copy into the folder as well. It's helpful to rename them in a way which makes sense. The .cdf file you are planning to use needs to end in '_fp3p.cdf'.
Setting Up the Model
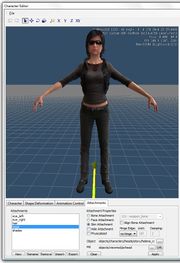
This is the model I will be using:
Now open the Gamedata.pak in your 'Crysis/Game' folder and navigate your way to 'Scripts/Entities/actor' where you will find the player.lua file. Copy this across into 'Crysis/Mods/ViewMod/Game/Scripts/Entities/actor', creating the necessary folders as you go along. This will override your normal player.lua whenever you're running ViewMod. Go ahead and open the new copy of player.lua.
There's a lot of stuff here, but the only thing we need are the two lines that start with 'fileModel' and 'clientFileModel'. We will change these to read:
fileModel = "objects/ViewMod/pc_fp3p.cdf", clientFileModel = "objects/ViewMod/pc_fp3p.cdf",
This points the game to the right place to find the 3rd-person model. However, if you try running your level now, you will likely find that at least parts of your character, if not all of them, are covered by a nanosuit texture. This is because, in spite of the material that your .cdf is using, the game has a selection of nanosuit materials that correspond to the different power states, which it applies regardless.
To fix this, we will override the current nanosuit materials.
Create the folder '.../Crysis/Mods/ViewMod/Game/objects/characters/Human/us/NanoSuit'. Copy the .mtl for your character into that folder and rename it to 'nanosuit_us.mtl'. Once that is done, you need three more copies:
- 'nanosuit_us_invulnerability.mtl'
- 'nanosuit_us_speed.mtl'
- 'nanosuit_us_strength.mtl'
Now you are set.
Примечание:
This will obviously screw up the textures if you have any other characters in the game that use US Nanosuit textures. Fortunately, the fix is simple. Simply copy the original 'nanosuit_us.mtl' from 'Objects.pak' in the 'Crysis/Game' folder to somewhere in your Mod folder and apply that material to anyone who is wearing a nanosuit. As long as you don't force power modes onto them, you'll be fine.
Setting Up the 3rd Person View
This is fairly easy to do.
- Open your map and create a new flograph - I usually put generic FGs on the SpawnPoint entity, but really it doesn't matter so long as you remember what Entity the FG is hooked on.
- Put in a Misc:Start node.
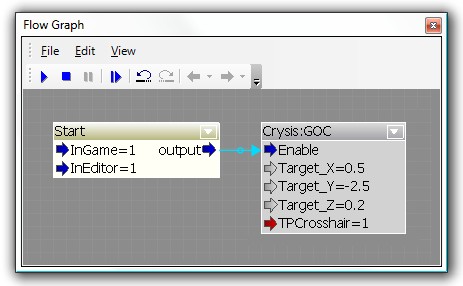
- If the Flowgraph Plugin System is correctly installed, you should be able to add the node Crysis:COG. If not, check that it's installed properly into your mod and that you're running the Sandbox Editor with the correct command-line.
- Connect the Misc:Start to the Crysis:COG node and try out the level.
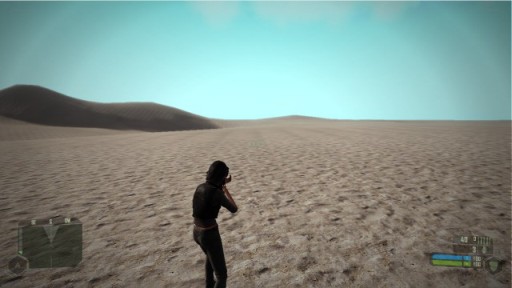
You should be able to run around and shoot in 3rd-person now, admiring your new player character.
Setting Up the 1st Person View
Okay, this is a little bit trickier.
Essentially we need to get rid of the arms and keep the legs. If you have any attachments - ie. if your hands are not part of the same model as the rest of the body, then don't worry about them because all attachments will disappear in first-person view. We need to make anything disappear that would be visible and which is part of the main body.
Create a new version of your character's primary .mtl (which you're keeping in your 'Crysis/Game/objects/ViewMod' folder as you remember). Have a look at the material and find where it keeps the Diffuse texture map. Extract that, and put it into the same folder as well. Don't forget to edit the new .mtl copy so that it uses the Diffuse texture you just copied, rather than the original.
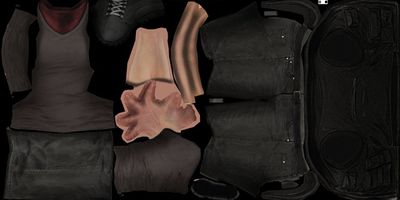
Now open that diffuse map in Photoshop:
Essentially, you need to figure out what you want to see and what you don't want to see in 1st-person. In my case, I want to keep the legs and lose the rest. So I create a simple mask where white areas cover the legs and everything else is black. Merge that down into a single layer, copy it, then go to channels and paste it in as an alpha channel. Don't forget to switch off the black and white mask layer. Once that's done, save it again - overwriting the texture file - using DDS with interpolated alpha.
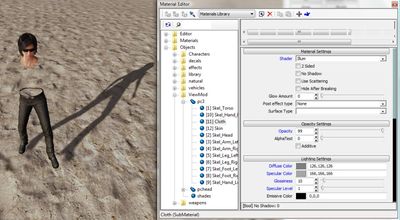
Pop the .mtl copy open once more. Your new alpha map is there, but it likely won't work just yet - you need to set the alpha settings. This is the slightly dodgy bit here. Ideally, you can just increase the value of the AlphaTest for the texture and you'll become transparent. The trouble is though, that this also gets rid of your shadow.
That's bad. What works better is changing to the Illum shader and, while keeping AlphaTest at 0, instead change the Opacity to 99.
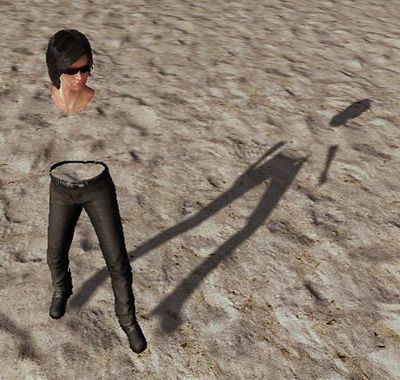
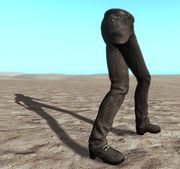
Much better! We sacrifice some shader effects, but we now actually have a working 1st-person player model. There are a few other issues though, such as the fact that this screws up culling - such as when viewed from the side:
But that doesn't concern us too much since we'll only be looking at the legs from above - so the issues here will be minimal.
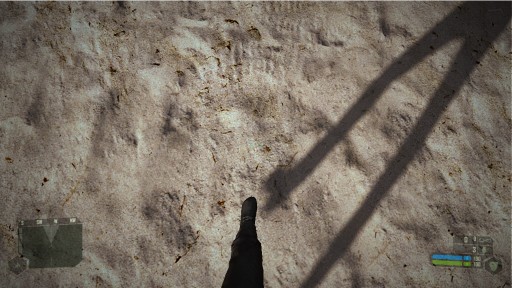
Now if you're not concerned about the 3rd-person view, just go ahead and replace all the nanosuit materials we created during the beginning with the new .mtl and try it out in-game! Your arms and torso should be invisible, while you can still see your legs. Moreover, any attachments on your body should be automatically toggled to be invisible by the engine.
Admire your new legs and shadow.
Getting 3rd and 1st Person Views to Work Together
We are nearly there!
If you've got this far, you should have a working 3rd-person view in your level right now and have a texture sitting ready but not actually in use for first-person view. Find the folder with your replacement nanosuit materials ('Crysis/Mods/ViewMod/Game/objects/characters/Human/us/NanoSuit/') and overwrite the 'nanosuit_us.mtl' with it. So now you should have 'nanosuit_us.mtl' be the 1st-person view material you made, while the others - invulnerability, strength and speed - should be the 3rd-person view material.
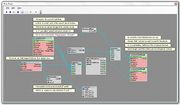
From here on, it's all just a matter of flowgraph coding:
You can still change the suit power modes, but we effectively control which suit texture we are using at any given moment! Our aim is to always have the 'Strength' texture enabled when the player is in 3rd-person view (nanosuit_us_strength.mtl) and the 'Armour' or 'Defense' texture when in 1st-person view (nanosuit_us.mtl). This is because in every mode other than Defense, you get a coloured 'glow' shader applied to the player's first-person arms, which we do not want to see. Since there is no such effect in the third person view, we are fine applying a 'Strength' material there, and switching to 'Defense', which looks normal, when we're in first person view.
Finally, we're all done!
Примечание:
After this, you may consider also changing the first-person hands model and creating a new sound-pack for the player character. Also, you may want to modify the FlowGraph to switch your nanosuit material to strength mode when you enter a vehicle: when viewing the vehicle in third-person view, you would potentially be seeing yourself without a torso then.
The End Result
This video demonstrates what we should have achieved:

